AliExpress Finds - Part 3
In this article, I am going to show you X different gadgets. I picked a few soldering-related stuff, because I wanted to upgrade my gear and try new stuff. I also bought some fun stuff like programmable RGB ring lights, or Peltier cooler-based cooling devices. And, I also got some educational stuff which can help to learn new principles like FOC using a BLDC motor and a magnetic encoder.
WS2812B addressable RGB COD LED light ring
I bought several different types of this ring with 36, 54 and 72 LEDS, and 48, 72 and 95 mm diameter, respectively. They use the well-known WS2812B “Neopixel” LEDs, so there are plenty of good resources on how to drive them with, for example, an Arduino microcontroller. Or, if you want to deviate a bit and use a CH32 microcontroller without the Arduino IDE, you can use my library. The reason why these rings are perhaps special compared to the regular RGB LED rings is that they have smaller LEDs on the board, and they are covered with a translucent layer of silicone. This silicone makes the LEDs’ light more diffuse, so the animations and the transitions between adjacent LEDs look smoother and nicer, especially in the dark.
Their operation is the same as usual: They need a solid external 5 V power supply and a microcontroller with 5 V logic voltage. The positive supply voltage is fed to the light via the RED wire, the ground is connected via the white wire, and the data line is green. According to the specifications, each LED draws 40 mA. However, the specs also say that, for example, the 36 LED ring requires about 3.2 W of power. This information does not add up, so I measured each ring at full brightness. The 36 LED ring draws about 0.6 A, the 54 LED ring draws about 1.6 A and the 72 LED one draws about 3 A. These values are much lower than the values would be based on the 40 mA/LED current draw. The reality is much closer to roughly 18 mA/LED.
Regardless of the confusion caused by the specifications, the rings are perfect for decorative purposes, or they can even be used for visualising something like temperature, humidity, or something similar.
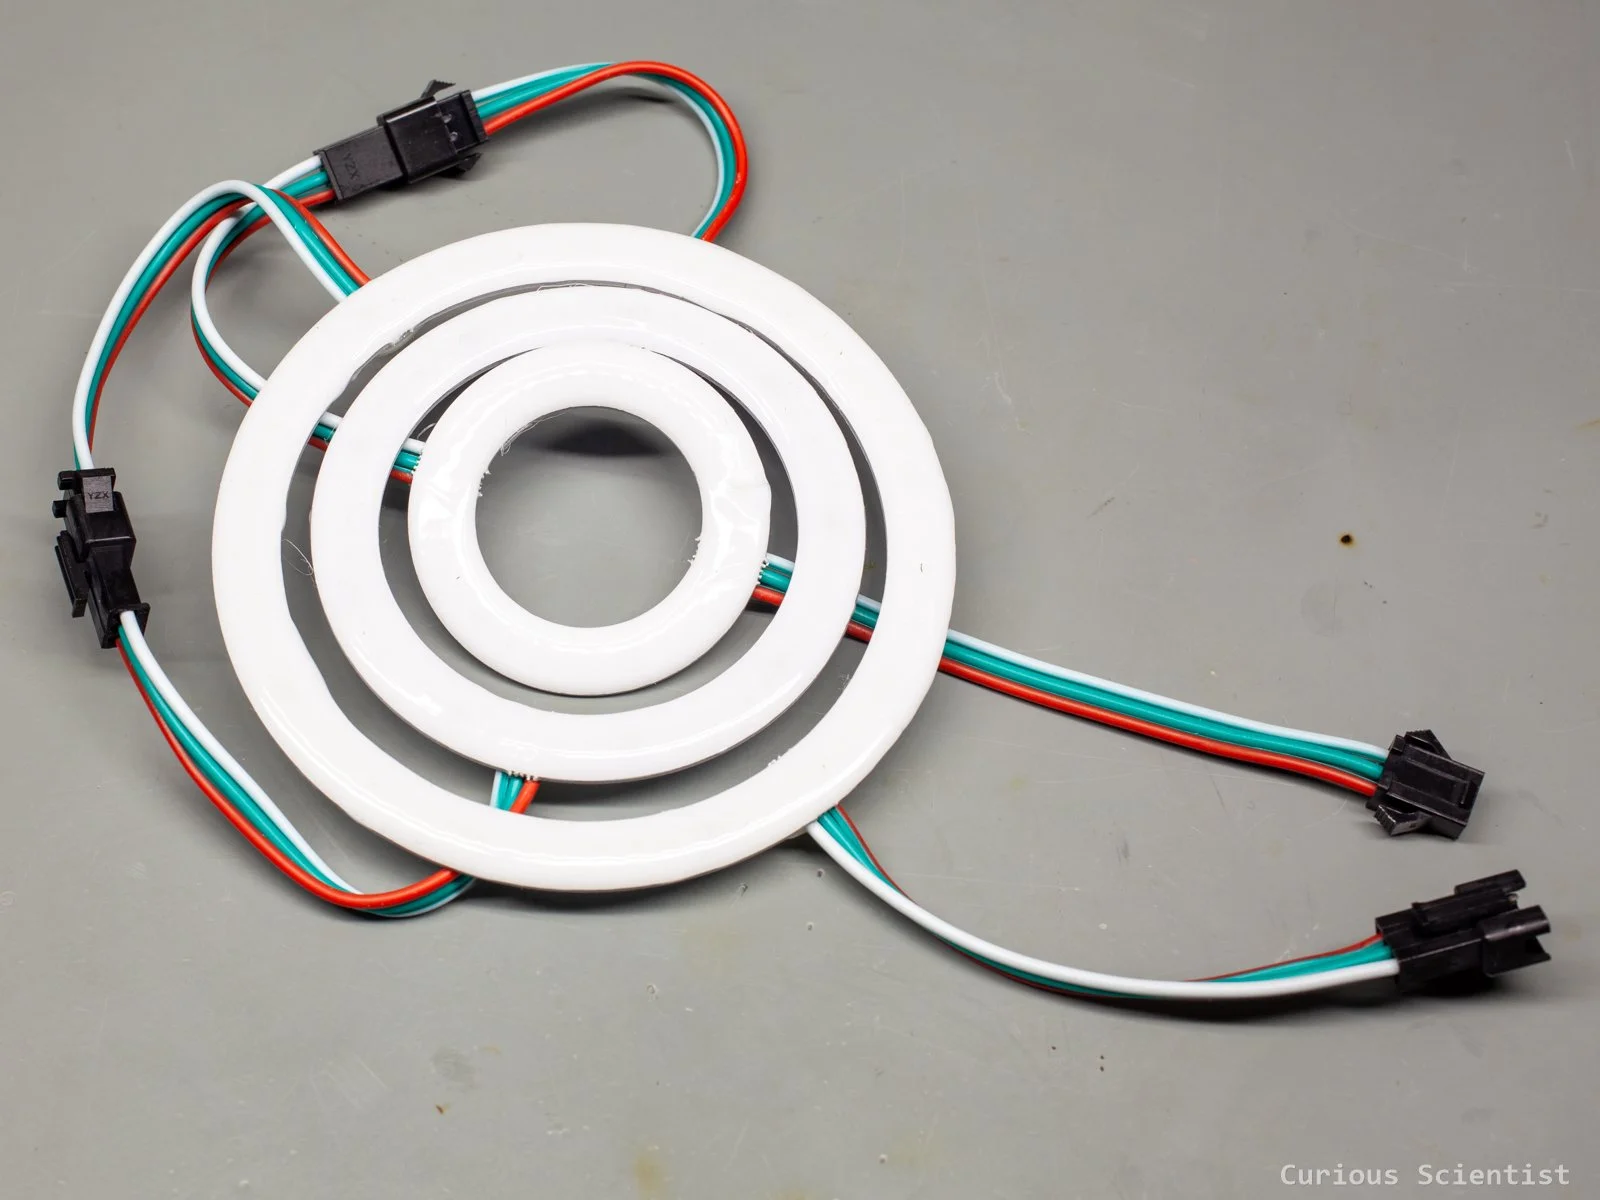
Three different RGB LED rings. They can be connected in series.
5 V COB LED ring light
Let’s also have a regular ring light without any RGB stuff. This ring light is very simple; feed it with a 5 V power supply, and use it for whatever purposes. Since it needs about 1100 mA, a simple USB power supply that can deliver 2 A (very typical) can be used to power it, which makes it very easy to operate.
This is also a COB-based light, so the individual chips are hard to see, and due to the covering silicone (or gel) layer, the emitted light is nicely diffused. The light is quite powerful, and since the device draws around 5 W of electrical power, it also generates some heat. Luckily, the board is made of aluminium, which helps to keep the temperature down.
The light is ideal for DIY lights for projects like soldering under a magnifier glass or a microscope. But it can be used anywhere where a lot of light is needed. If we can trust the datasheet of the device, the light has a lifespan of approximately 50000 hours, so it can be used as an everyday light source. You can 3D-print a nice enclosure around it, and you can have a nice USB light.
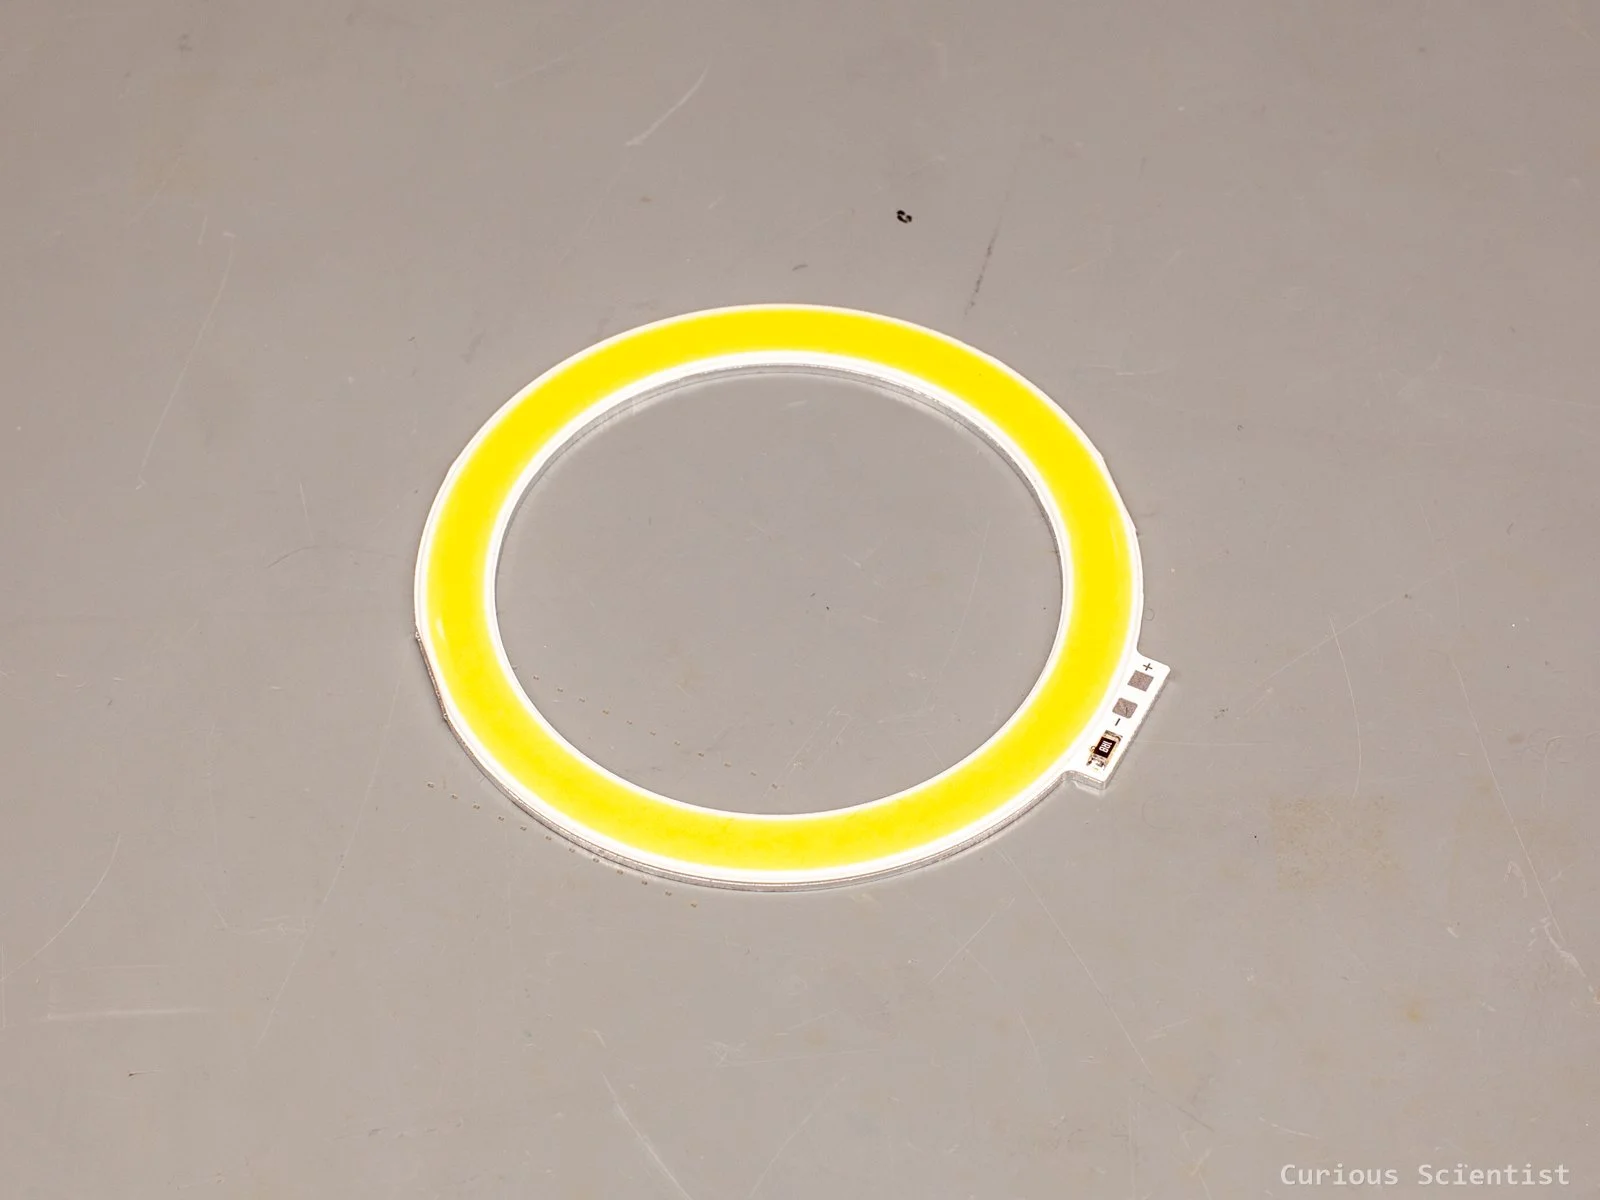
5V white COB LED ring
CNC solder paste stencil fixture (+ solder paste squeegee)
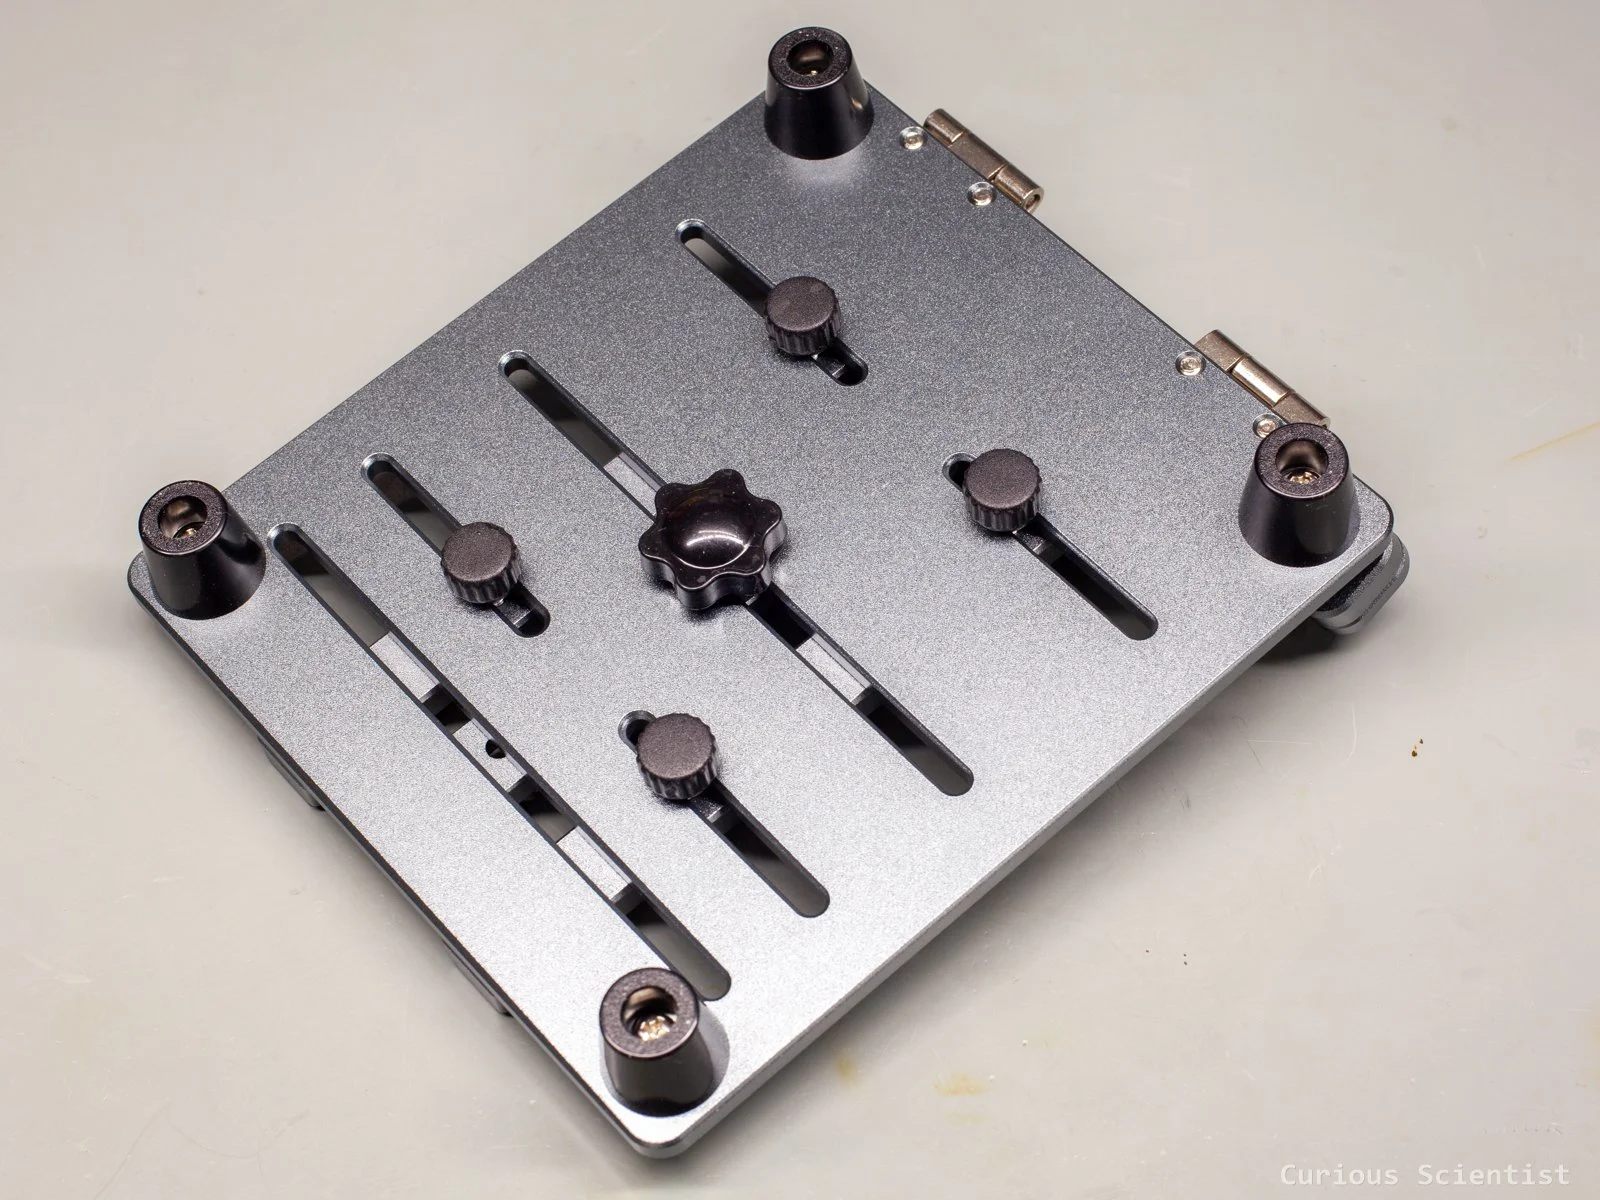
Now we have sufficient light; let’s work! Recently, I got criticised for my solder paste spreading technique, and it hurt me so much that I started to invest in better gear (\s). Anyway, I bought this solid CNC-machined fixture that is perfect for people like me who are typically working on smaller boards.
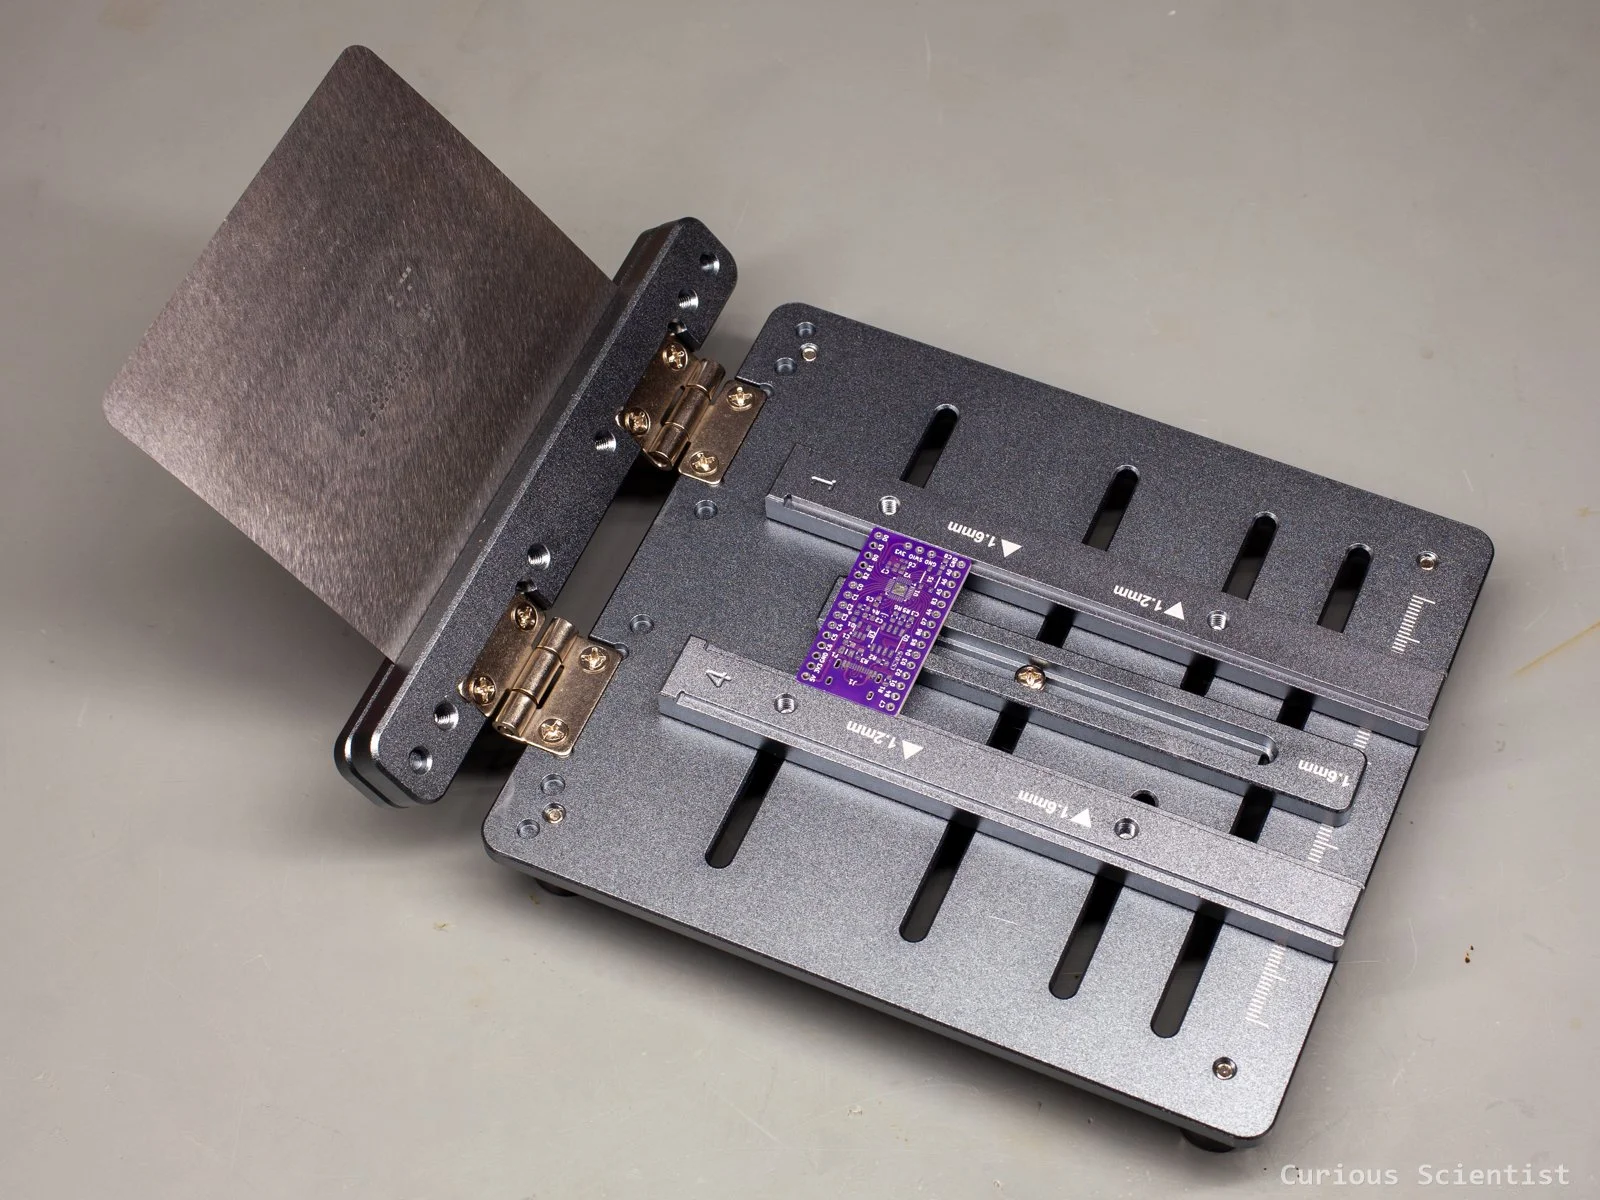
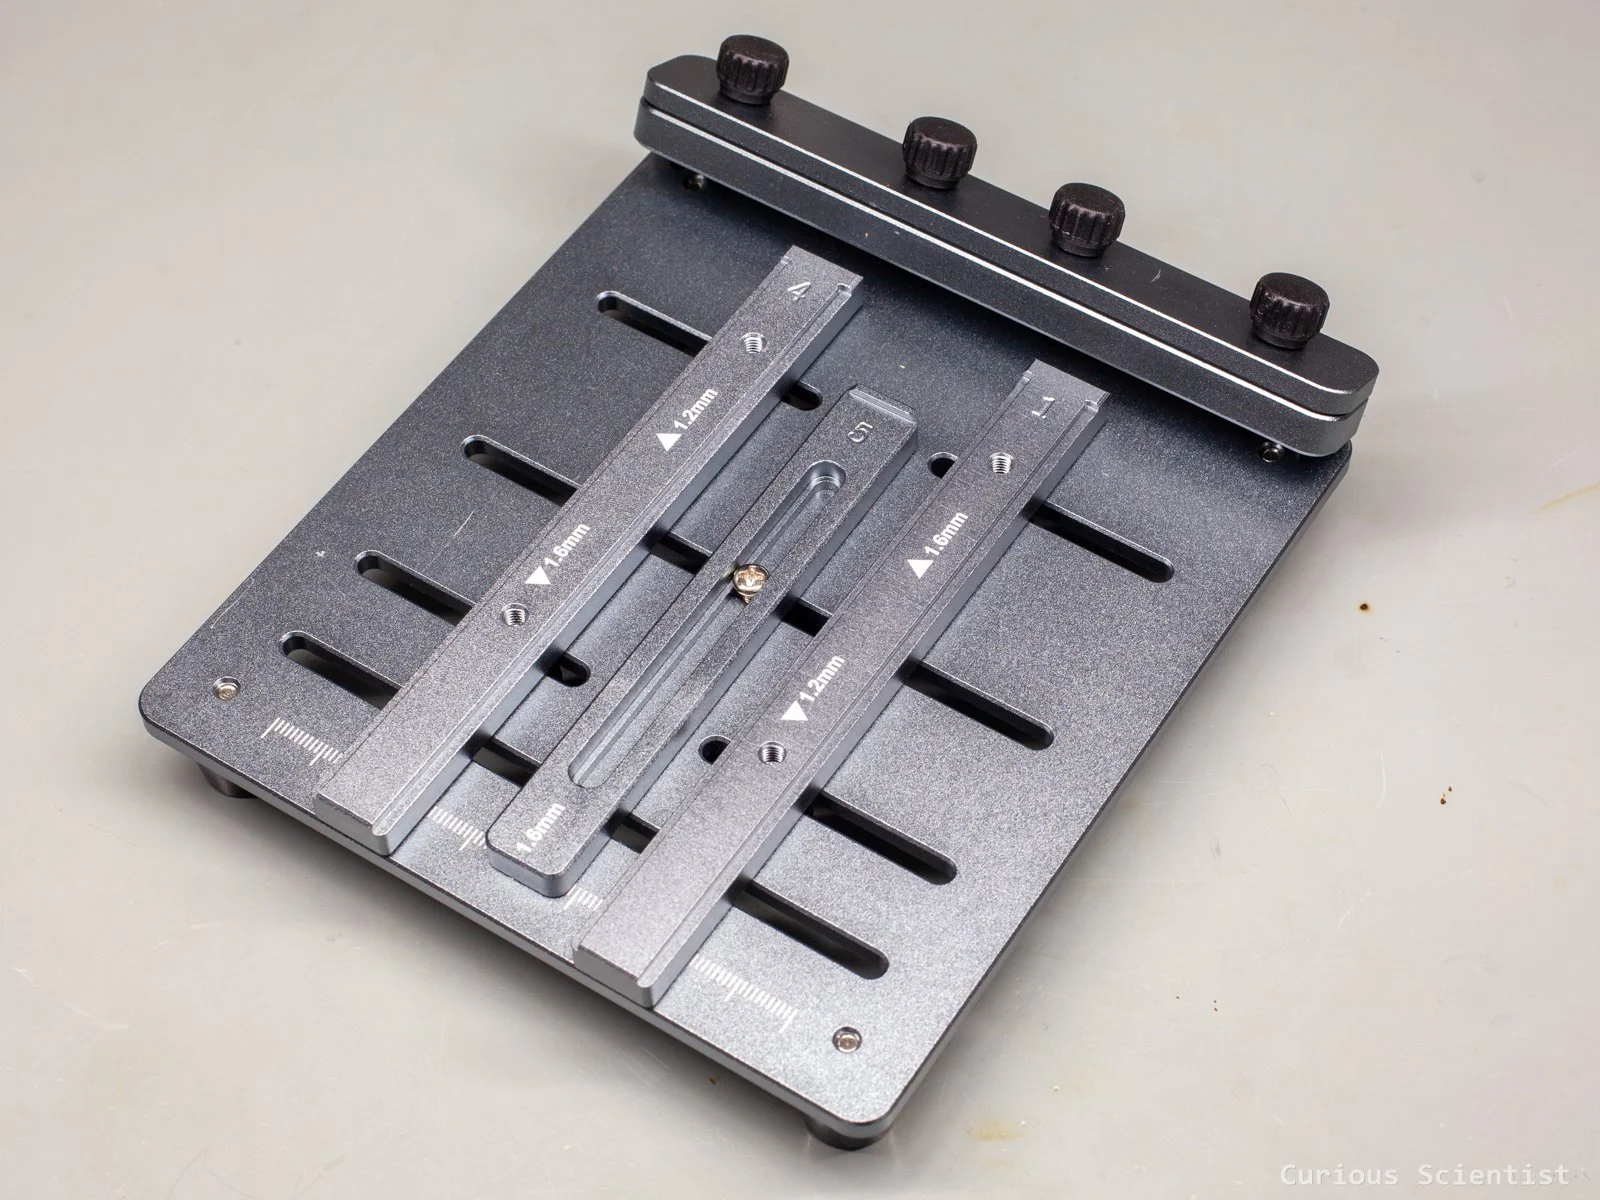
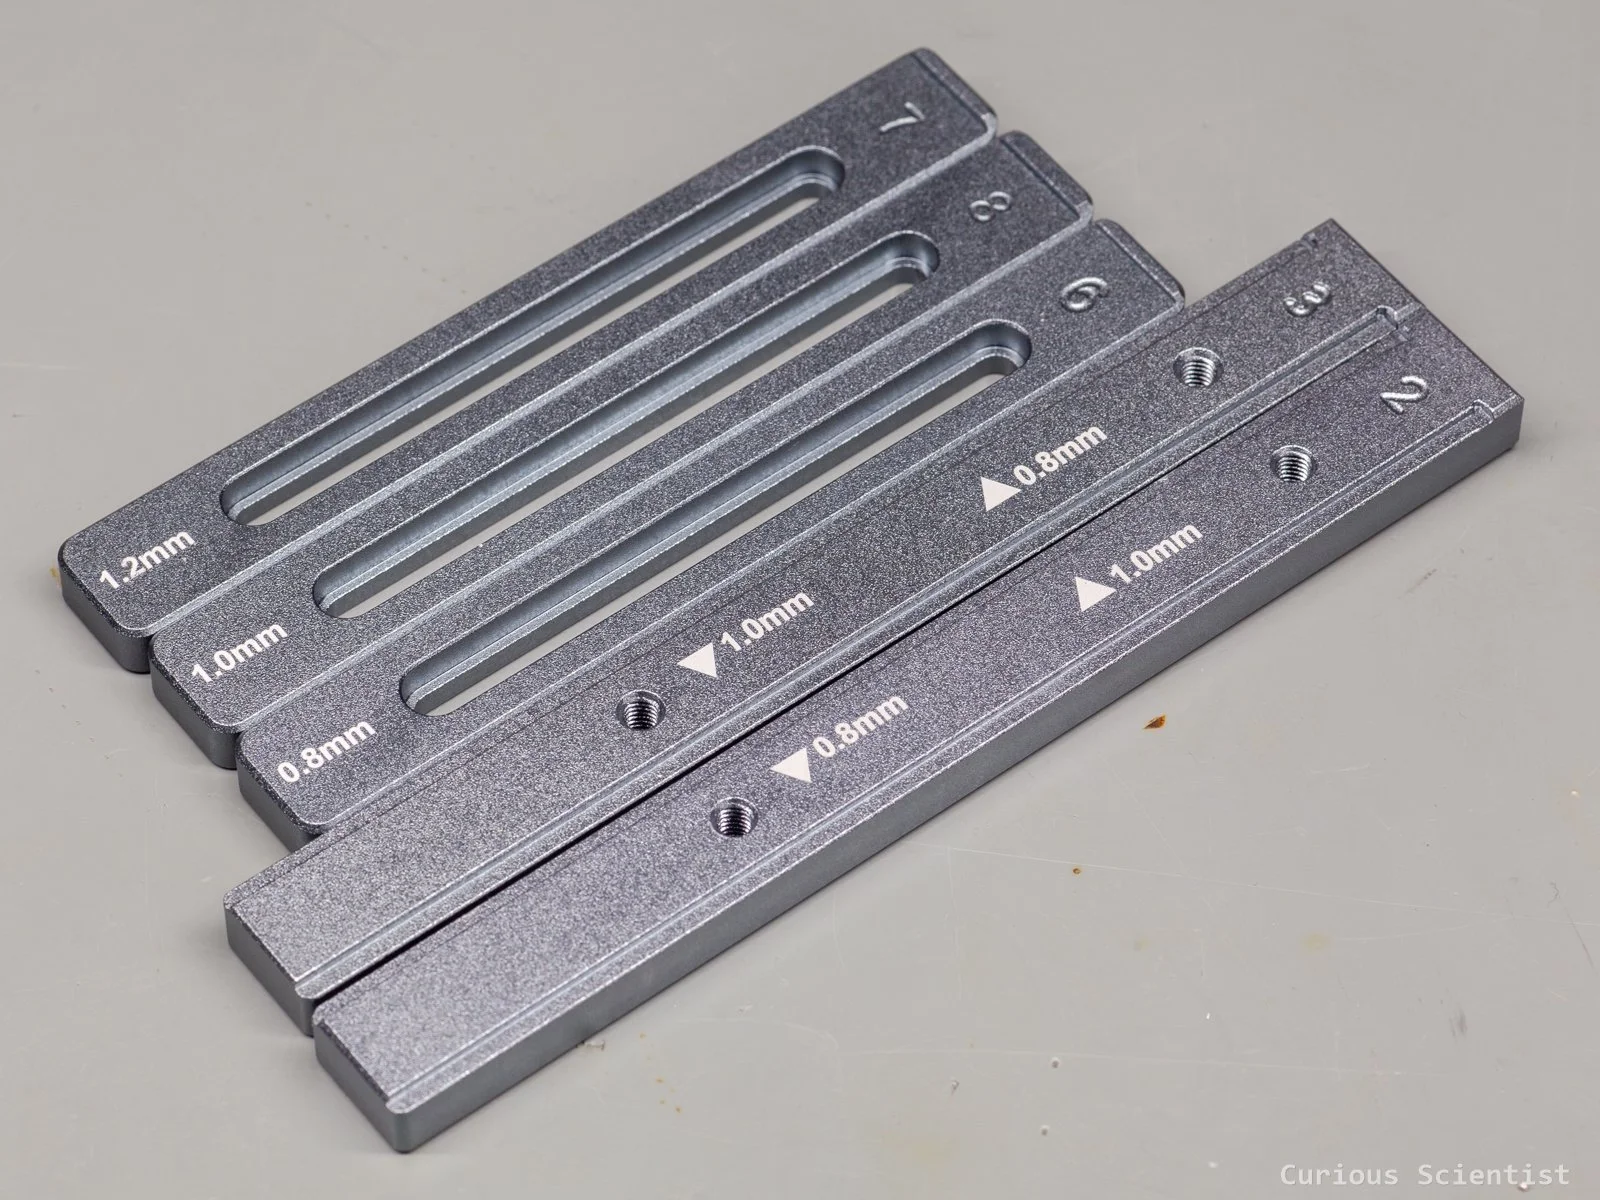
The fixture supports boards up to 10 cm x 13 cm. It also has different inserts that allow 0.8 mm, 1.0 mm, 1.2 mm and the more common 1.6 mm board thicknesses. There are three adjustable fixtures that allow us to precisely position the PCB. They are held in place by hand-tightened screws located at the bottom of the fixture. The side fixtures support the edges of the board, and the centre piece both supports the centre of the board to avoid sagging and it also determines the position of the board. A small edge at the end of the fixture stops the board and keeps it in place.
Another important part of the fixture is the solid hinge. This part holds the stencil in place, and it allows us to print multiple boards in a row. The stencil is kept in place by tightening four screws on the top of the hinge. The screws clamp the stencil in the hinge. Then, printing the solder paste is very simple. Close the hinge so that the stencil covers the PCB, spread the solder paste, open the hinge, remove the board with the paste and then repeat the whole process with the next board.
Thanks to the robust build, the stencil won’t move even after multiple printings.
It takes a few minutes to set up and align the fixture, but once everything is in place, the rest of the work becomes super easy.
Bonus
Since I bought a new fixture, I also upgraded my spatula to a solder paste squeegee to enable more precise application of the solder paste. I tried two types: one with a typical metal handle and steel blade, and one with a fancier plastic handle. I picked up a few with different widths, so I can use the one more suitable for the job.
Vacuum pick–up tool for SMD components
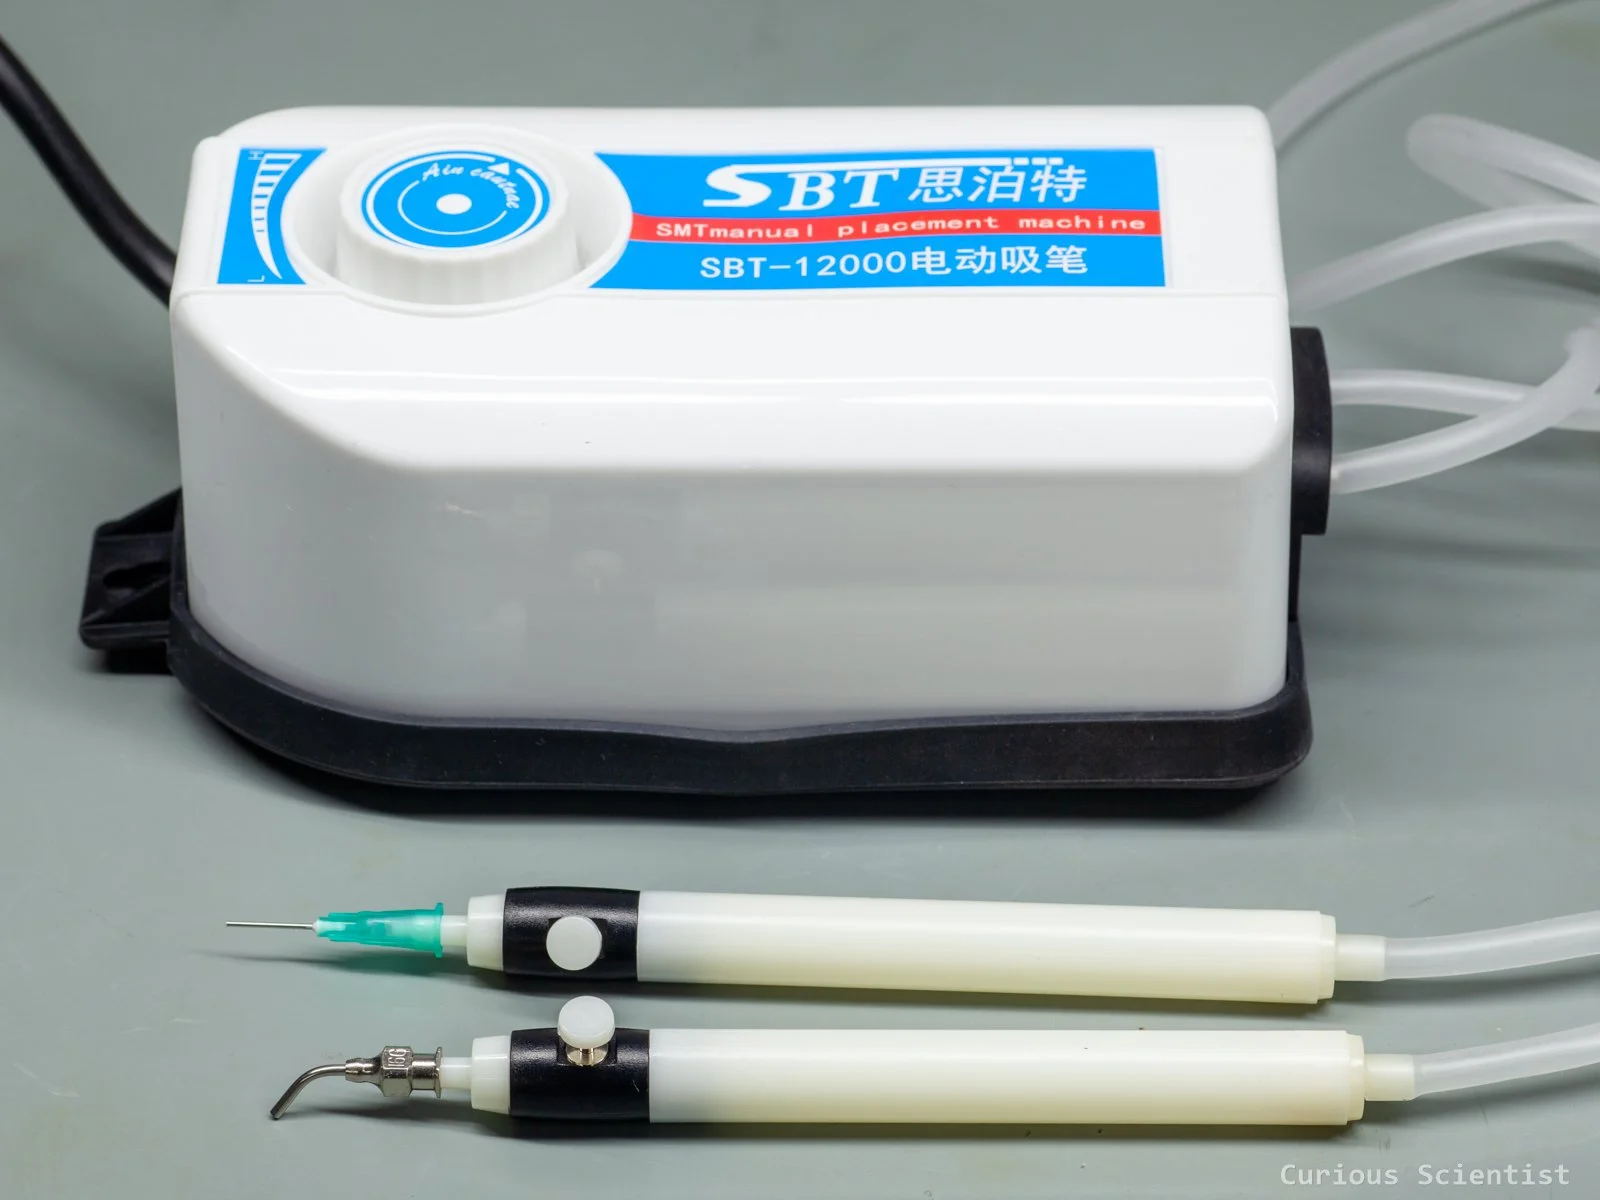
So, we have a nicely printed circuit board, but we still need to get the parts on it somehow. This little device can help us replace tweezers. The problem with tweezers is that on a densely populated board, it is hard to avoid accidentally dipping the tip of the tweezers into the solder paste on the board. This is annoying because we can mess up the applied solder paste on the pad, and we always need to keep the tweezers clean; otherwise, they become sticky from the flux.
This device is supposed to solve this issue by grabbing the component by its top surface using suction (vacuum). However, it is worth noticing that it takes some time to get used to it. Initially, it took me three times longer to pick and place the same PCB as compared to tweezers, and the result was considerably uglier.
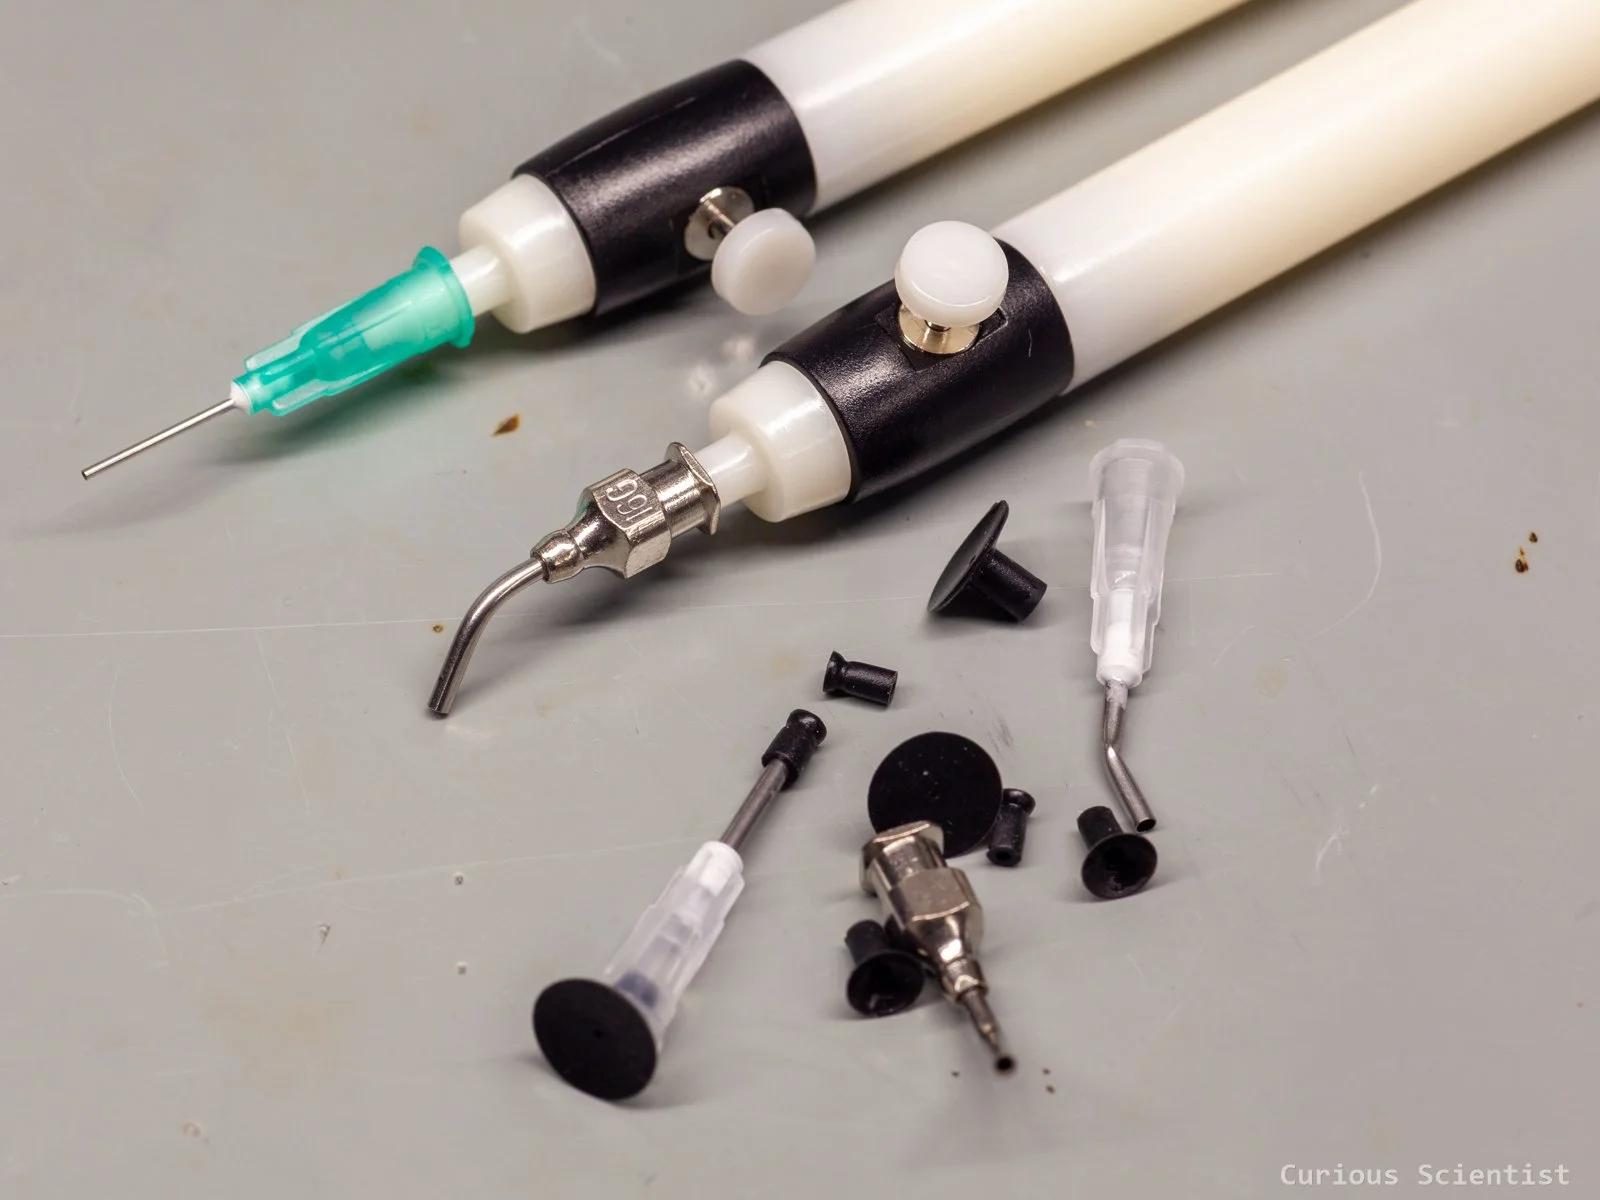
The device comes with two handles and several attachments. The different attachments allow us to pick up small parts like typical passives (capacitors, resistors, LEDs, etc.), and the larger suction cup-like attachments allow us to pick up chips, connectors, or other larger components. The two handles allow us to have two different tools at hand, so we don’t need to switch between attachments when handling boards with different components.
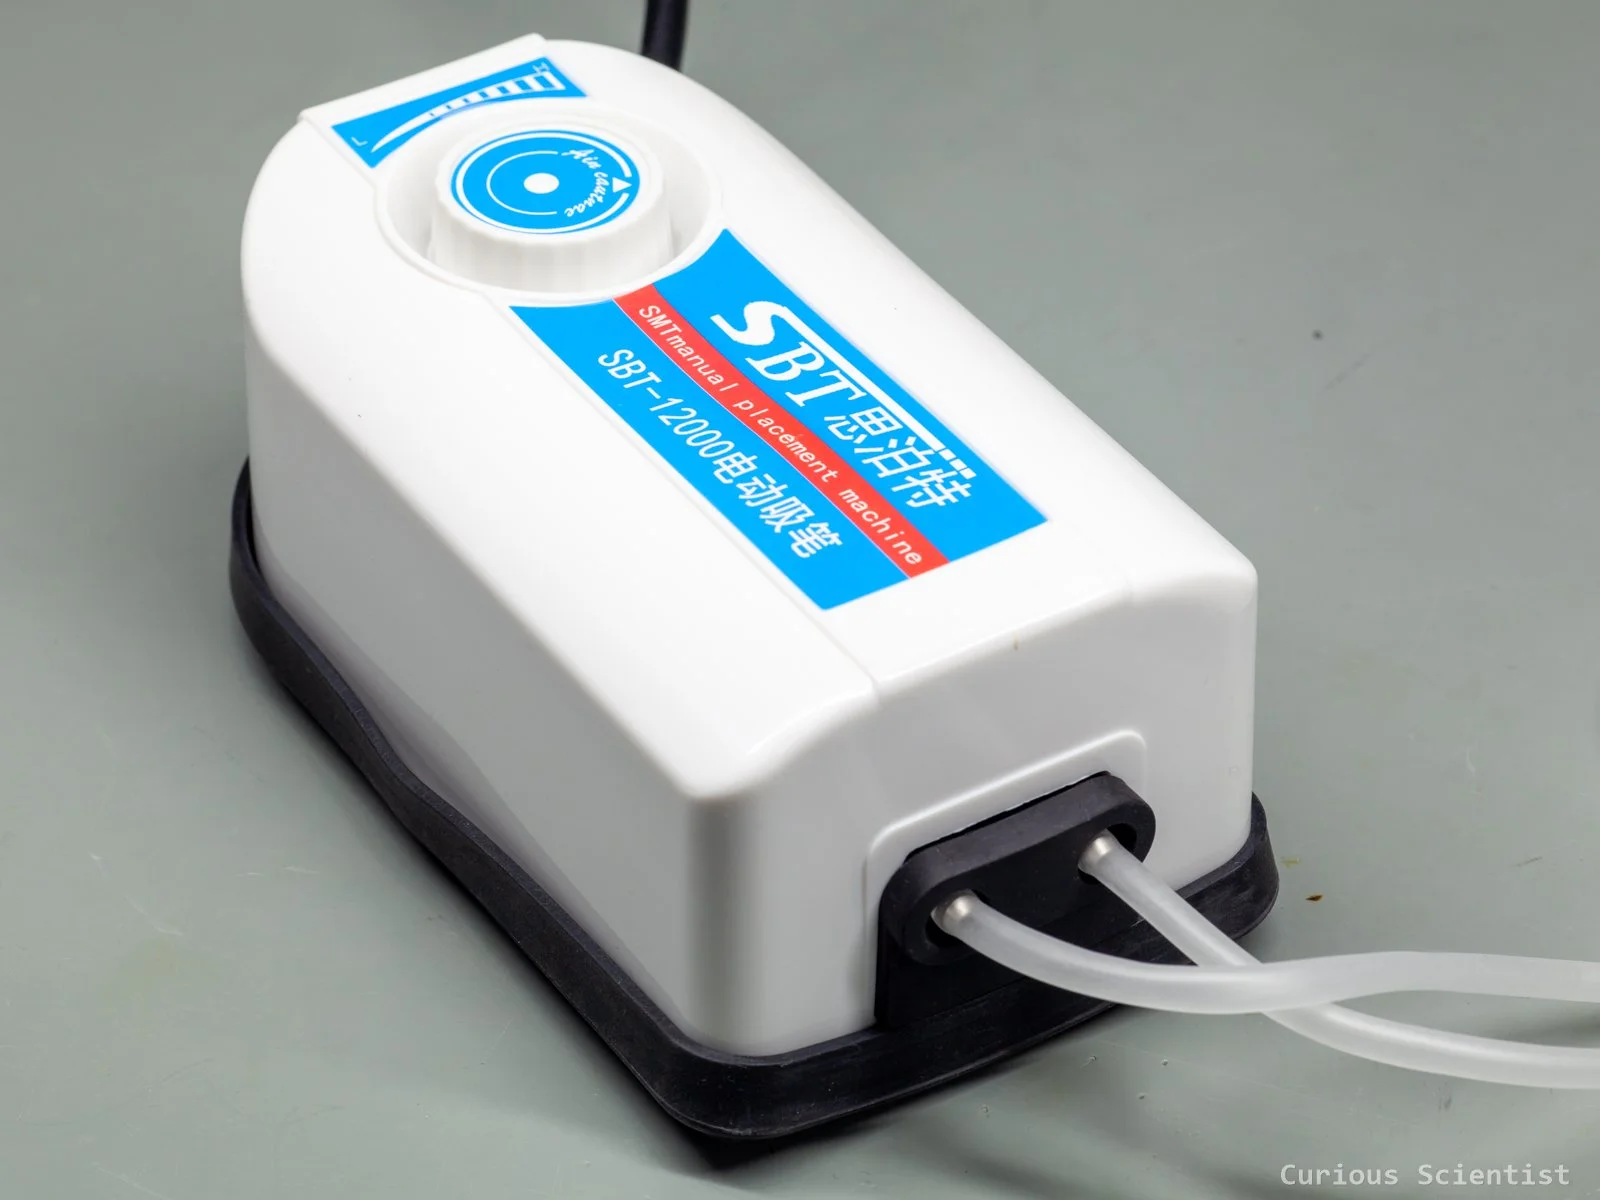
The device is not super loud, even at its highest setting. The two inlets of the device are independent, so we don’t need to attach both to allow proper operation, but it is recommended to at least block the unused inlet to decrease noise levels and avoid dirt being sucked into the inlet.
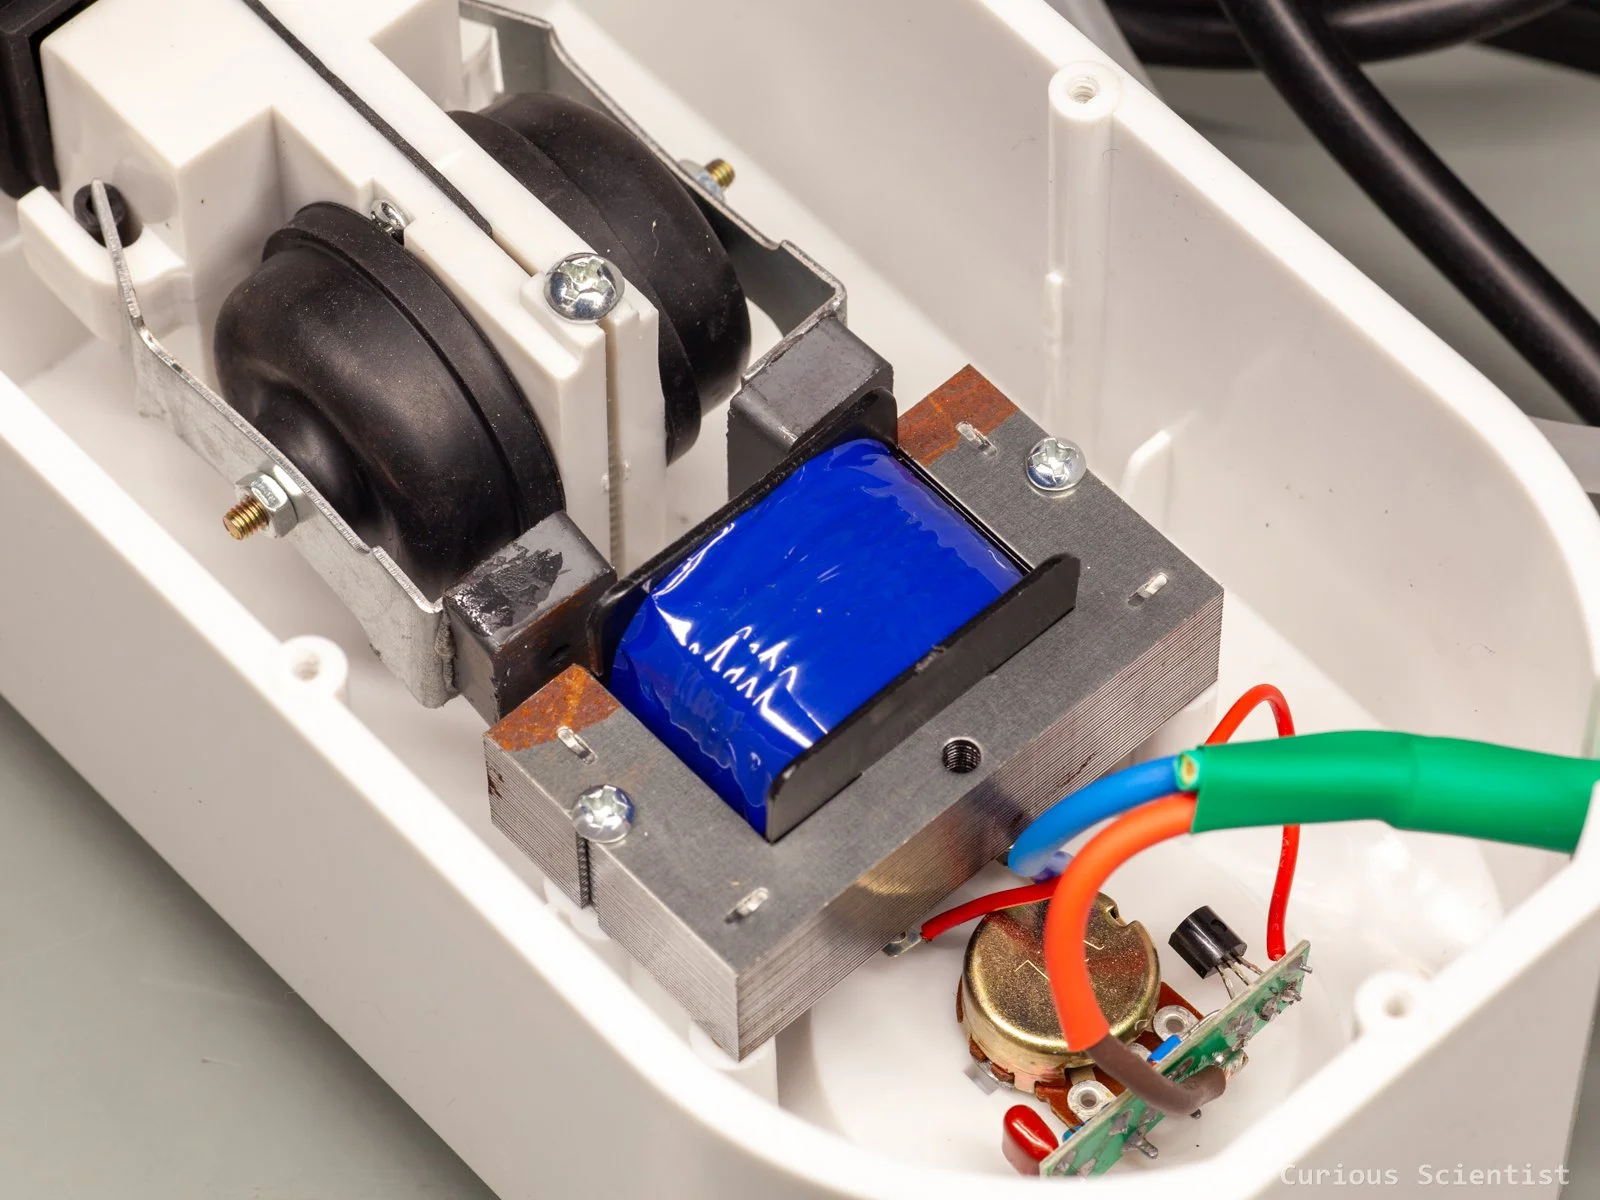
I opened the enclosure because I wanted to replace the original cable, which had a Chinese plug, and I also wanted to see how it works. Apart from the very dodgy circuit board, I got mildly baffled by the pumps. It is made of an open-core transformer, two magnets and two rubber domes. As the 50 Hz mains passes through the transformer, it creates an alternating magnetic field that repels and attracts the suspended magnets. This force is enough to compress the rubber domes to create enough suction force. Diodegonewild would probably not approve of the electronics part; however, I am quite impressed by the principles of the pump.
Soldering iron tip cleaning brush
Finally, the last soldering-related part in this batch. It is very simple; it is just the brush that you should use to keep the tip of the soldering iron clean. It is much better than using a wet sponge, and it is perhaps also better than the brass sponge. After a while, a brass sponge tends to lose its “sponginess”, and it becomes compacted, which makes cleaning the tip more difficult.
When I compared the brush with the brass sponge, I achieved much better results with the brush. The tip became immaculate.
This brush has straight, sturdy bristles. Furthermore, it fits a lot of popular soldering stations, which makes it an even better and more convenient accessory. But you can just place it anywhere near your soldering setup, and in the worst case, you can use double-sided tape to keep it in place.
It is more expensive than a brass sponge, but I believe that its longevity and ease of use are worth the investment.
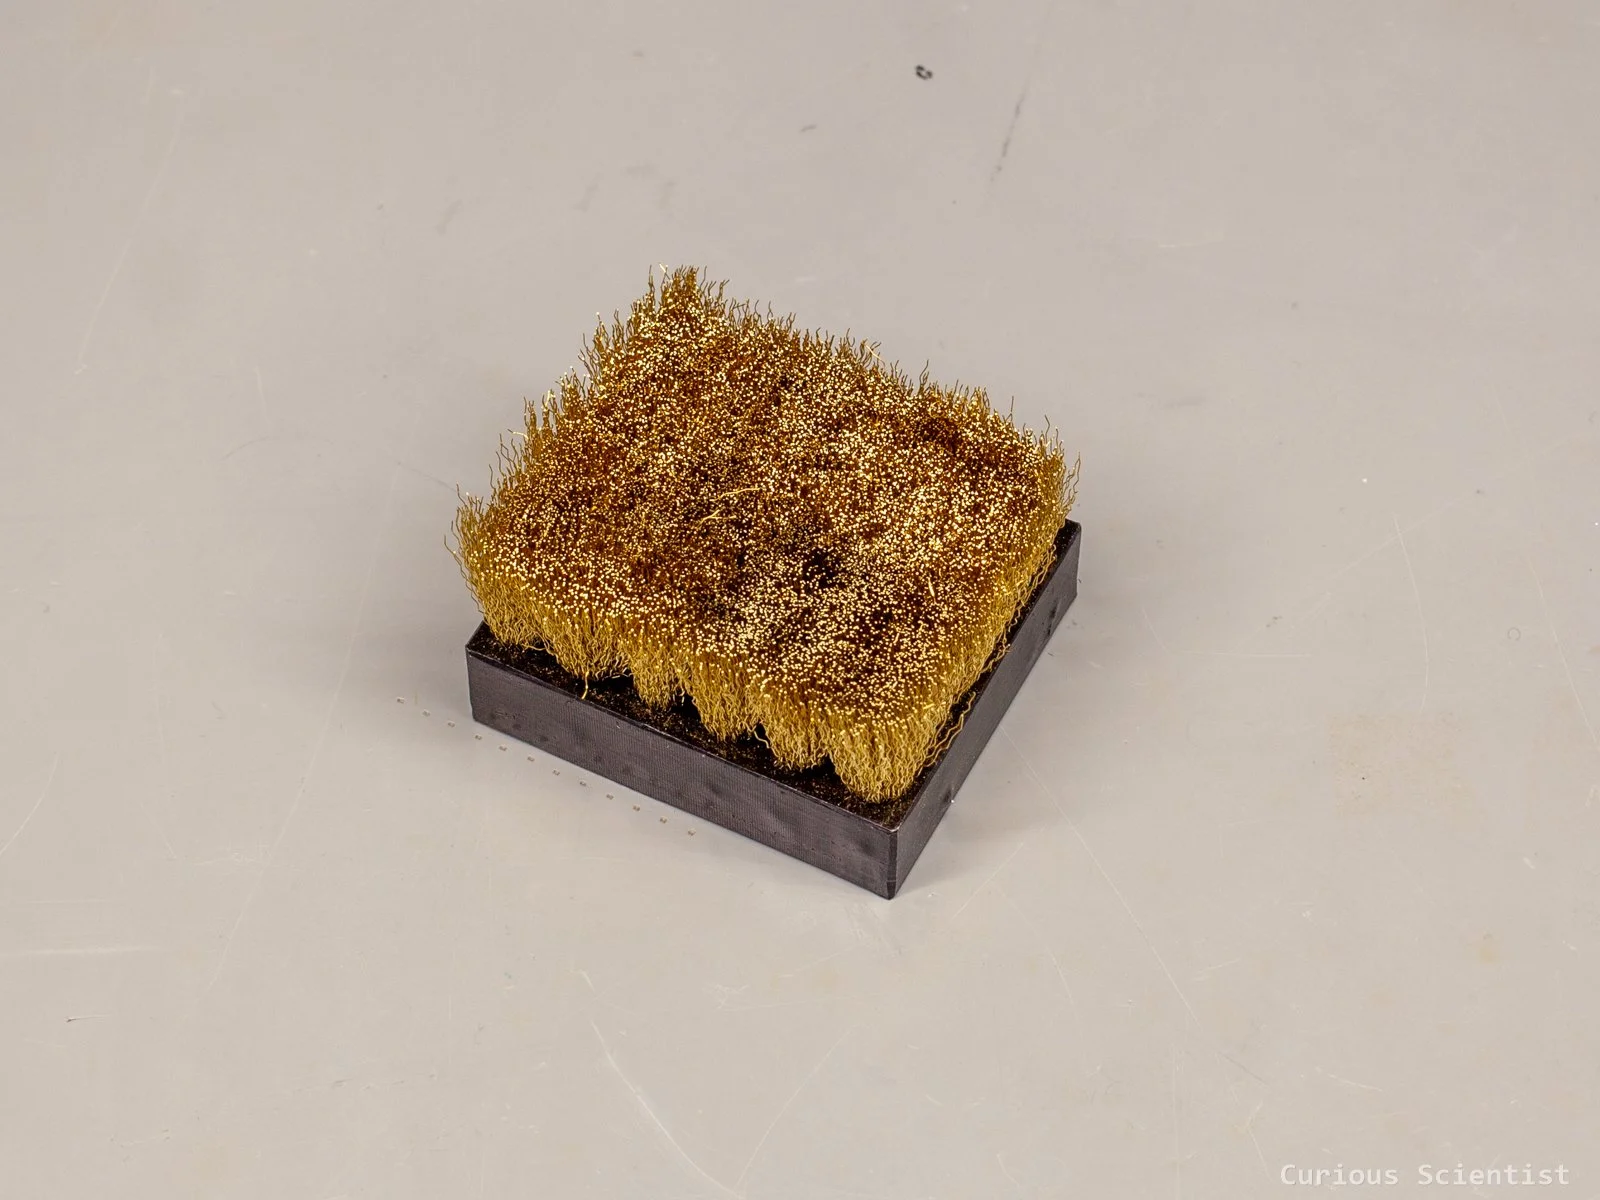
A simple brass brush, but it seems to be more effective than the common brass sponge.
Magnetic PCB holder
I am a big Omnifixo supporter, and I stay that way, but maybe for those who can not afford it, this can be a good alternative.
This product is a spring-loaded clamp with a magnetic base that can be used to hold PCBs, wires, or whatever else you need to hold in place. All it needs is a magnetic surface.
As I said, it is similar to Omnifixo, but it is not as smart. The clamping part is essentially the same; the manufacturers can not deny that they were inspired by the Omnifixo.
However, the bottom part is totally different. While Omnifixo has a ball joint that allows total freedom in positioning the clamp, this device can only stand upright or can be tilted back by 90°, so the clamp is pointing at the sky. The joint allows rotation, so there is a bit more freedom, but, for example, the clamp can not be tilted forward or sideways.
Despite the differences, the clamp is still a solid accessory for those who solder a lot and need a solid support for their boards and components. It is best to use them in pairs so they can be set up to support each other. A single unit by itself is very unstable and it is very easy to tip it over.
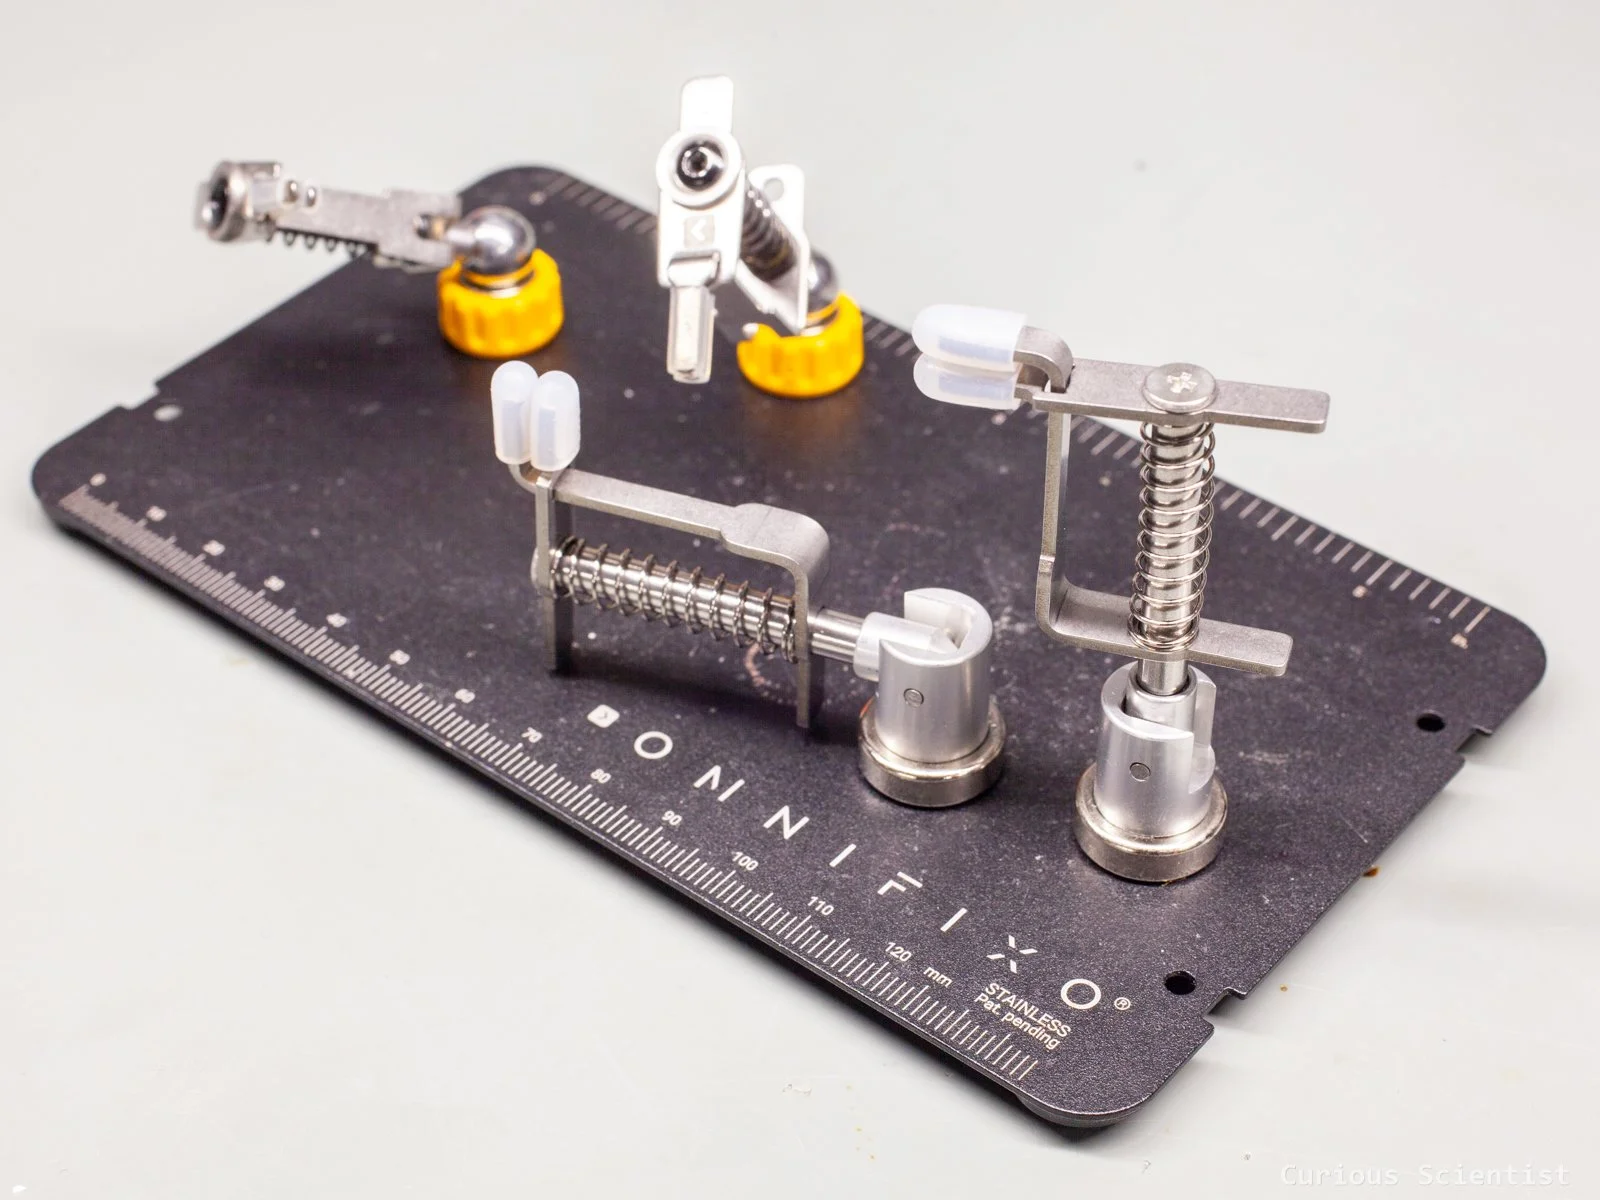
PCB grabbers. As a reference I placed two Omnifixo clips in the background.
AINEXTBOX P2X 140 W USB-C trigger with different cables
This is another USB-C power delivery device. I keep finding newer and smarter gadgets in this area, and this device was interesting enough to buy it and share it with you. The product came to me in three parts:
A bag with a compatible USB-C cable
A bag with 12 different connectors
A paper box with the device, an adapter cable (5.5 mm × 2.5 mm) and a manual
The device is simple, and the manual explains the operation in a simple way. When a proper power adapter is used, the device can negotiate up to 140 W according to the standard, which is achieved by getting 28 V and 5 A. The device supports the typical PD voltages: 5 V, 9 V, 12 V, 15 V, 20 V, and 28 V and can allow up to 5 A. It does not have a PPS mode, so we can not utilize the adjustable power supply mode of the USB power adapters.
The gadget has a built-in 0.96” IPS LCD that displays the selected voltage, the actual voltage, the real-time current, the real-time power and some other parameters that could be customised by using the button on the device. The housing is made of metal, which helps to dissipate heat when a lot of power is being drawn through the device. Despite this, it can become hot, and the manufacturer warns the user about this in the manual. To avoid overheating, the device has built-in overtemperature protection.
The device is perfect for DIY electronics projects where a relatively large amount of power is needed. Thanks to the large variety of plugs, it can be adapted for various devices. It can be a perfect replacement for old laptop chargers thanks to the wide variety of supplied connectors.
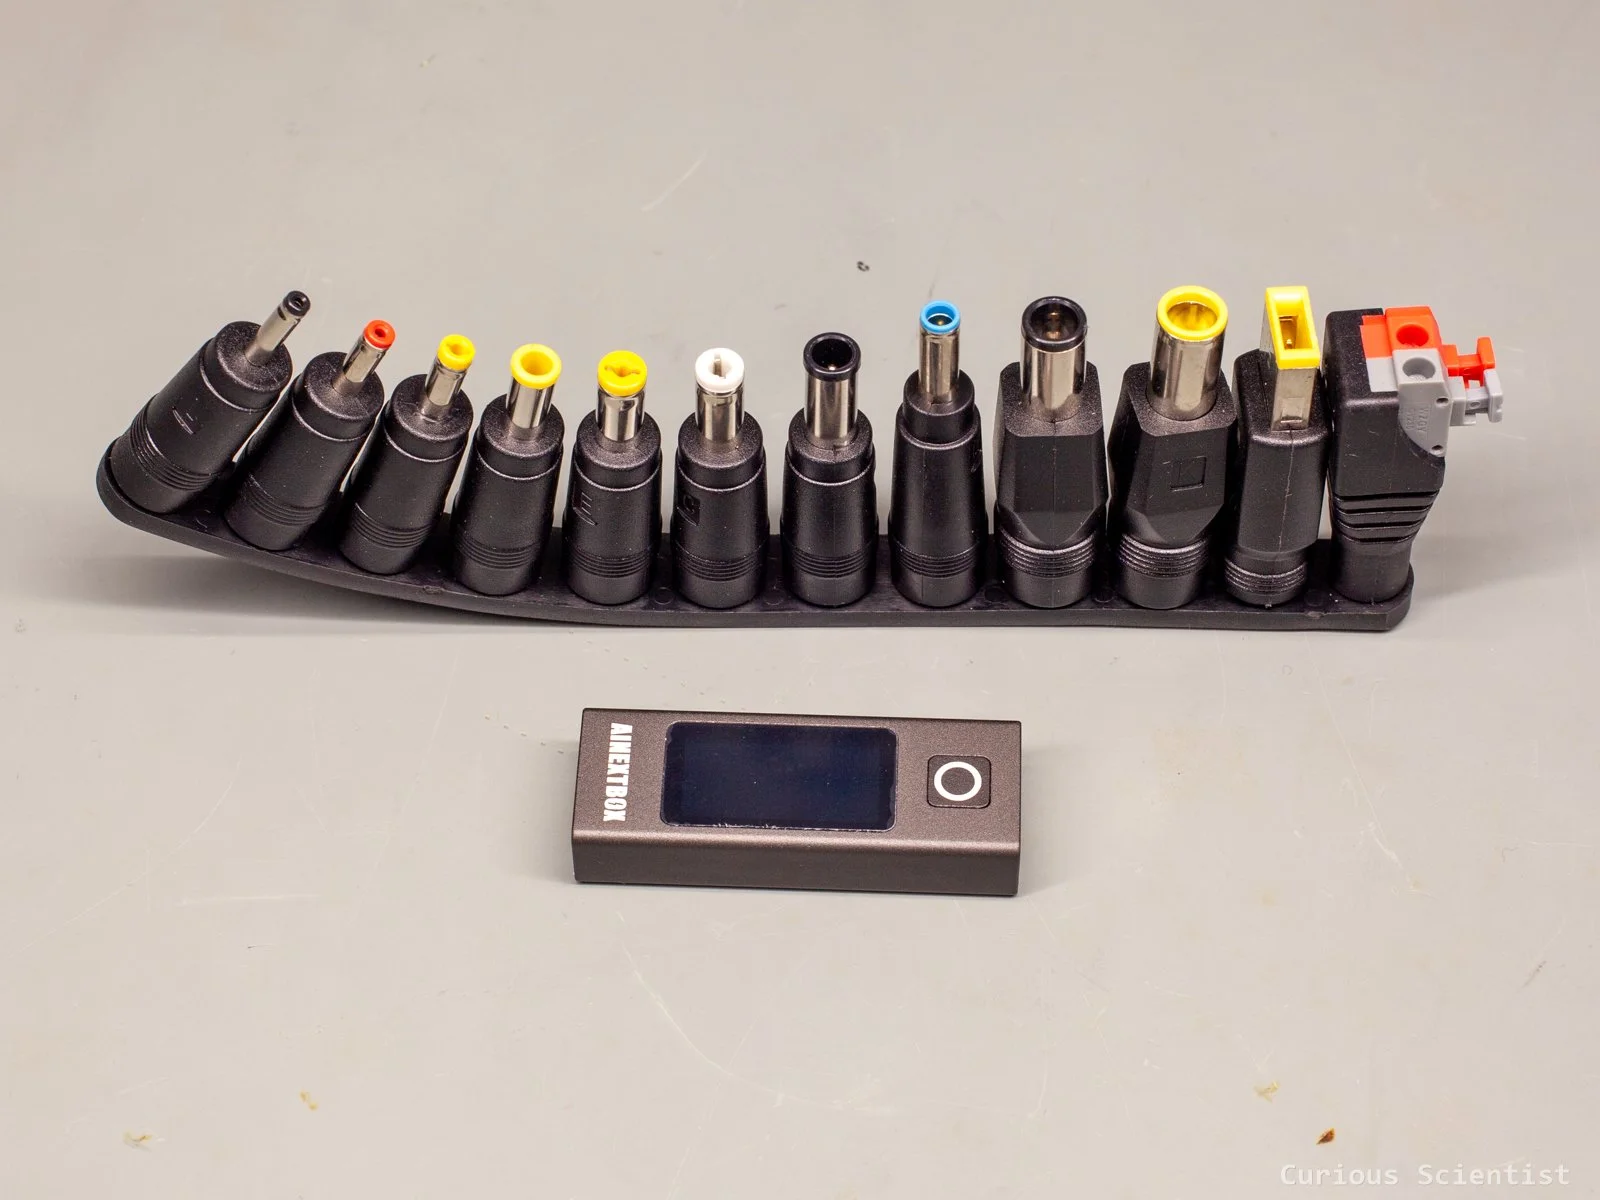
USB-C power trigger with dozen different connectors
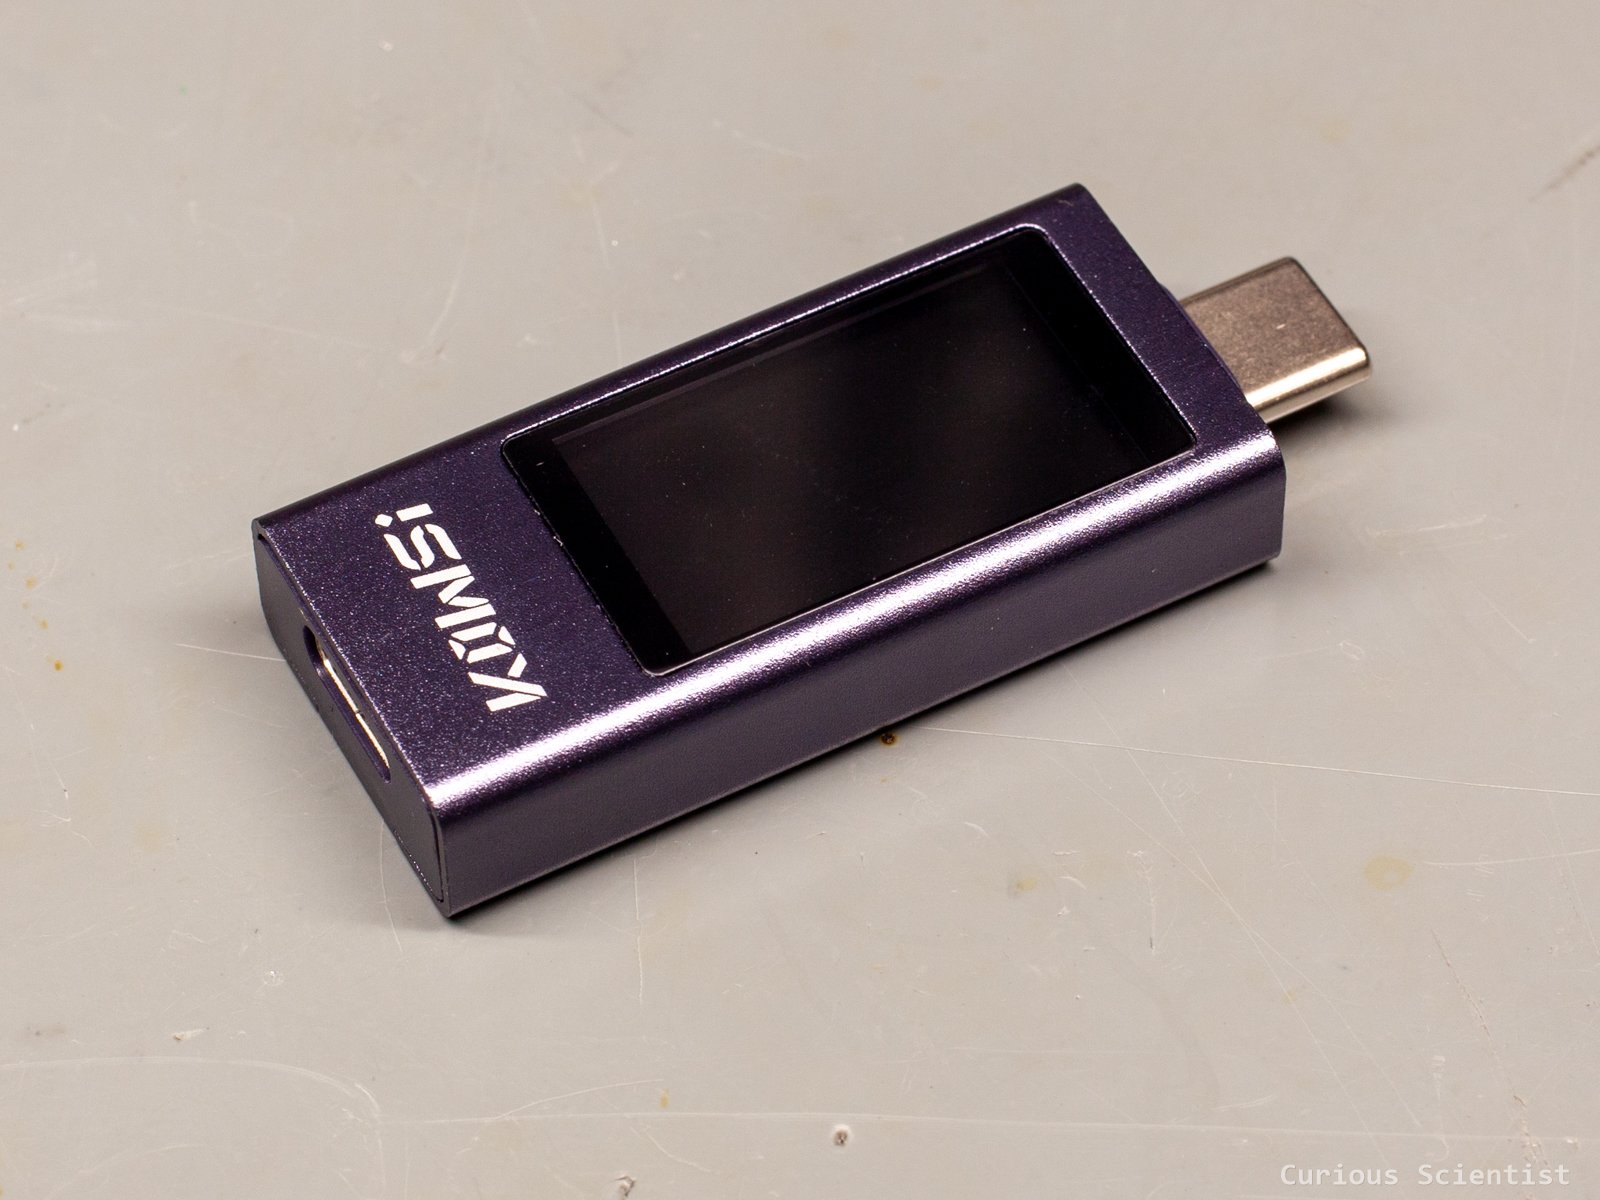
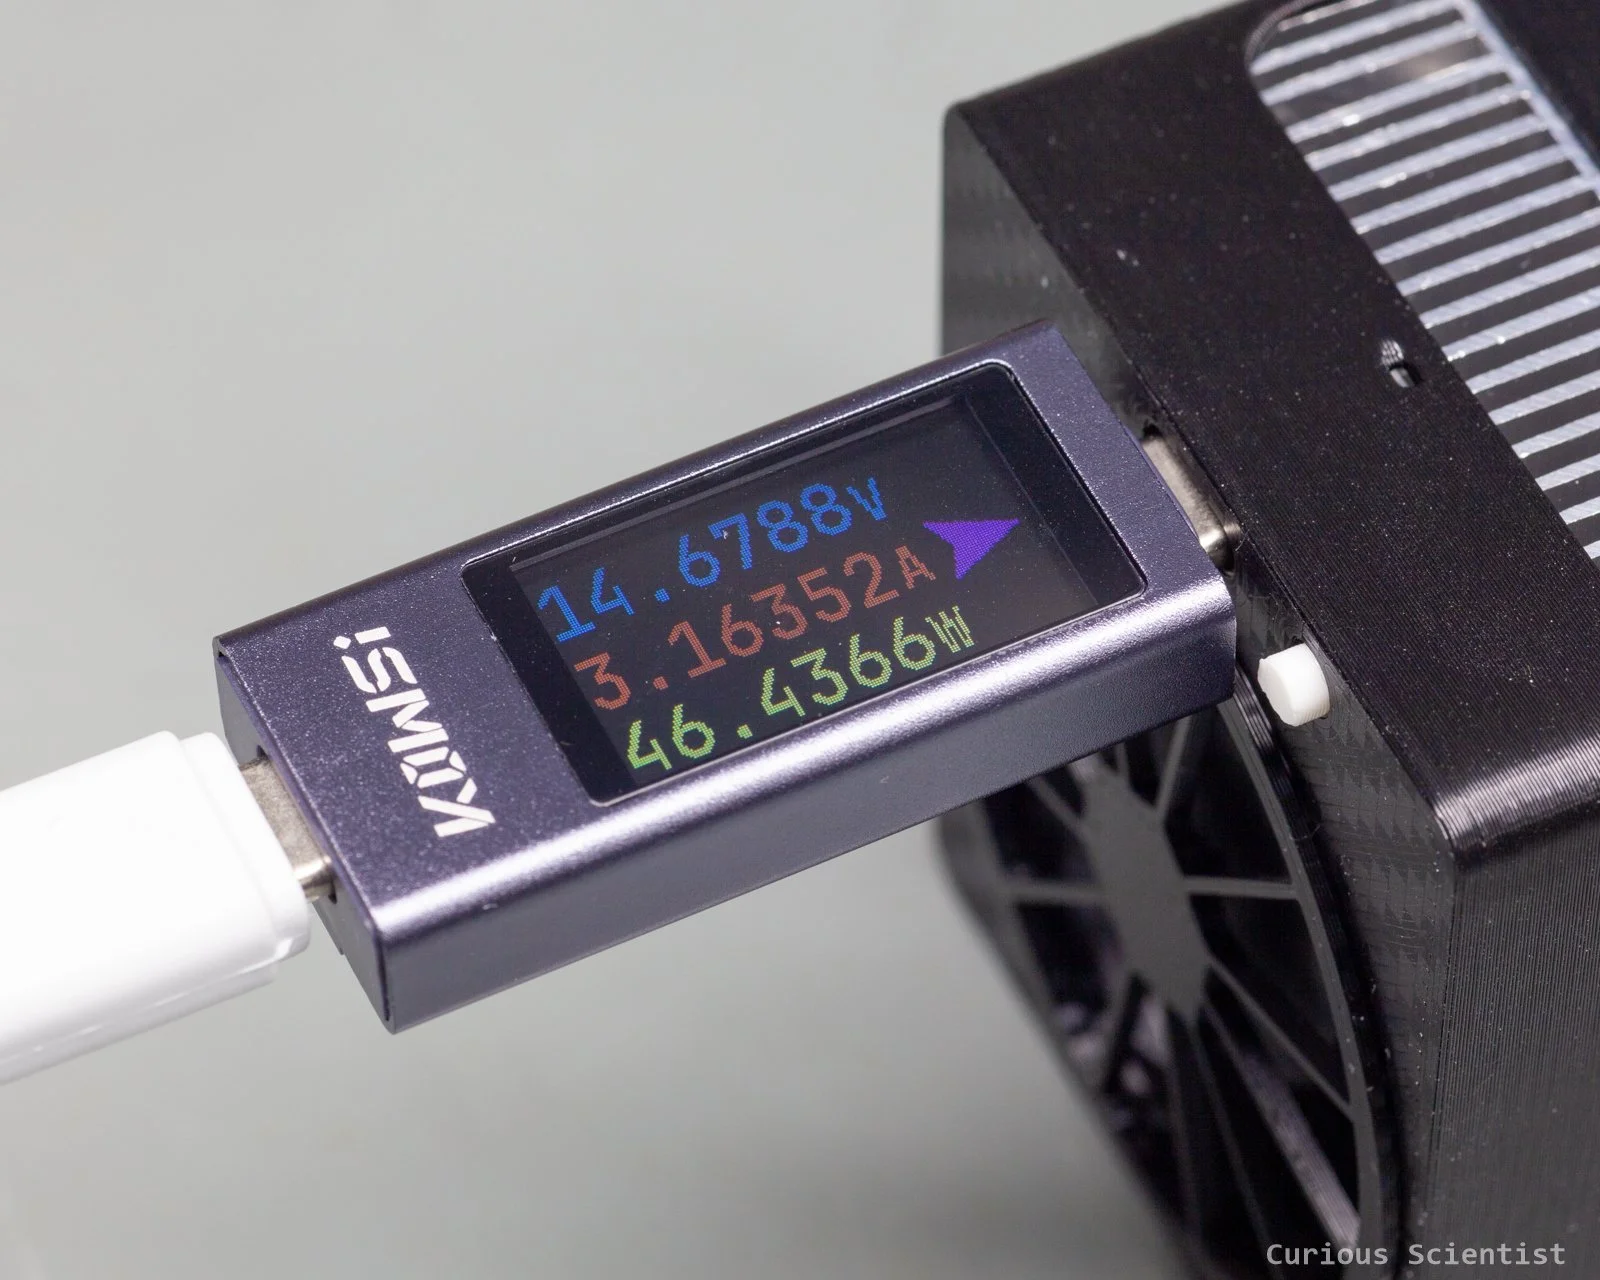
KWS-2302C USB-C power meter
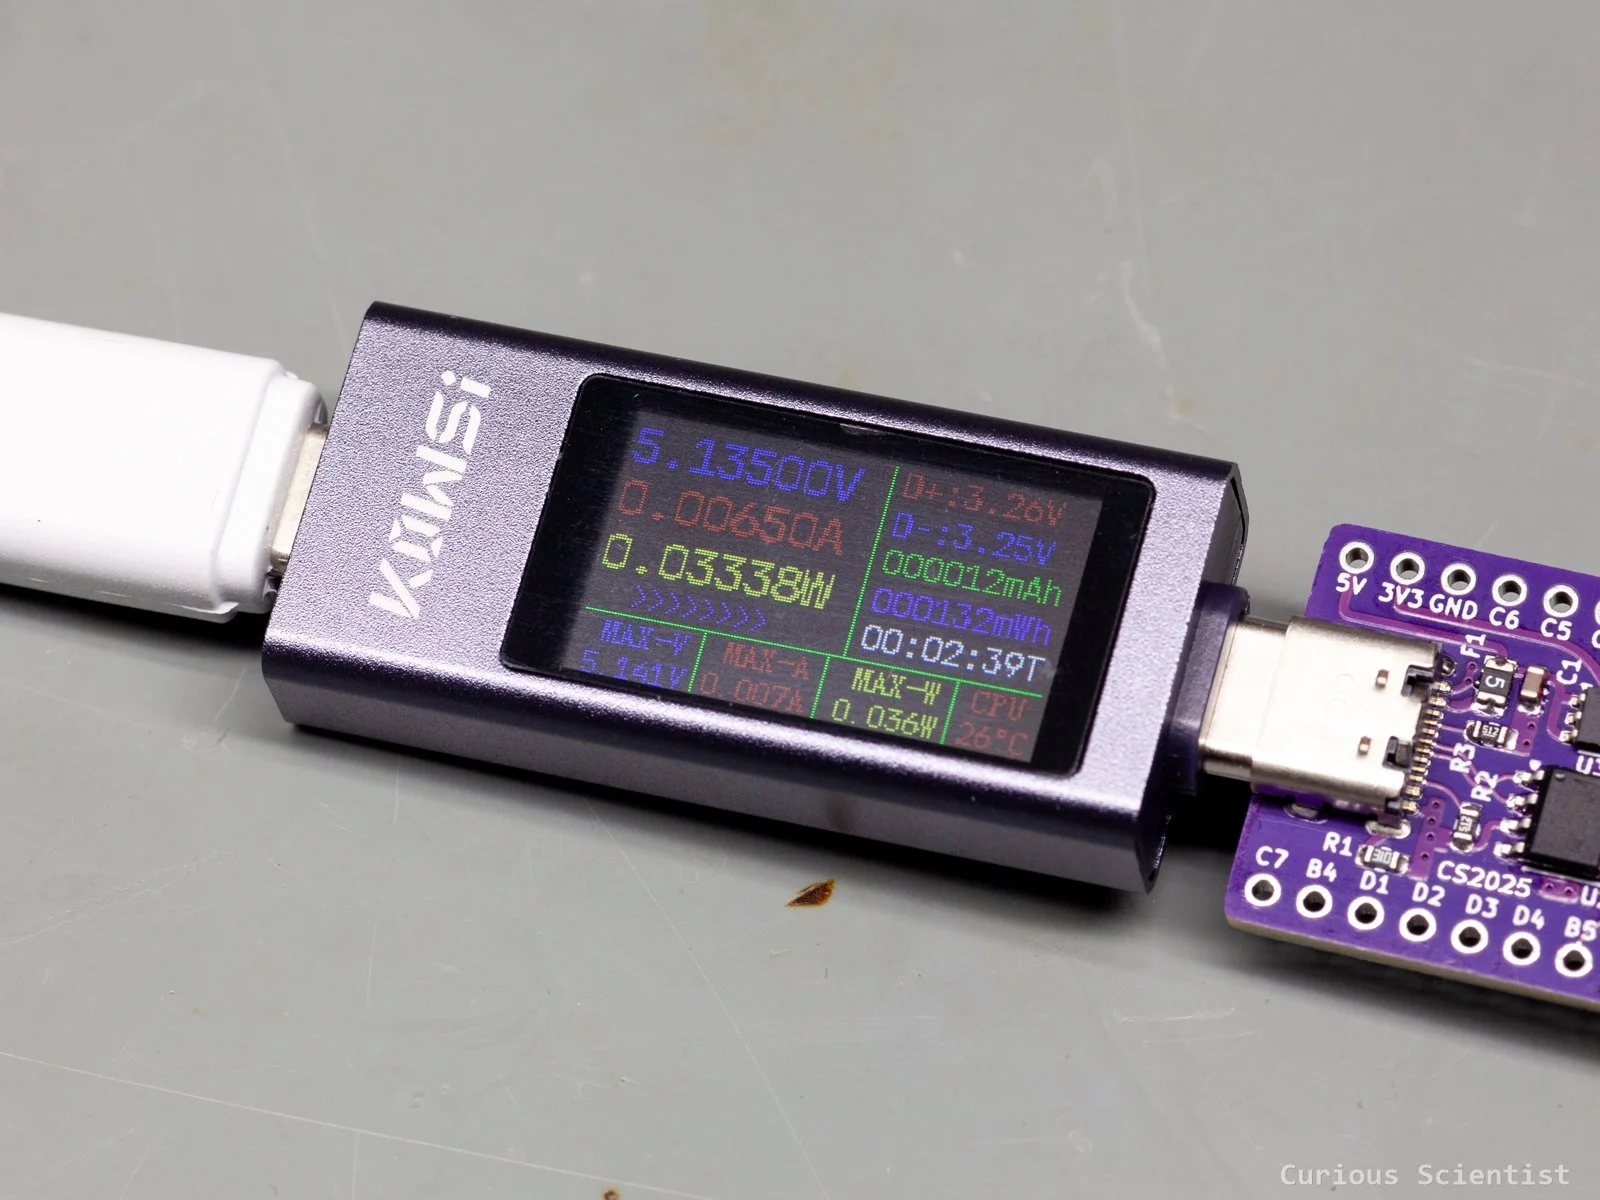
This tiny USB-C dongle is a DC power meter for USB-C devices. It is a pass-through device with a male USB-C connector on one side and a female USB-C connector on the other side. It supports voltage levels between 4-30 V and currents between 0-12 A. It also supports fast charging and other relevant power-negotiation standards, so it can be used with a wide range of devices. We can test power banks, chargers, phones or other devices with it.
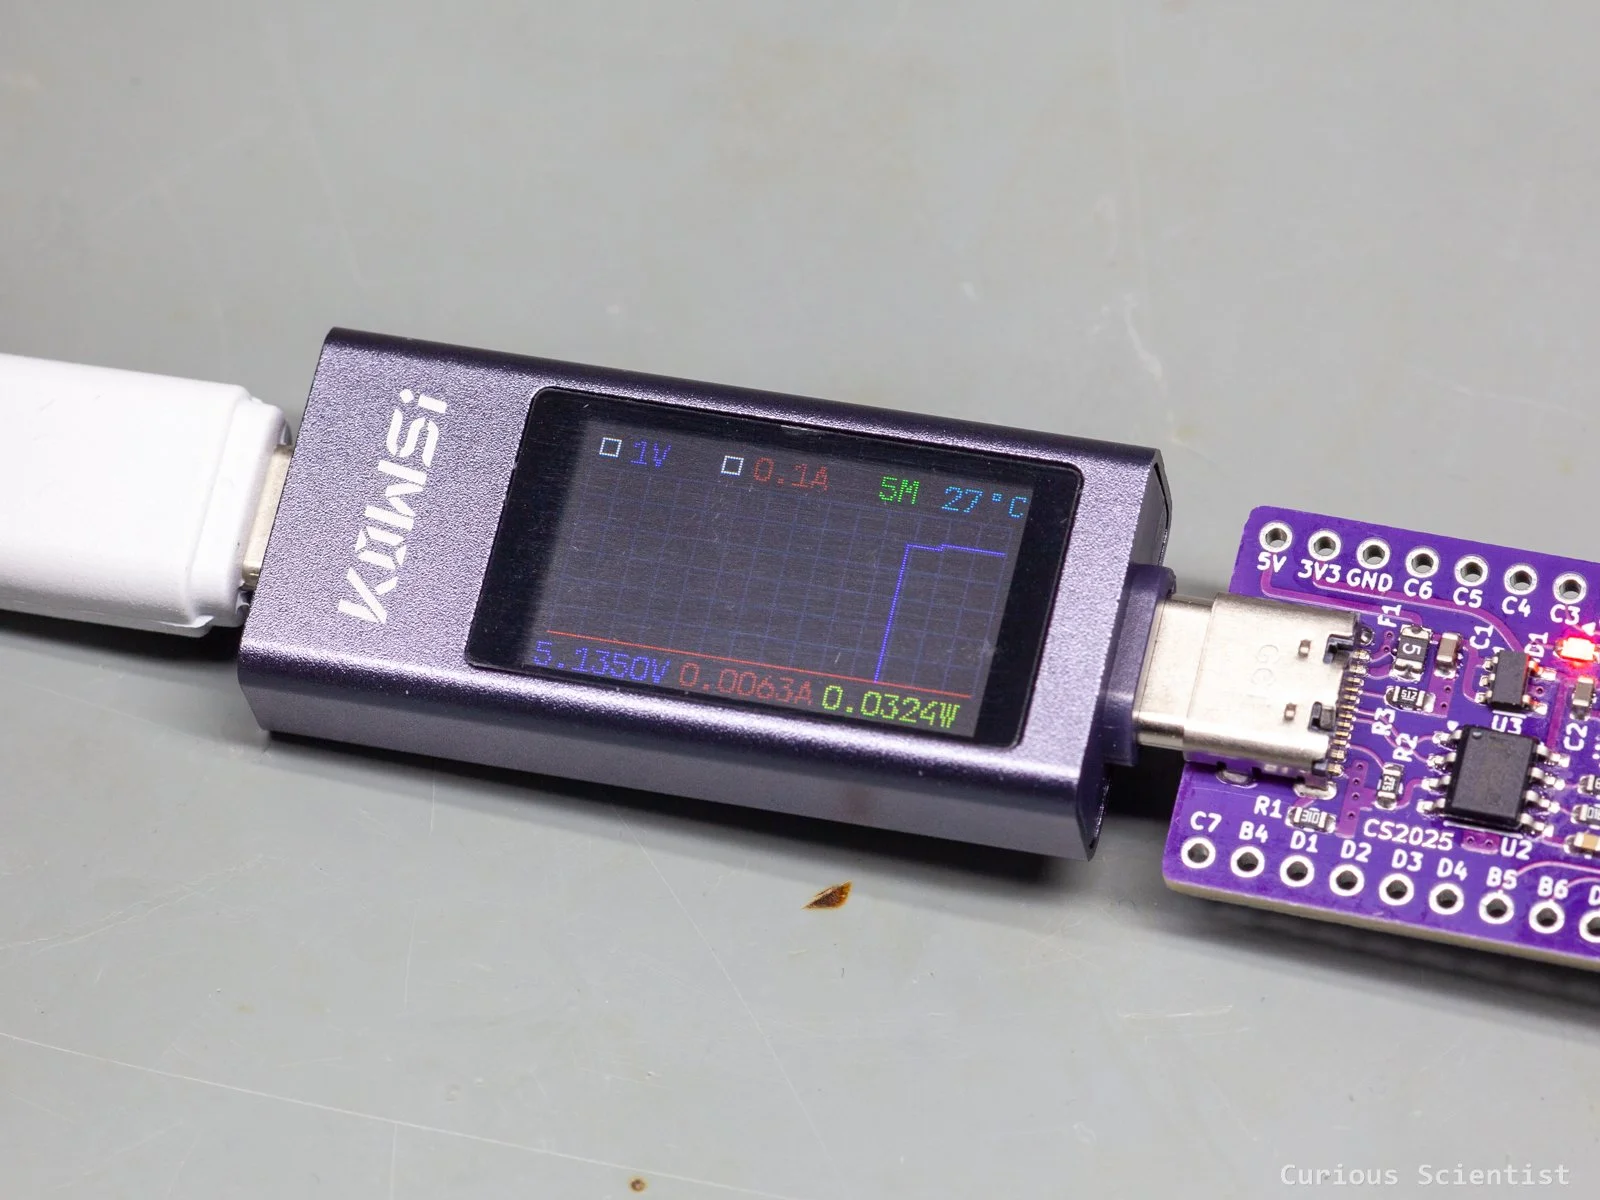
It has a small but quite readable display. All the parameters are printed in different colours, so it is easy to distinguish them. The most important parameters, voltage, current and power, are shown in the top-left corner and are printed with slightly larger characters.
With the built-in button, we can do different things. With a single click, we can switch to a chart view or to a voltage-current-power view. Or, long-pressing the button on the main screen resets the timer and the energy-related parameters, so we can start measuring with a clean slate. Double-clicking the button flips the display, which is a very convenient feature. An arrow on the display also indicates the output direction. It can point towards the male USB-C connector (output) or away from it (input).
If you are building USB-C devices, this device can help you both with analysis and troubleshooting. If something is, for example, shorted on your board, this device will help you to find it quickly based on the excessive/unusual current consumption. Or, you can just simply evaluate the power consumption of your devices.
Peltier cooler-based cooler for phones and DIY projects
This product is a bit of a contradiction for me, because I don’t exactly like its concept. But I always wanted to test one and discuss it, so people can learn from it.
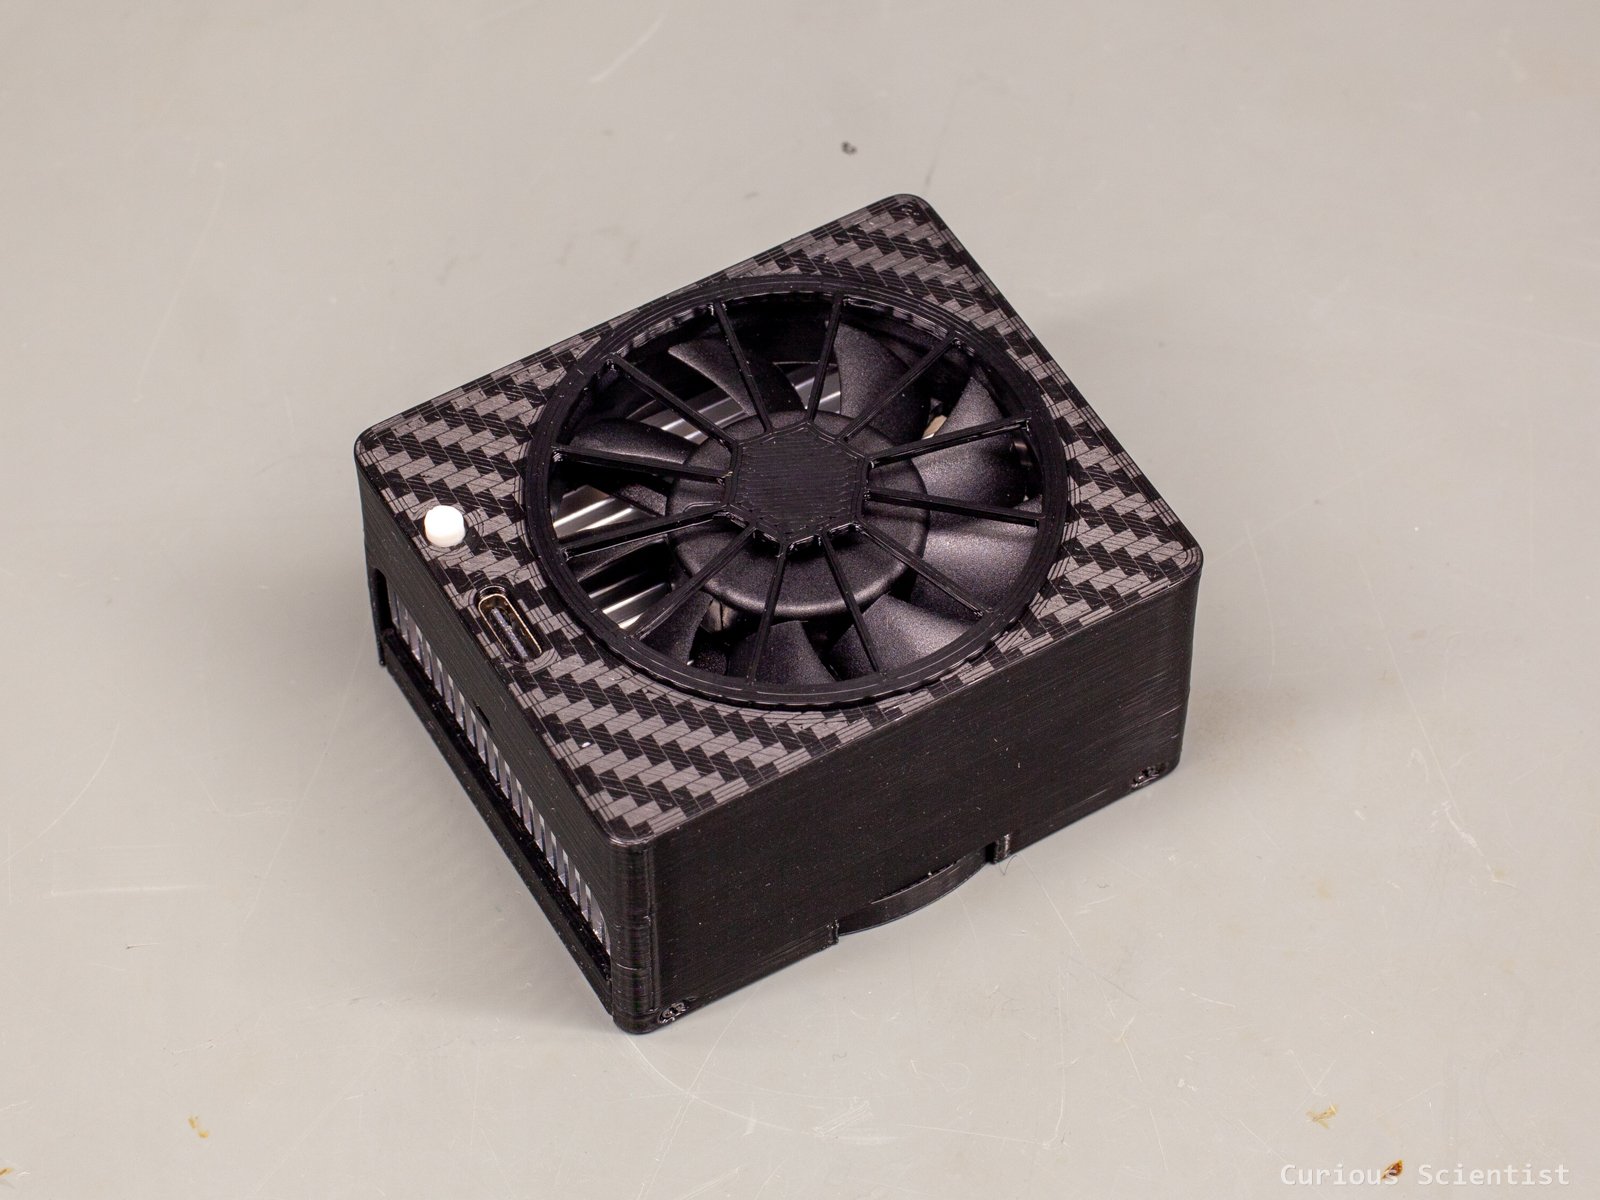
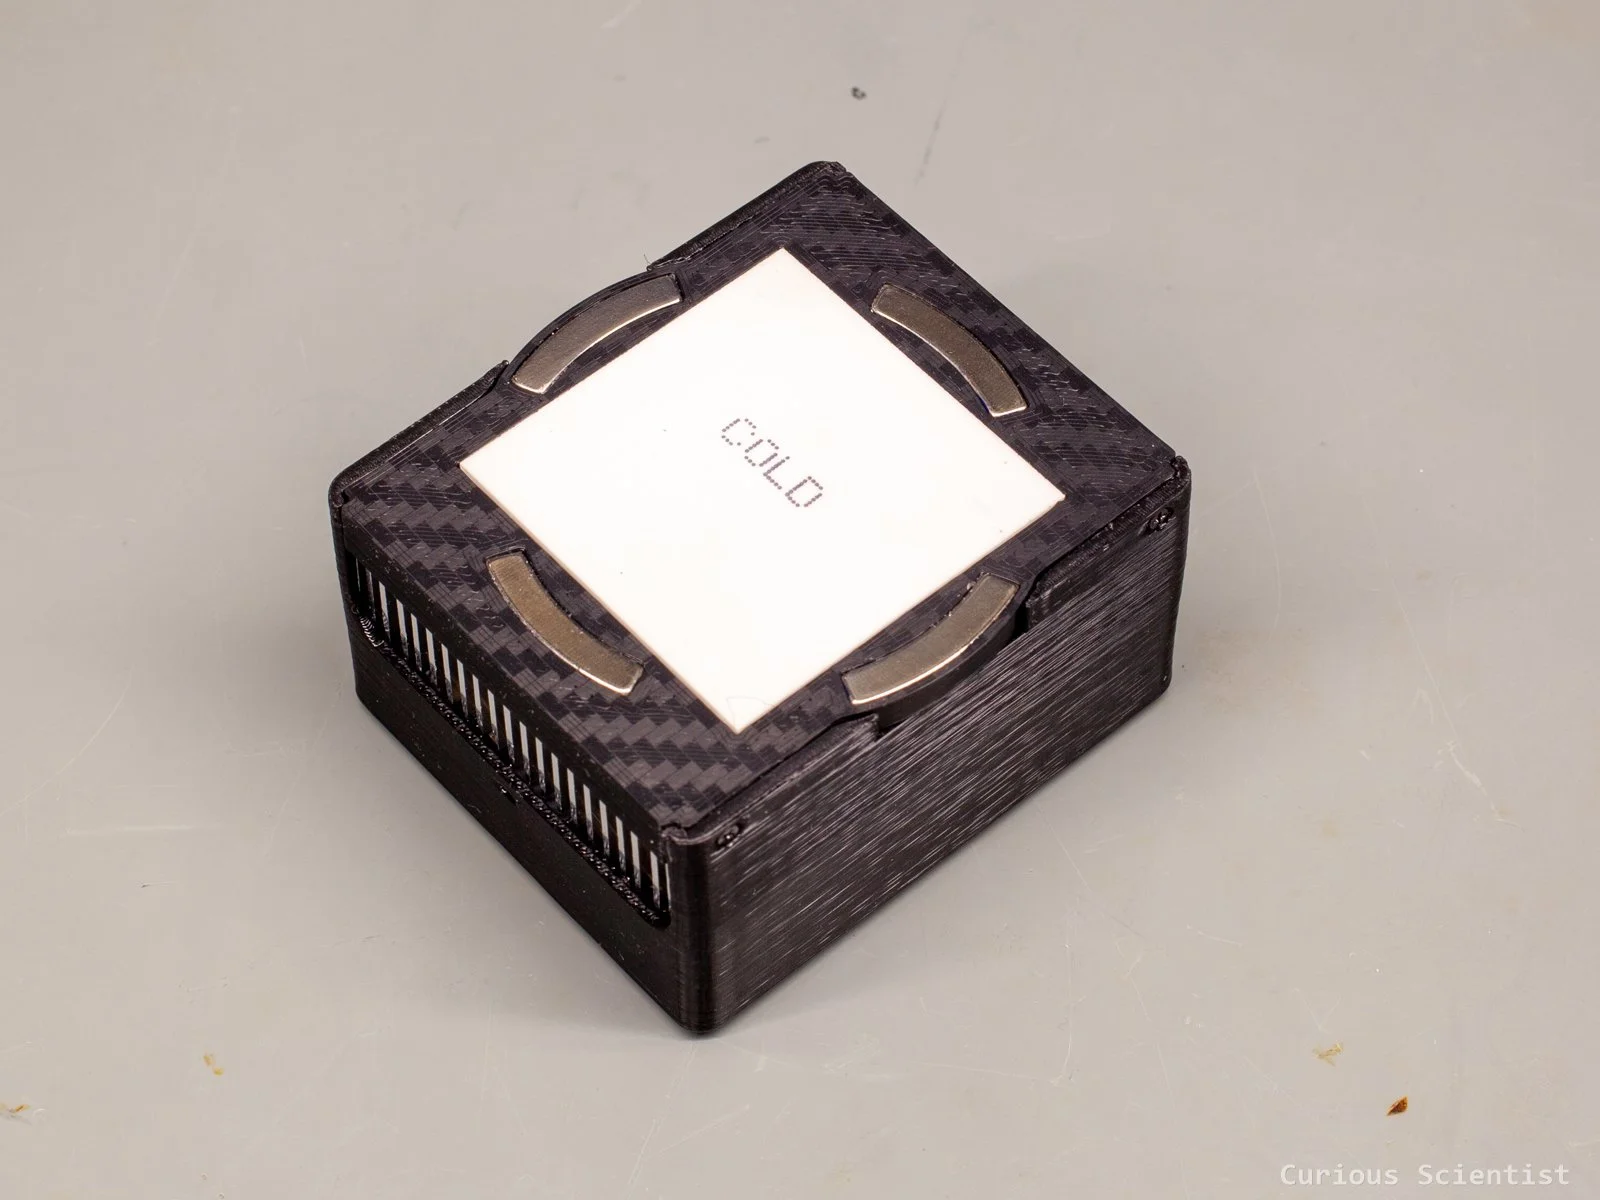
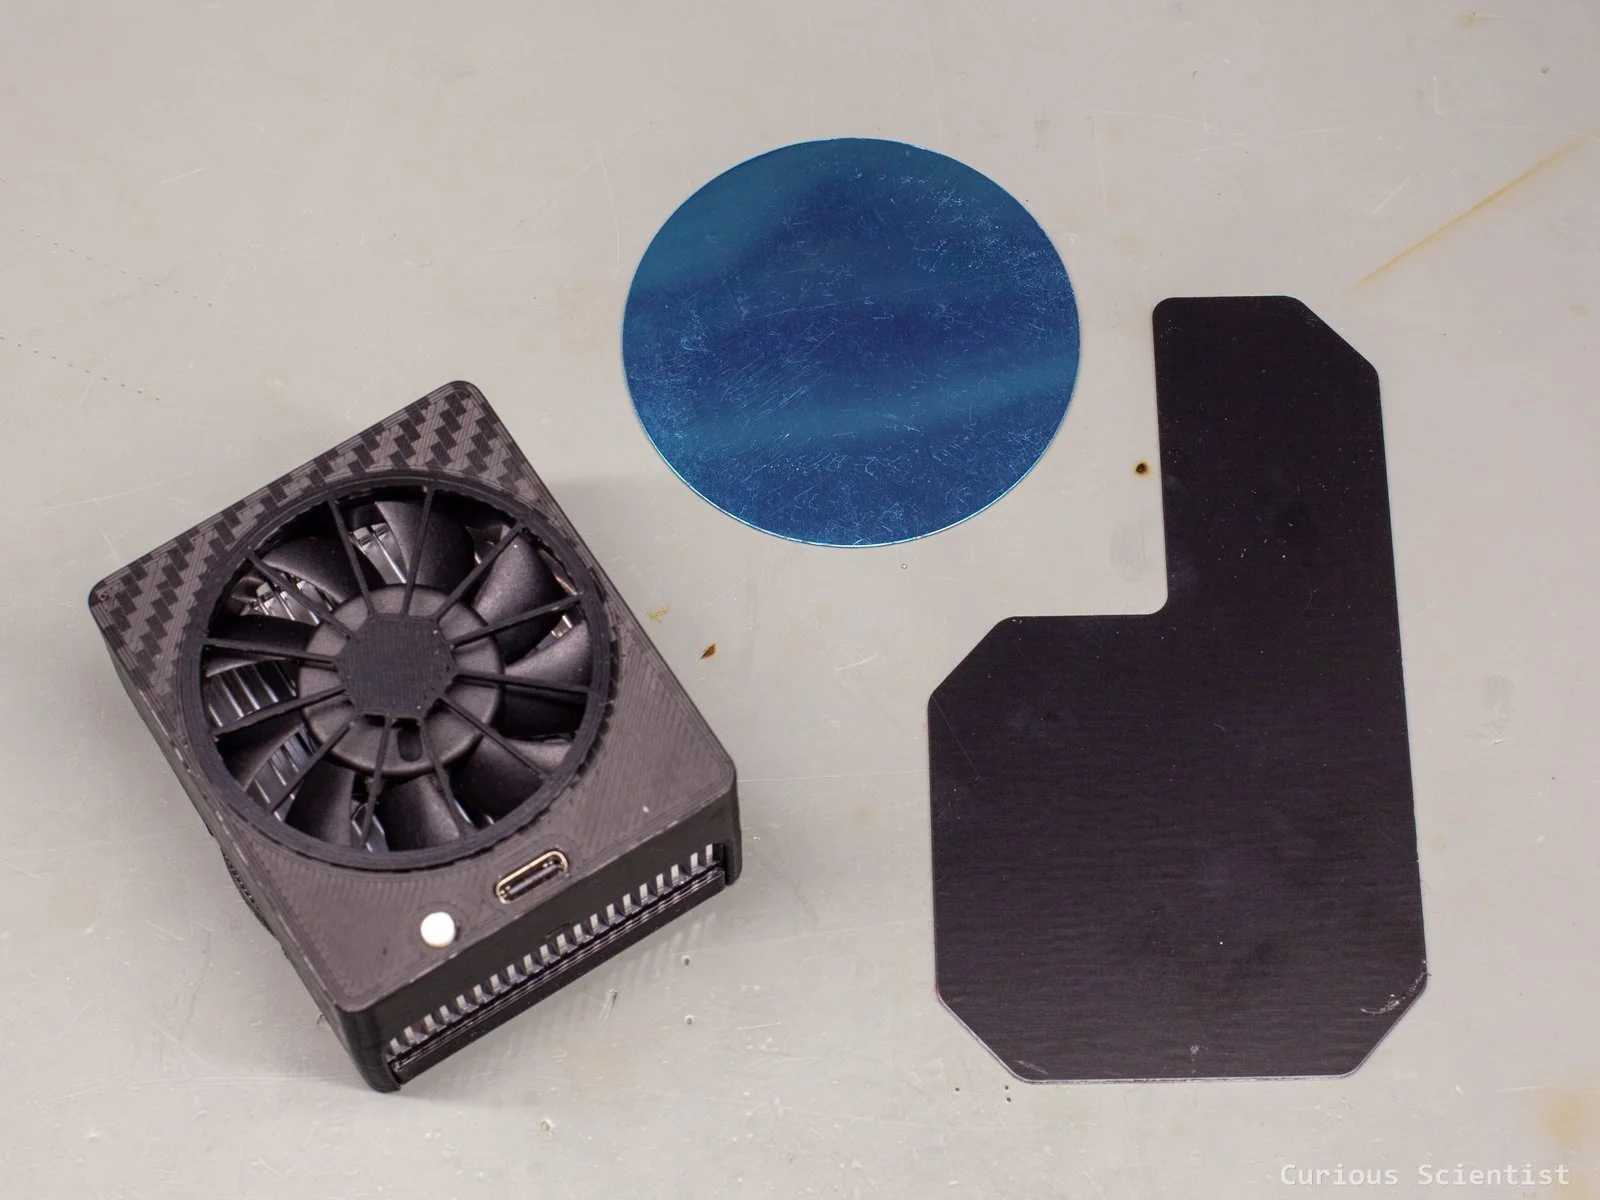
In my opinion, it is an overpriced cooler for the purpose they are selling it for (phone cooler). But for other purposes and experiments, it can be a fun gadget. So, first of all, it is supposed to be a phone cooler. It came with two attachments, steel sheets, in different shapes that are supposed to be glued on a phone’s or a tablet’s back panel, and then the cooler module would snap onto the steel piece thanks to the built-in magnets.
The wow-factor of the device is the built-in Peltier cooler that can bring the surface temperature below room temperature. I could reach roughly -12°C on its cold side without any thermal load attached to it. This can trick people into thinking that the device is a high-performance cooler, but it is not really. The Peltier cooler draws 14.6 V and 3.1 A at the highest setting, which is ~45.3 W. This heat and the heat pumped from the cold side must be dissipated by the small heatsink. It obviously can’t do that very well, so the heatsink can become quite hot, and if the hot side of the Peltier cooler becomes warm, it throttles itself, and it will pump less heat.
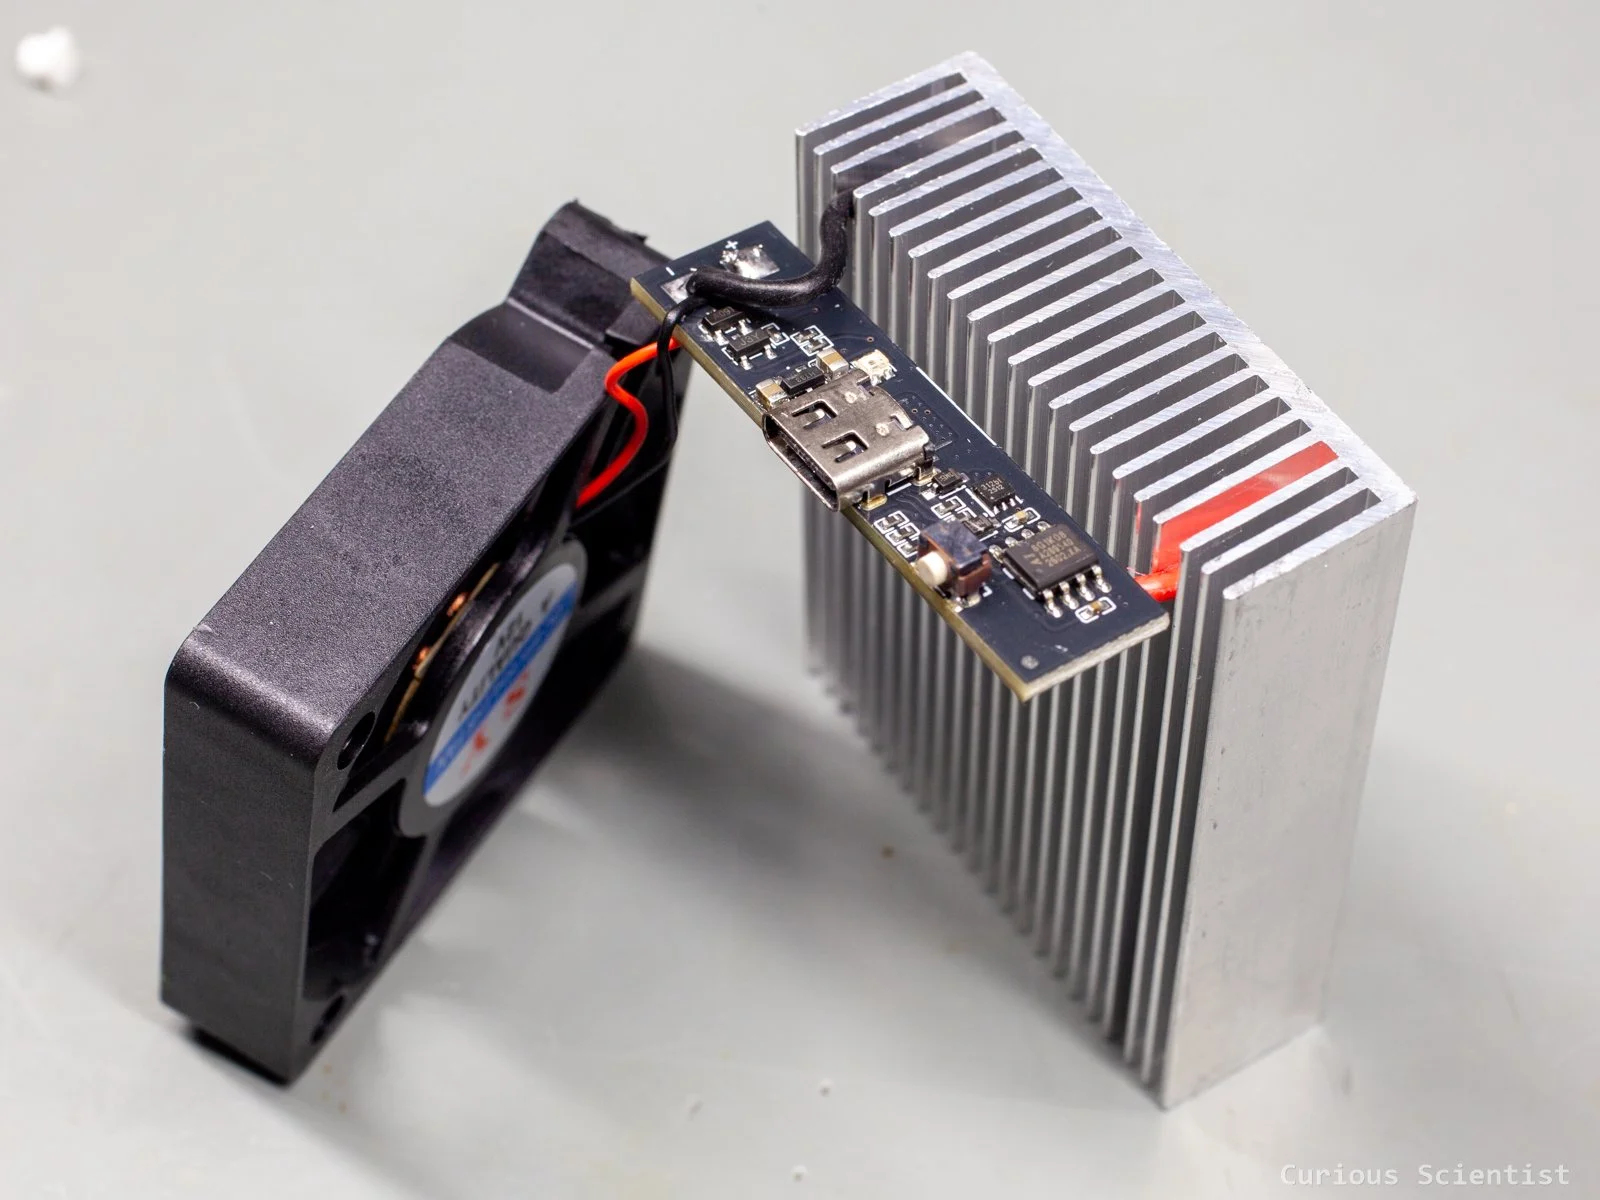
The device has a built-in STC8G1K08 microcontroller and some other components. They control the fan, the power negotiation and the status indicator RGB LED. The cooling level, and consequently the fan speed, is controlled by the small button on the device. The device has 4 power levels (5 V, 9 V, 12 V and 15 V) which can be cycled with the button, and long-pressing the button shuts the device down.
So, my problem with these devices is that the Peltier cooler in them is just an expensive add-on, in my opinion. They are very inefficient. They make the users believe that there’s powerful cooling going on, but in the end, the heatsink has to dissipate the heat. The Peltier cooler does not make the heat disappear; it just pumps it from its cold side (phone) to its hot side (heat sink) while also generating a ton of Joule heat (product of operating current and voltage). So, imagine we have a Peltier that generates 45 W of heat just by running, and it also pumps an additional 10 W (optimistic!). This 55 W of heat appears on the heatsink that must be dissipated somehow. Even if the heatsink can do it, we waste 45 W on it. The heatsink is not extremely good, and it gets quite hot during operation, so the Peltier cooler is probably throttled.
Yes, the temperature gradient created by the Peltier helps to pull the heat out of the phone or tablet, but it requires a lot of waste heat, and one must have an additional high-performance USB-C power supply to operate the Peltier cooler. So, maybe just attach a heatsink with a fan, and you can achieve roughly the same results with much less wasted power, or, in other words, with better efficiency.