AliExpress Finds - Part 1
In this article, I try a new format. I thought it would be nice to buy a few gadgets from AliExpress (AE) that I would need for different projects or uses, and make a summary video of all the things I bought. This is not a “worth it"-type of video because I consciously buy stuff that I know is good and useful. These articles could help people to decide whether they should also buy the products or not, because I aim to give a better description of the products than their product descriptions and specifications on AE. I do not only intend to show the product, but I also give some use case examples and other tips and tricks.
OLED display digital voltmeter 0-30V
This sleek-looking device packs a powerful voltmeter. It is compact enough so it can be placed anywhere: workbenches, dashboards, battery packs and so on.
The device itself can be powered with any voltage between 3.5 V and 30 V. So, for example, if the power consumption of the device is not an issue and you want to continuously monitor a circuit with voltages above 3.5 V, then the device can be wired so that it can be powered from the monitored power rail. For example, perfect for continuously monitoring a car battery.
The power supply is connected to the G (ground) and V (positive supply) pins, whereas the voltage is measured between the G (ground) and V+ (positive voltage) pins. When the above-mentioned self-powering method is used, the V and V+ tabs can be shorted together, and it is enough to run a single cable from the tabs as the positive pole.
It packs a 12-bit ADC to allow accurate measurements. The accuracy is approximately 0.7%, so for a 10 V input, the error is 0.07 V. The display can accommodate three digits, so at voltages above 9.99 V, this uncertain digit is “masked” anyway due to the fact that there’s only a single decimal digit is shown on the display.
The sampling frequency is 5 Hz, which is good enough for continuous monitoring of a slowly changing DC voltage.
There are two sets of tabs, “A” and “B”, that can be shorted with a blob of solder. Shorting the “A” tab makes the “V” (voltage) symbol disappear from the display, and shorting the “B” tab increases the sampling frequency from 5 Hz to 10 Hz.
The device has a pre-installed self-adhesive sticker on the back of the PCB so the display can be folded back and glued against the back of the PCB. This makes it even more compact.

0-30 V digital voltmeter with OLED display
5-36 V, 10 A power monitor with built-in display
This is another power-related gadget, but with several extra functions. The coolest feature of it is that it can be powered from a PD-compatible USB-C power supply, and it can act as a programmable power supply. It can’t just request fixed, predefined voltages (PDO - Power Data Object), but thanks to the PPS function, it can deliver any voltage between 3.3 V and 21 V, depending on the power supply used. So, with a proper cable and a power supply, this tiny circuit is basically an adjustable power supply with a monitored output. The requested voltage can be adjusted with a step size as small as 20 mV.
However, if you want to use it as a standalone power meter with a wider range of voltages and higher current, then you have to use the onboard terminals and the supplied XT60 connectors (optional). In this case, the input (and therefore the output) can be as high as 36 V and 10 A. The output is monitored by an INA226 chip, which is capable of measuring 0-36 V using its built-in 16-bit AD converter.
The device has two tiny buttons for control. It allows the user to adjust the requested power from USB and change parameters shown on the display. It even has a GUI that you can manipulate from your PC, so if your PC’s USB port can deliver power, you can have a programmable power supply controlled from your computer. However, I would not dare to connect any power-related stuff to my PC in case I short-circuit something.
The manufacturer shared a lot of resources, including software, on their GitHub!
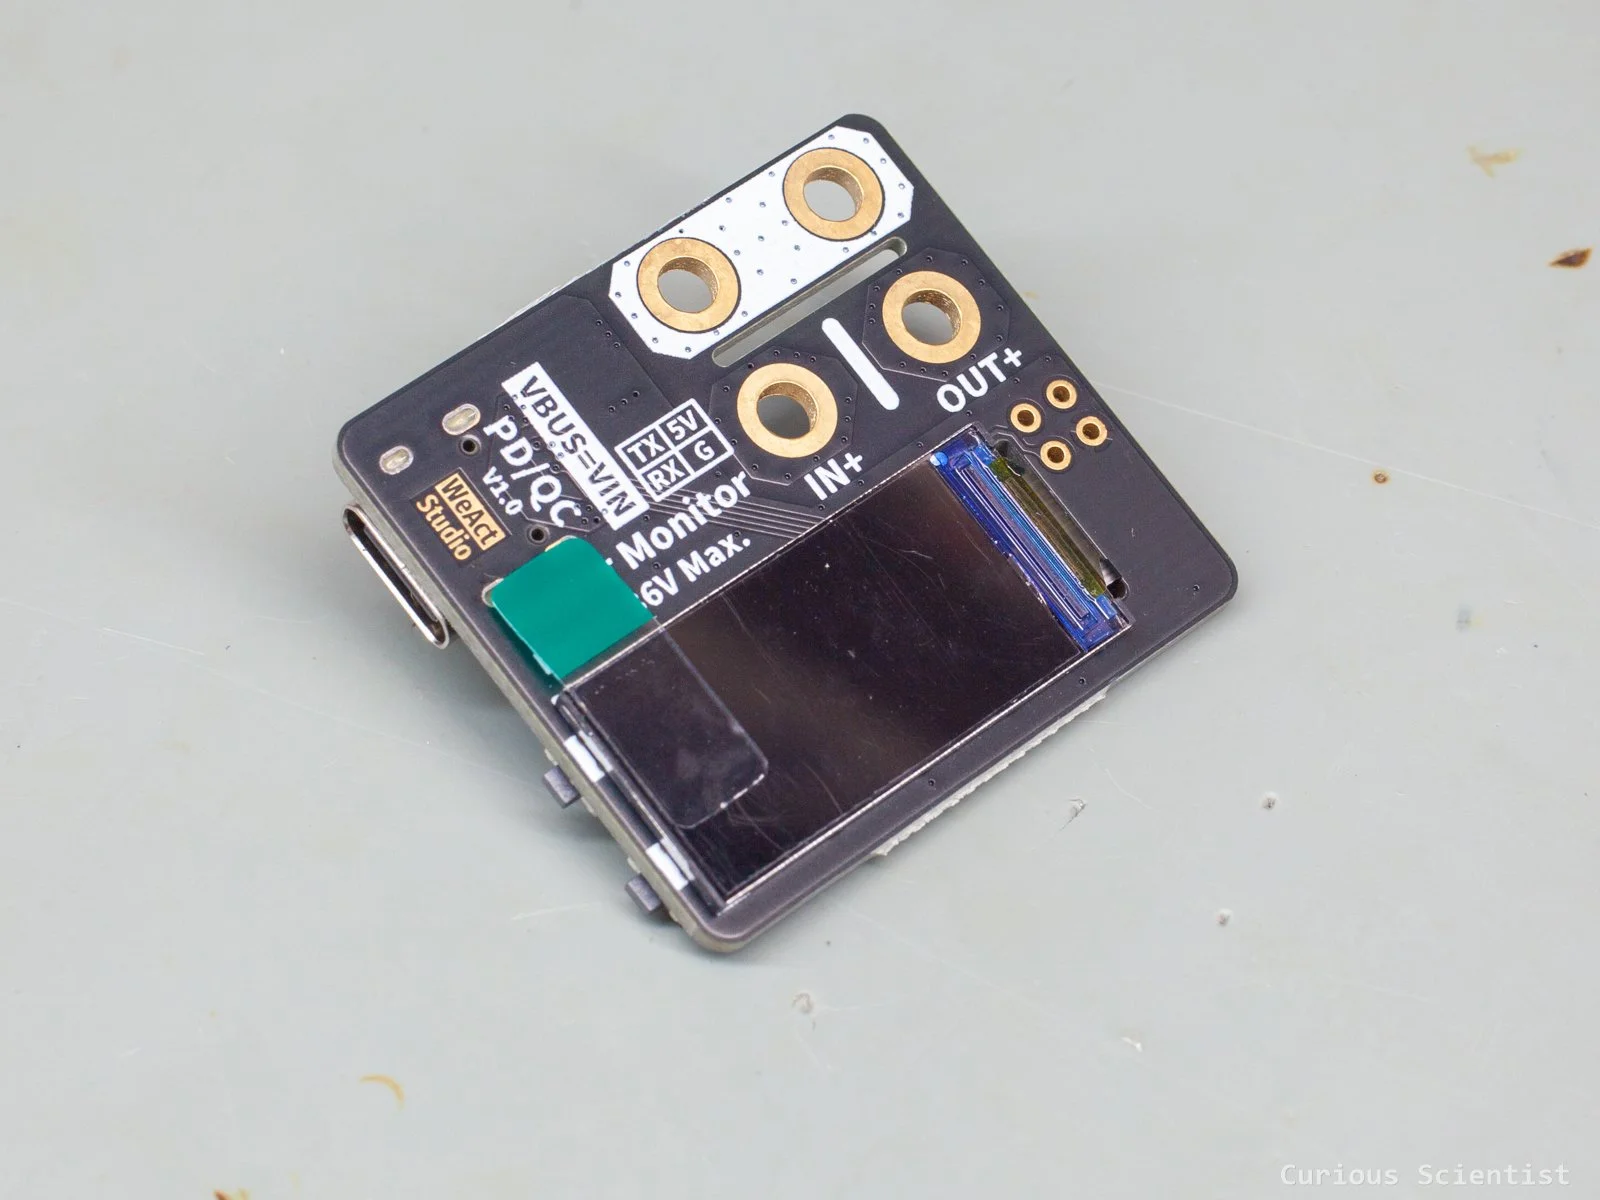
5-36 V USB-PD digital power monitor / programmable power supply with built-in display
0.96” USB stick display
This small device is more of a fun gadget than something serious. It is a small, 0.96” 80×160 pixels colour display USB stick that can be directly plugged into a female USB-A port. Like a USB drive. Its USB pins are exposed on both sides of the terminal, which means that the device can be plugged into a socket in any direction. But, after deciding the orientation of the dongle and before plugging it in, one of the sides must be covered using the sticker provided by the manufacturer. This helps to avoid shorting the USB port, so it is mandatory to do it!
It can be used as a system monitor or as an external monitor. In both cases, we can use WeAct Studio’s configurator software that allows us to build a custom layout with the parameters we want to show on the display. We can display CPU usage, memory usage, date and time, and so on. Alternatively, we can use it as a virtual monitor. However, due to the relatively tiny display size and resolution, it does not feel very practical to use it as an external monitor.
Maybe on a regular desktop PC, this device does not make as much sense, because many users already have multiple monitors and can use motherboard or GPU manufacturer software to display system health information. However, for mini PCs, servers, Raspberry Pi systems, and other headless computers, it can serve as a very useful peripheral.
These systems are often not connected to a monitor, so checking their status is not always straightforward. With this customizable display, we can show crucial system parameters such as CPU load, temperature, memory usage, disk usage, network activity, uptime, IP address, or service status directly on the device.
The manufacturer shared a lot of information on their GitHub! Plus, you can get the screen projection app from SourceForge to use the device as an external monitor.
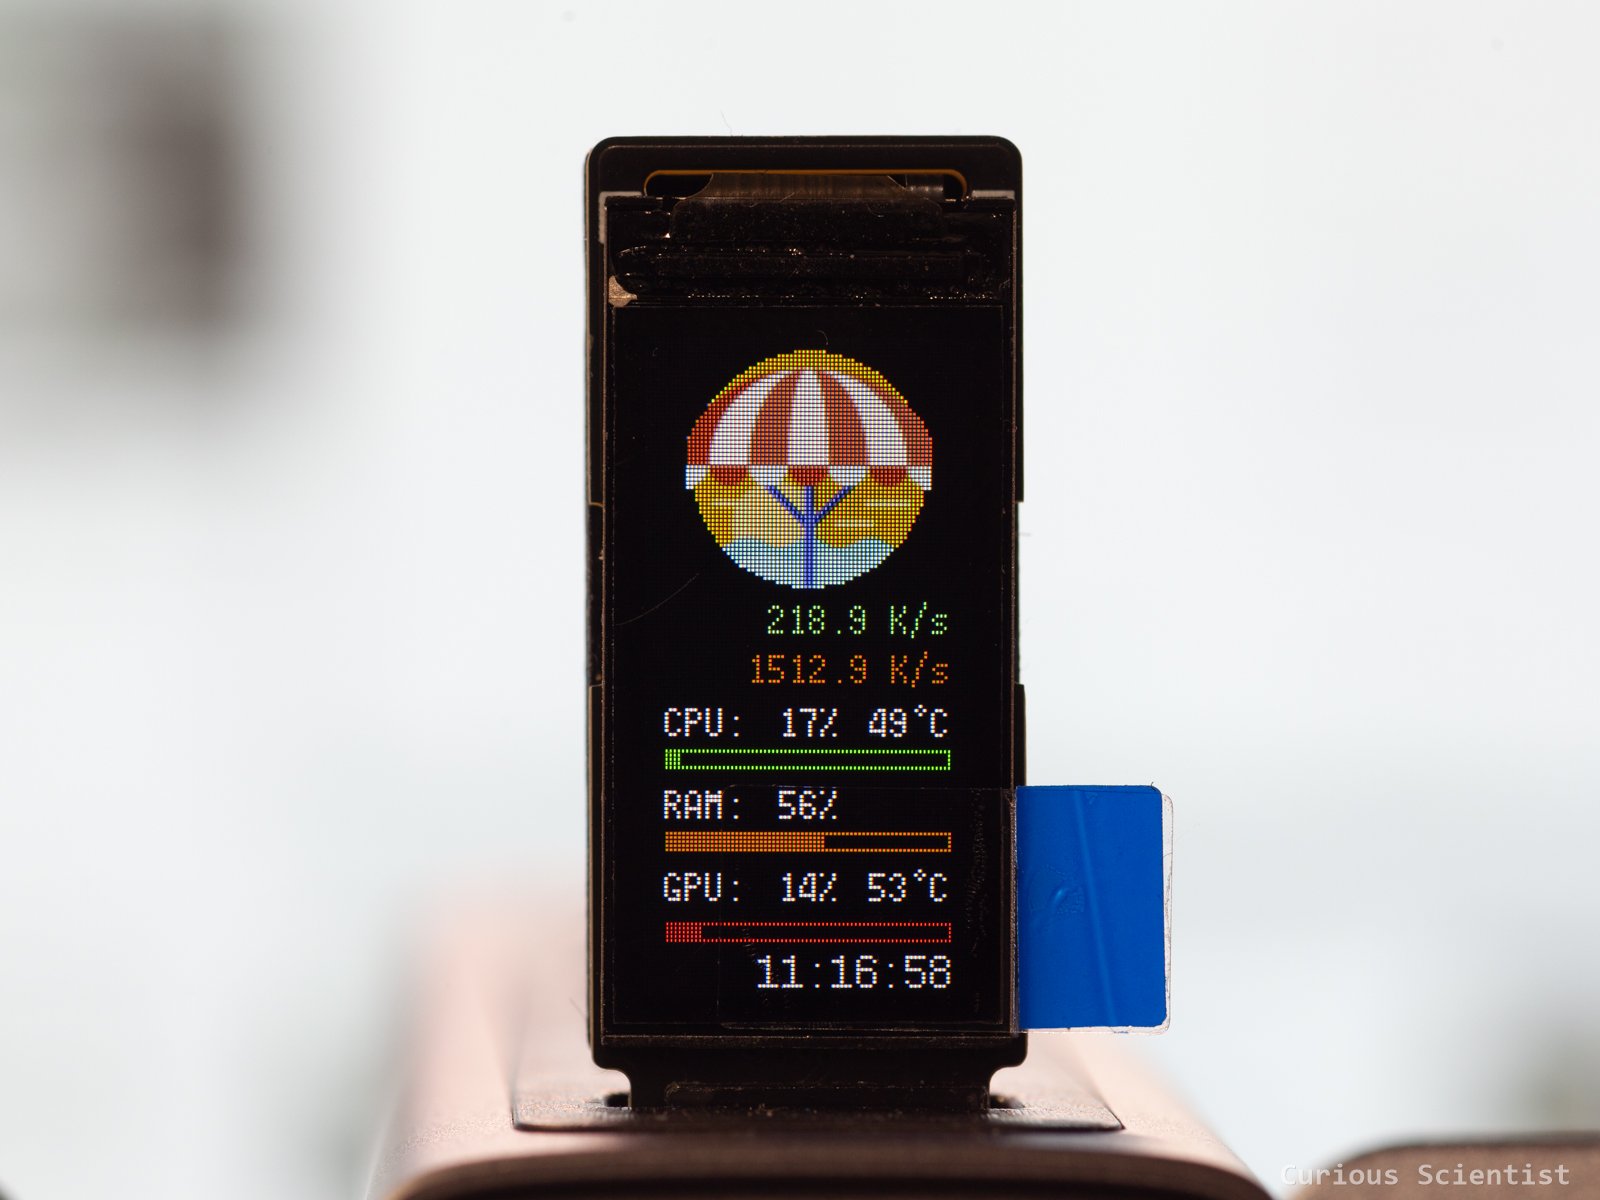
0.96” Display sitting in a USB hub and displaying some parameters of my PC
Programmable Bluetooth LED display panel
This fun device has 11×45 LEDs, which together create a matrix display. I picked the blue colour, but it comes in several other colours. The device can be programmed via PC, and it also has a Bluetooth connectivity option. It can support text or even pictures (icons). I tested its Bluetooth app because it was easy to download it from Play Store. The software allows 8 presets, and they can be sent to the display quickly and easily. The display can be put in Bluetooth download mode by pressing the top button twice. When the Bluetooth icon appears, the device is ready to receive the graphics. The upload process is relatively fast and easy.
The display’s brightness can be easily adjusted with the button on the module. It has a built-in 280 mAh lithium battery, so changing the brightness can extend the battery life, which can make the module into a fun wearable badge at events, or a decoration at your office that you can run during the day and charge during the night and so on. Or, if you don’t want to operate it from a battery, it has a built-in USB connector, so it can be powered via USB.
The device comes with a built-in pin, so as I mentioned, it can be used as a badge. Furthermore, a self-adhesive magnet attachment is also included in the package.
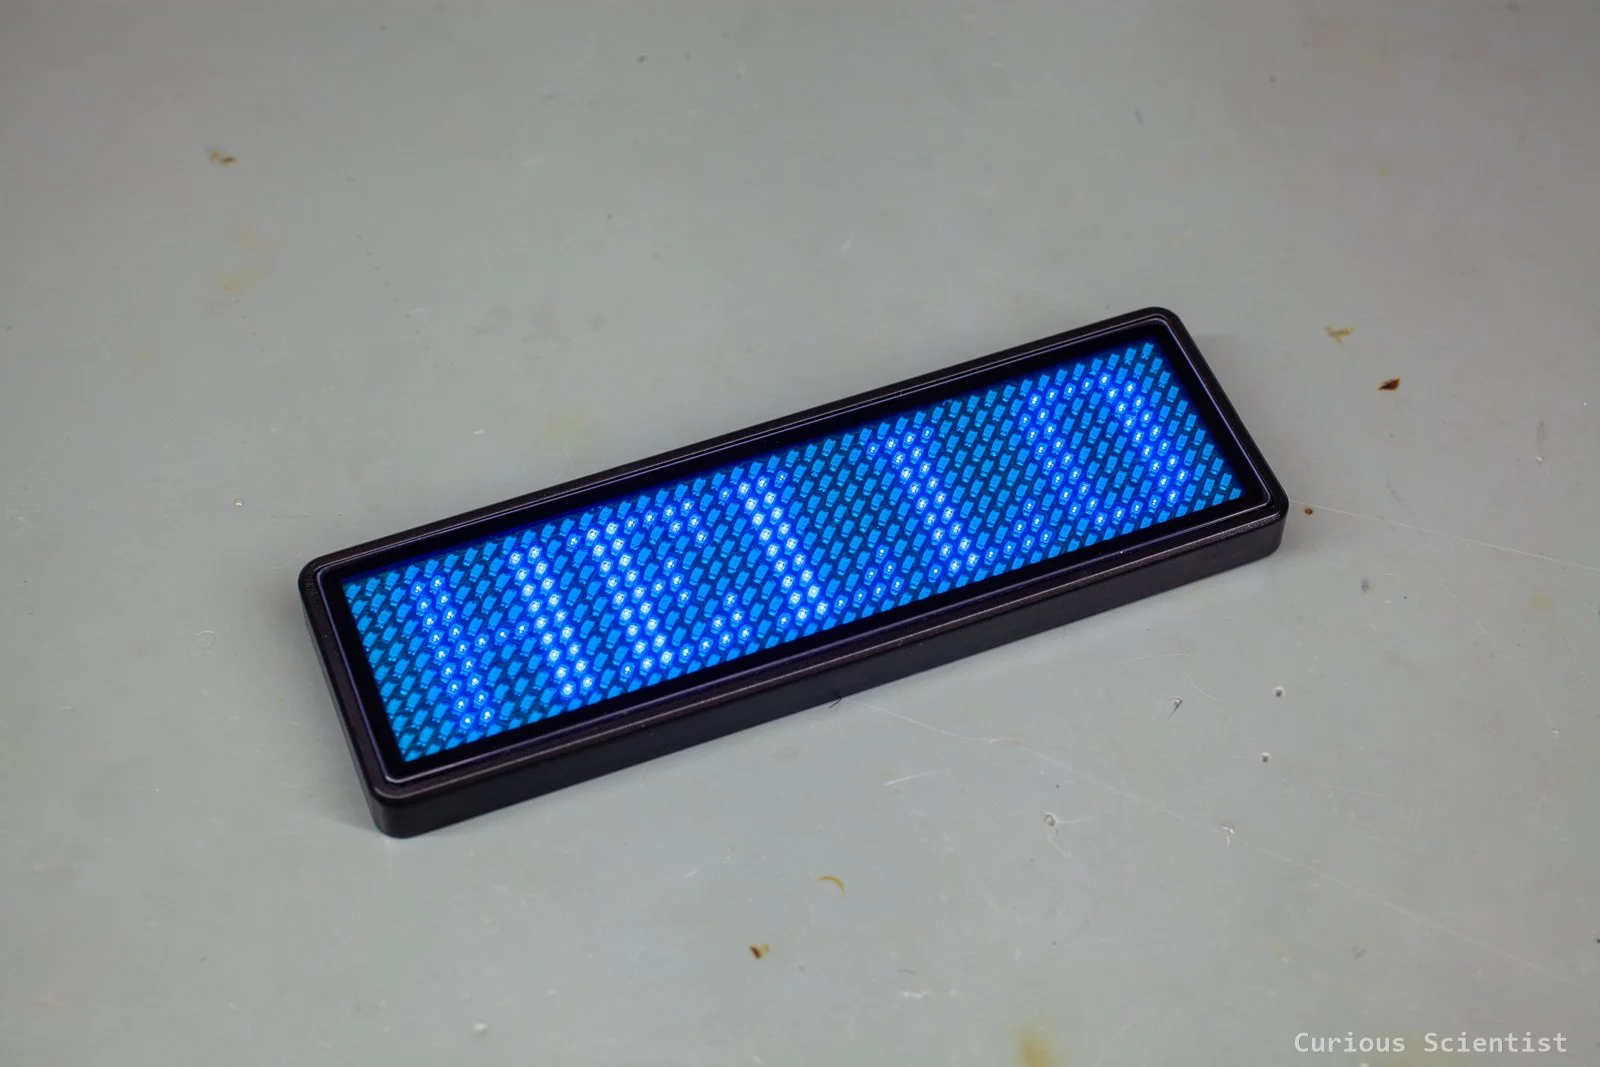
Programmable LED matrix display panel displaying “HELLO”
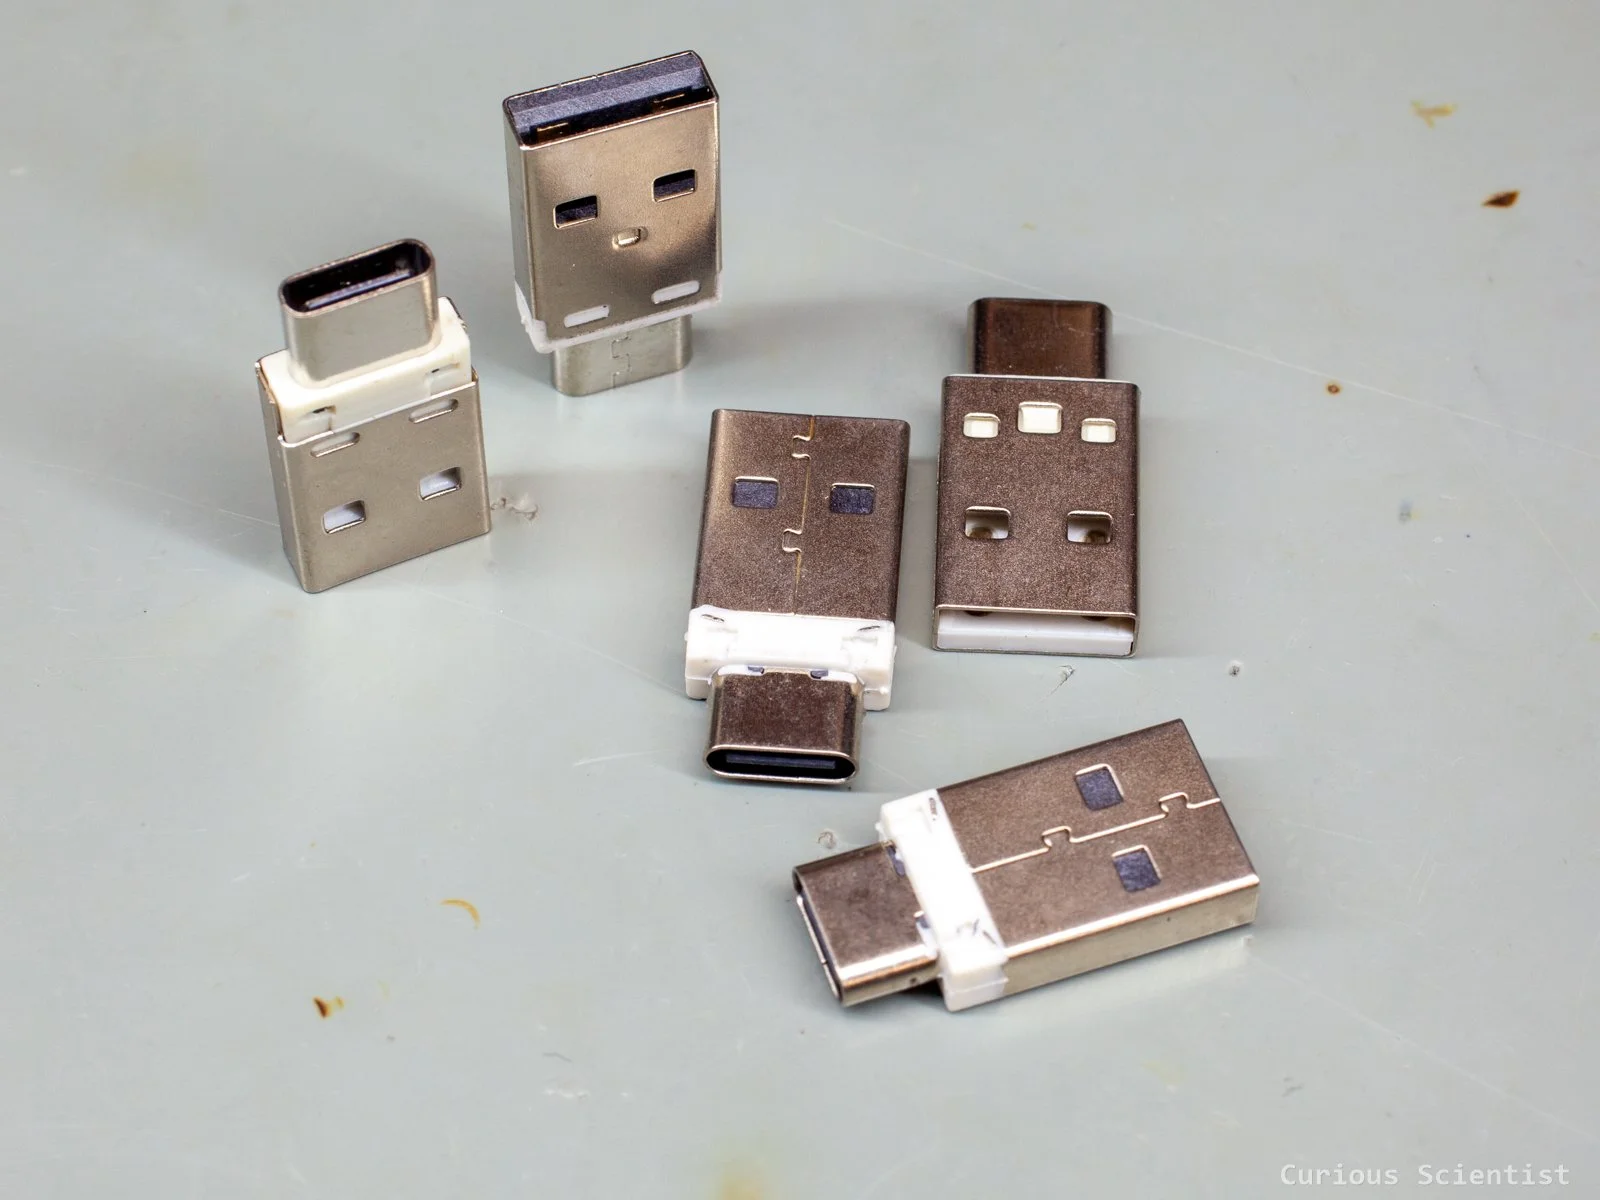
USB-A to USB-C adapters
It is frustrating when you have an older, but otherwise totally fine charger with a USB-A output and you only have a USB-C to USB-C cable for your more modern devices. Or, you happen to have a charger with a USB-C output, but your older cable is a USB-A to USB-C one. Instead of buying a new charger or a new cable and generating more waste, these adapters solve these issues.
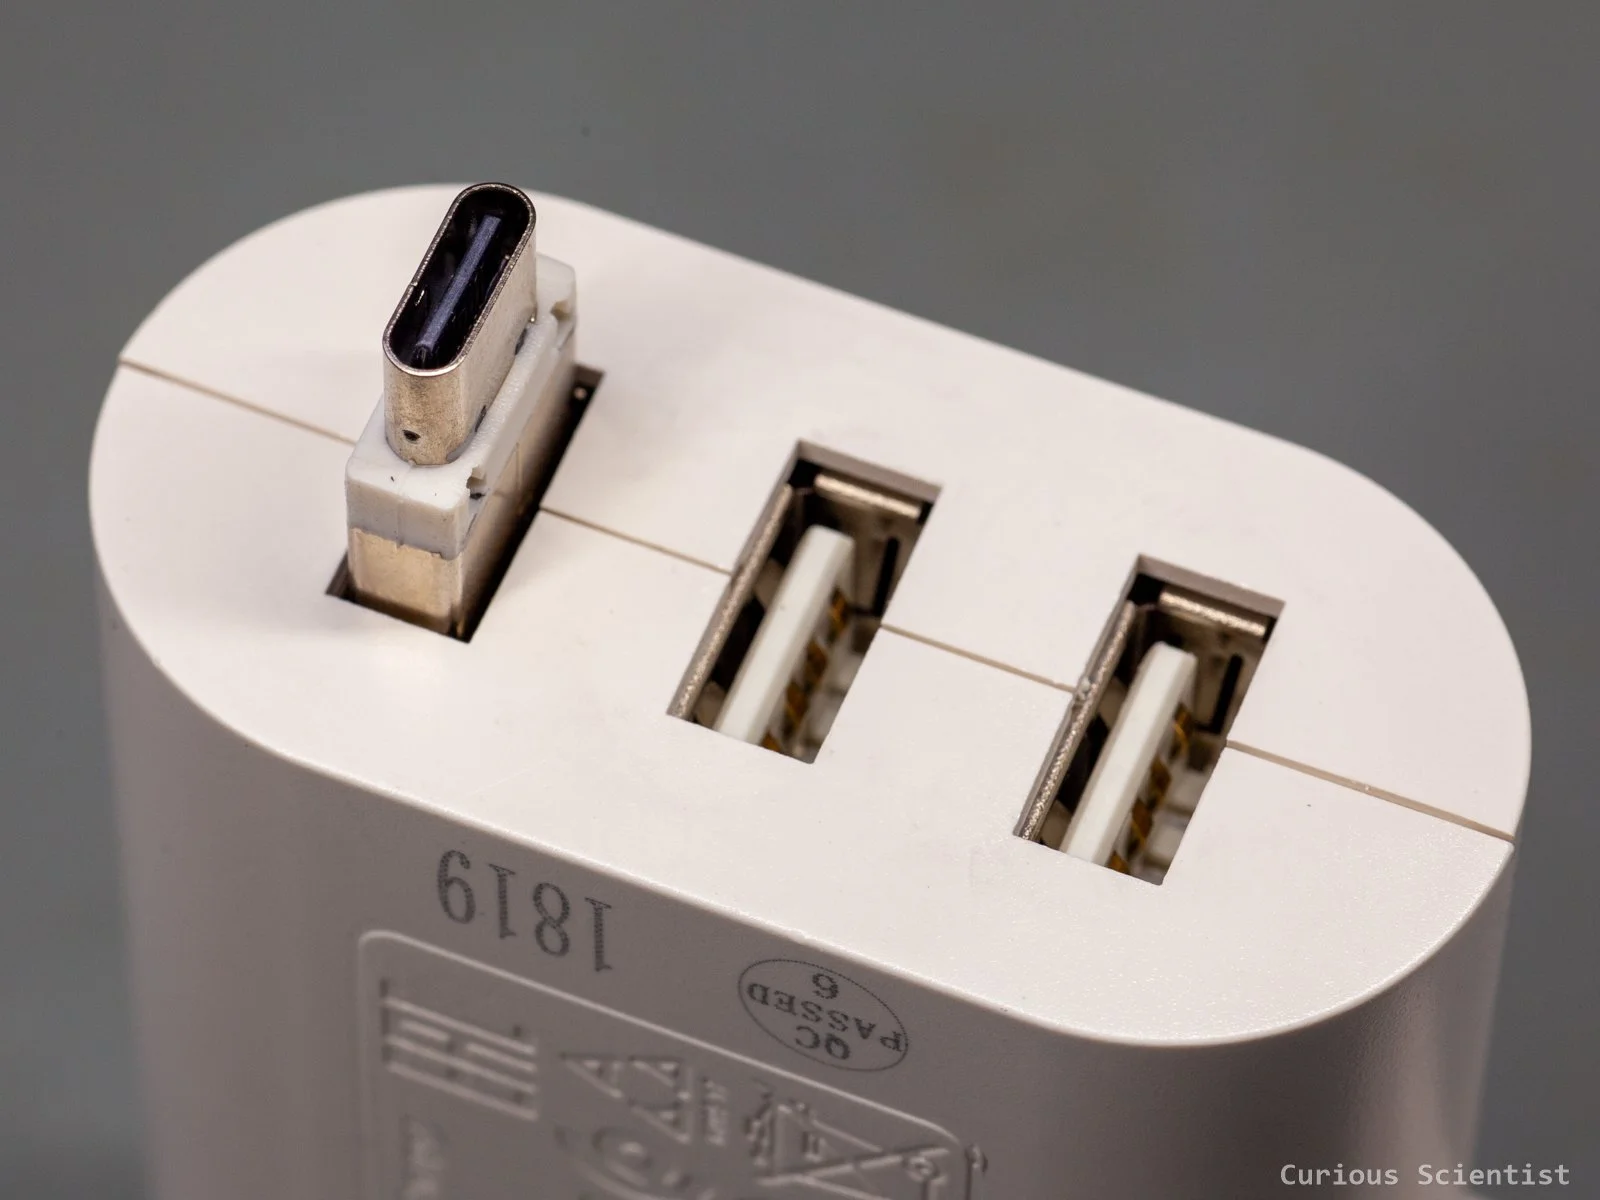
One of the adapters is a male USB-A to female USB-C connector. This can convert your power adapter with an older (but even USB 3.1!) USB-A terminal to a USB-C terminal. It supports QC protocols, so you can draw up to 5 A with these plugs, so quick charging should not be an issue. Furthermore, thanks to the USB 3.1 support, high-speed data transfers are not an issue either.
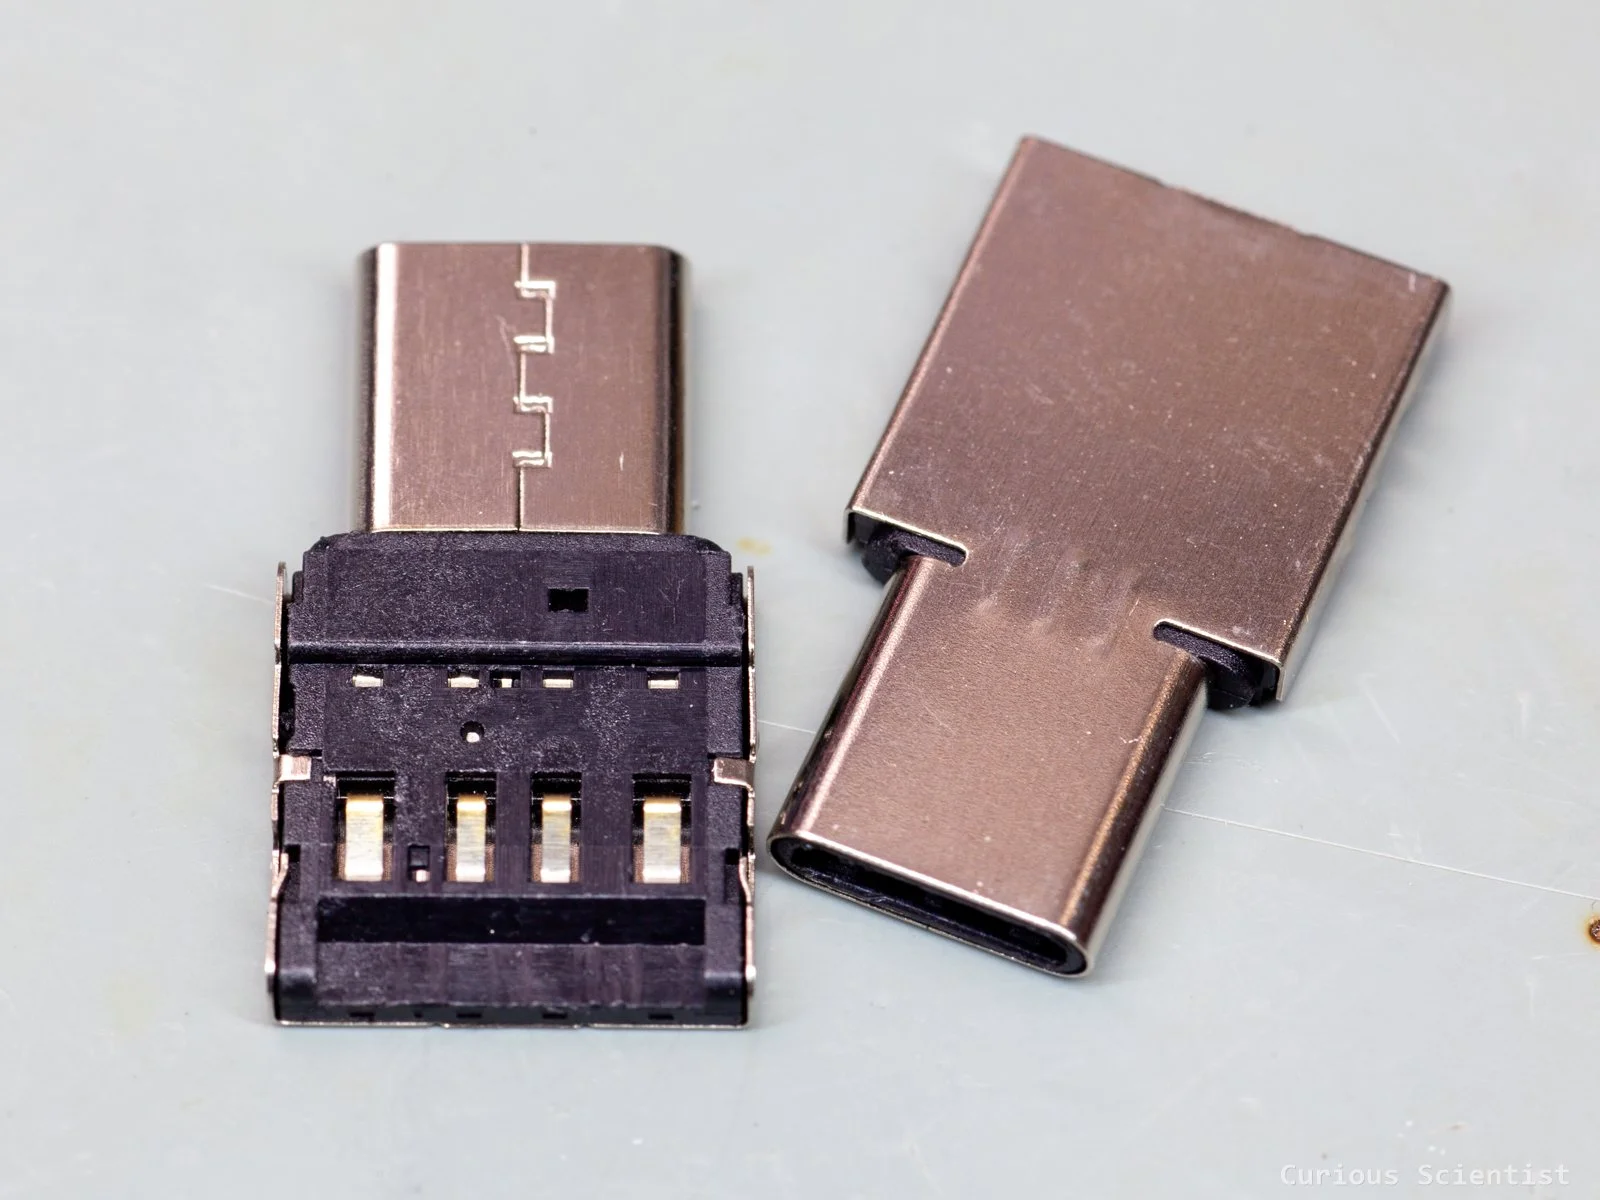
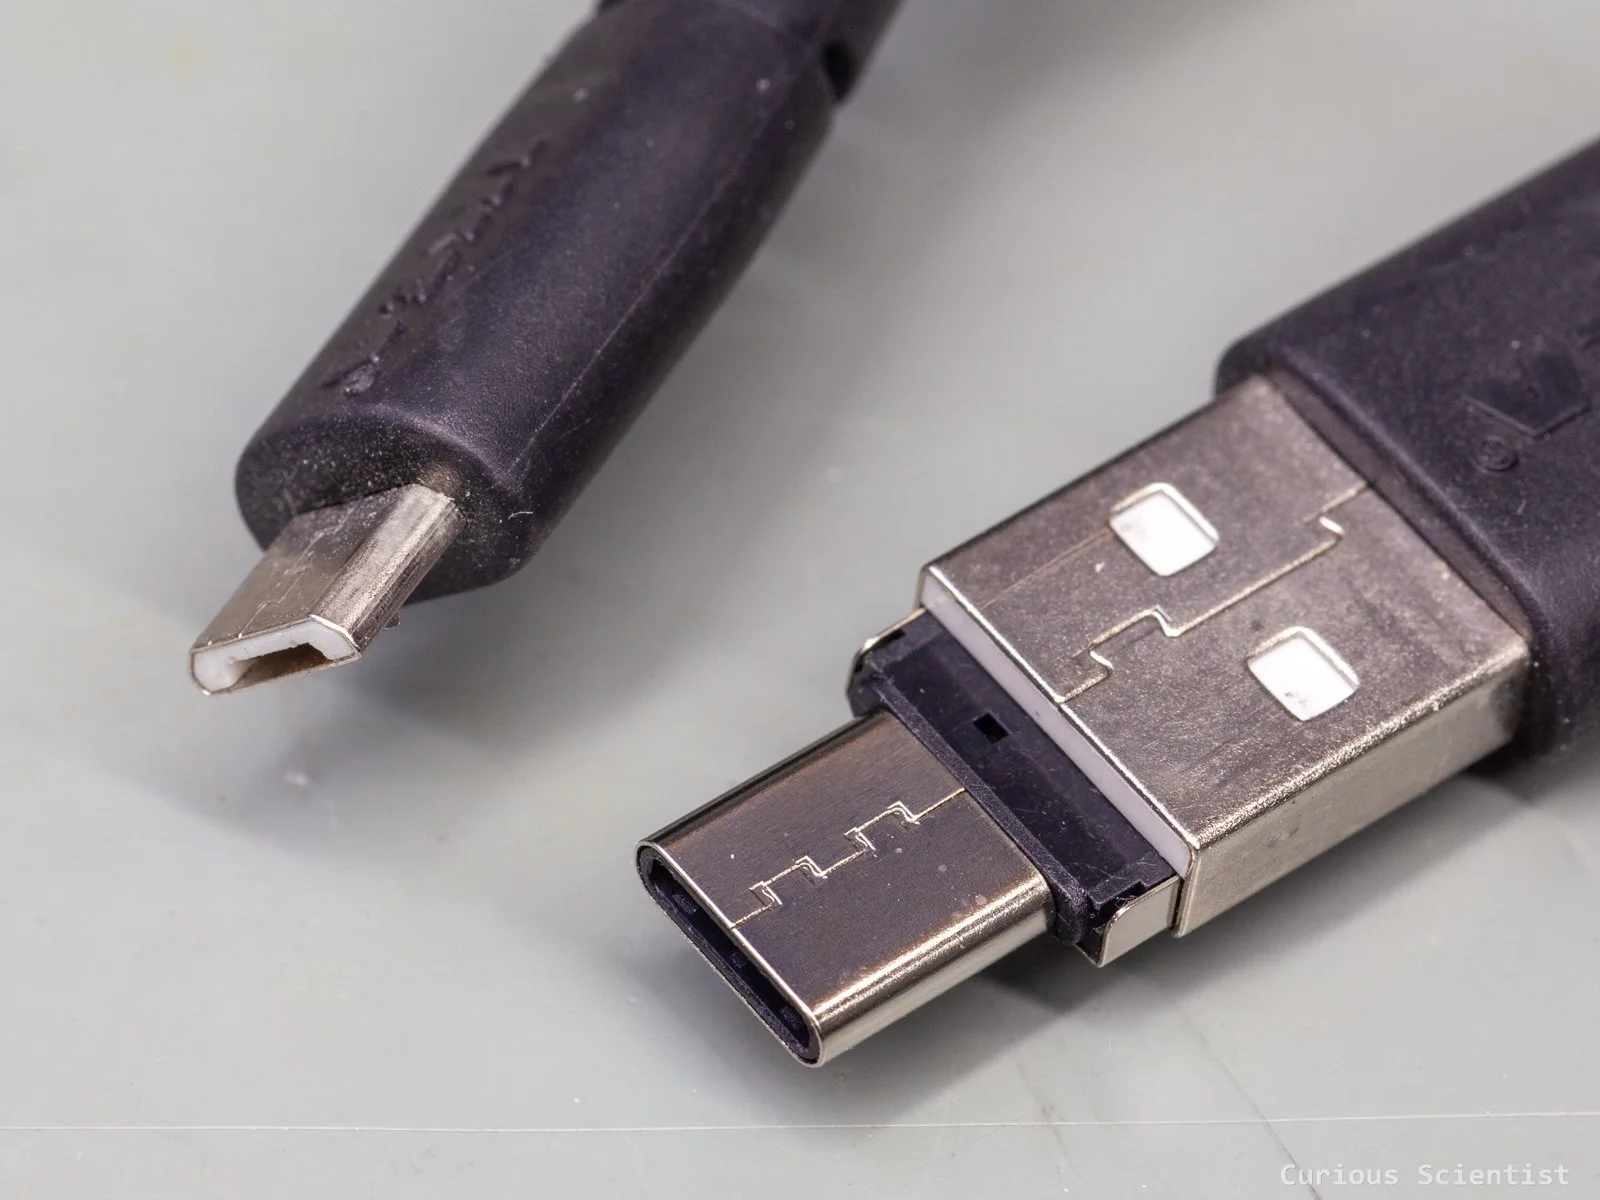
The other adapter is even more sleek. It slides into a male USB-A terminal, which can be found on, for example, charging cables, and converts it into a male USB-C plug. So if you have an older charging cable with a combination of USB-A (male) and micro USB terminals, you can convert the old cable to a fully USB-C cable (in terms of physical connectivity). It is just a USB 2.0 converter, so do not expect very high transfer speeds from it. But it is perfect for the old USB cables that you would otherwise throw away because you don’t have a power supply with a USB-A connector around. Older tablets, phones or even different microcontroller boards still use micro USB connectors, where this might be a relevant gadget.
Male USB-A to male USB-C
Female USB-A to female USB-C
Miniature USB-C lithium battery charger
This charging circuit is basically the same size as the USB-C port itself. It is ideal where space and weight are a concern, such as drones, IoT devices, smart wearables and so on. The circuit has 2 LEDs: a charge indicator (lights up when the battery is full) and a power indicator.
The circuit is based on the LP4054 charging manager chip. According to the specifications and my measurements, the board can charge at ~600 mA current. This means that the program resistor is 1.65 kOhm. Increasing the resistor to 10 kOhm can reduce the charging current to ~100-120 mA, which is much more gentle for the battery. Plus, the charging heats the chip up to temperatures above 80°C! This might become even higher when the device is encapsulated and has worse heat dissipation possibilities. However, decreasing the charging current could make charging take forever for batteries with a large capacity. Replacing the program resistor, or even soldering the wires for the battery, requires steady hands and good tools because the space on the board is rather tight.
It is an ideal choice for the LED driver circuit, also mentioned in this article, when it is paired with an 18650 battery. The small circuit can be easily built into an enclosure with a battery and the LED and its driver.
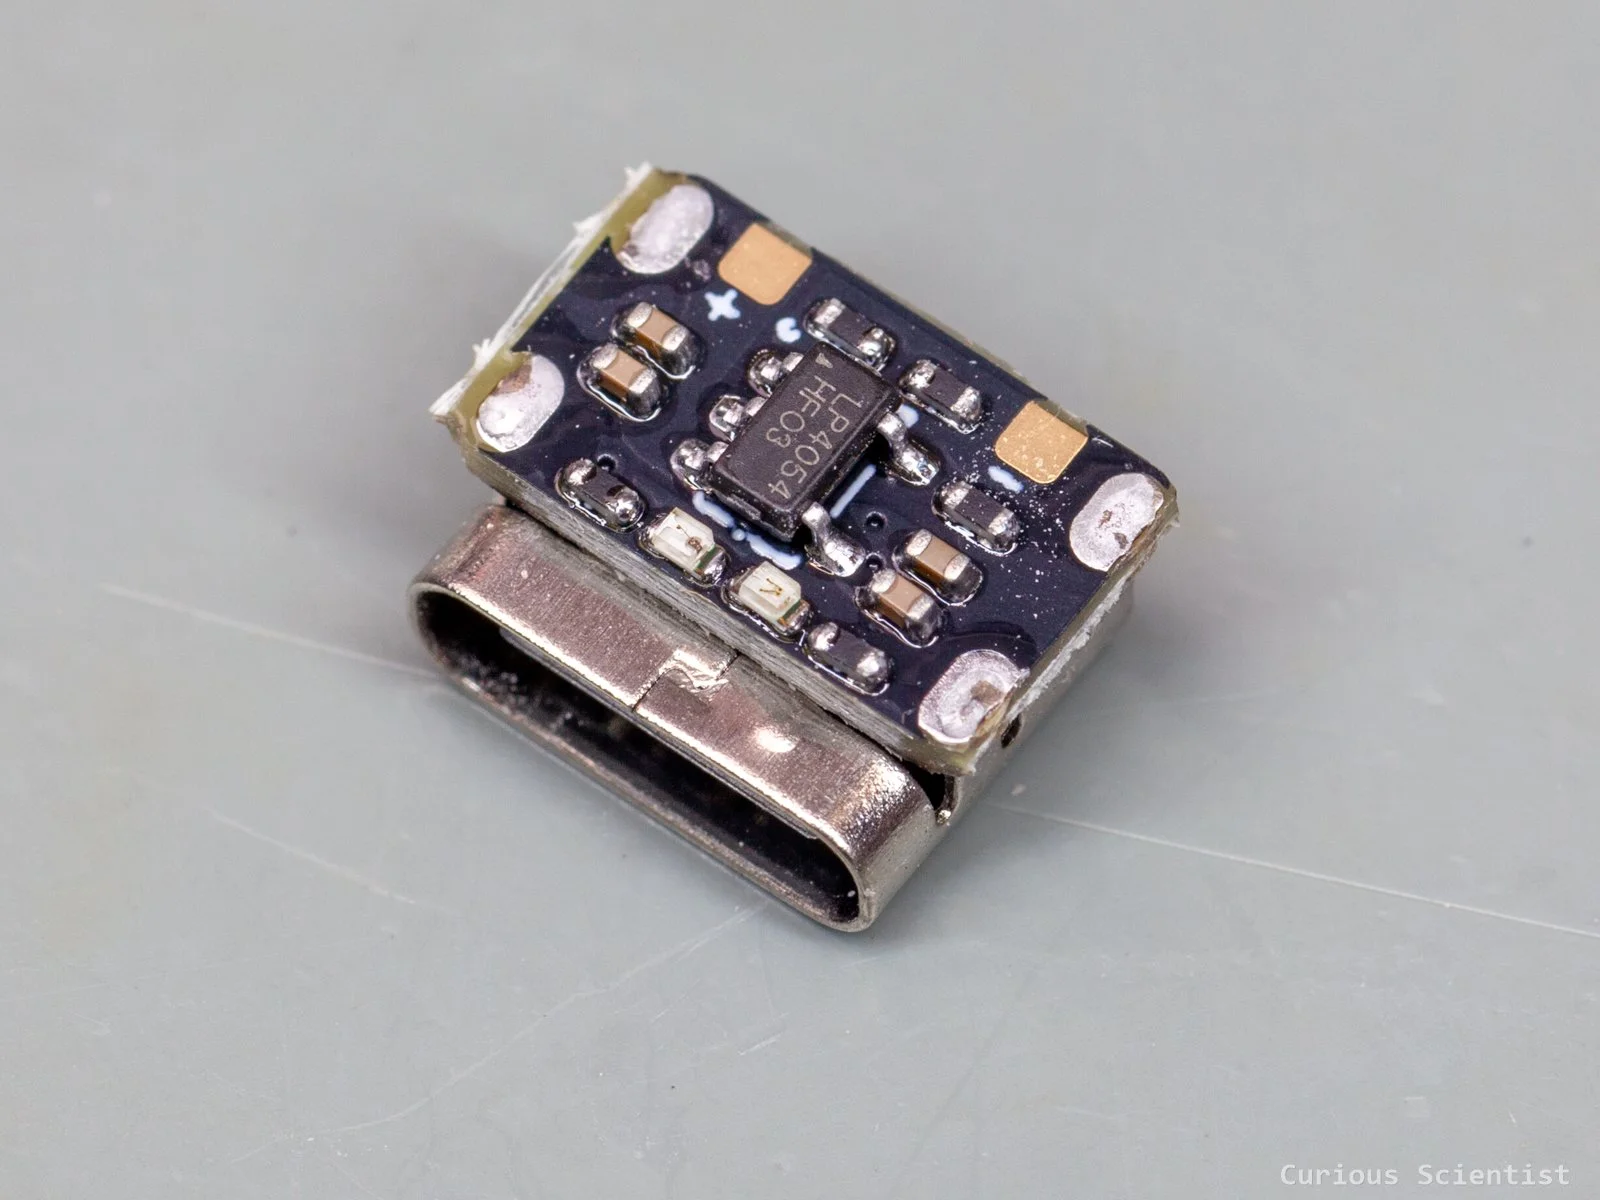
A 600 mA capable lithium battery charger, smaller than the USB-C port
100 W 5A TYPE-C PD Decoy
This miniature decoy allows you to negotiate different voltages with a compatible power adapter and draw currents up to 5 A. It is ideal for a miniature benchtop power supply or for projects where you can use a USB-C power supply and want to have more power. The circuit is quite small, so it is easy to embed it in DIY projects.
The device can negotiate the typical voltages: 5, 9, 12, 15 and 20 V. It has 2 pins, both for the negative and positive output terminals, so even at 5 A, the device should be fine.
The solder tabs for the voltage selection are rather small and they are close to the resistors, so one must manipulate them carefully.
The voltage selection is not super obvious, despite the fact that there is some kind of guidance on the backside of the PCB. Therefore, I tested all the options and noted down the combinations. Hold the board so that the chip faces you and the USB port is on the right side. The tab next to the negative terminal is “A”, the middle tab is “B” and the tab next to the USB port is “C”.
5 V: B-C
9 V: A-B
12 V: B
15 V: A
20 V: Default, nothing is shorted
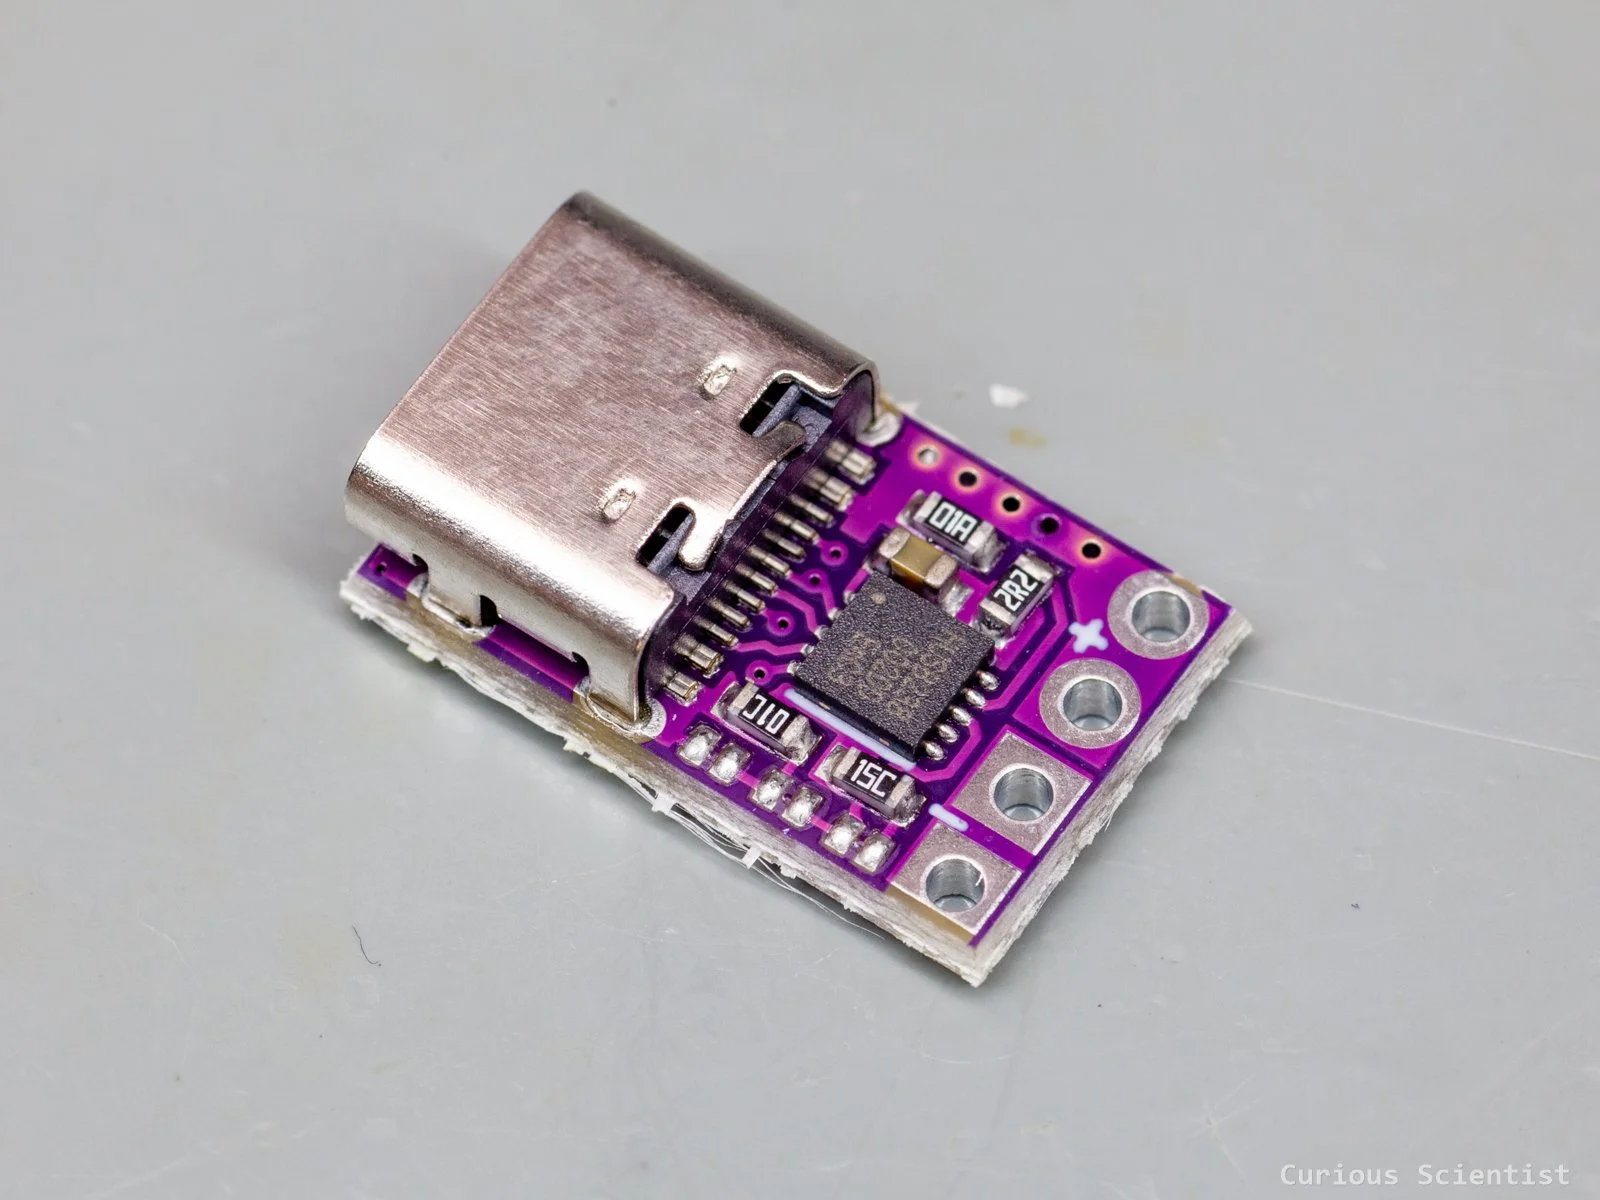
A tiny module capable of negotiating up to 100 W (20 V, 5 A) power
CN3065 Mini Solar Lithium Battery Charger
This small module is perfect for IoT devices or similar gadgets that must be placed outdoors and need a continuous power source. If you want to build some solar lamps to scatter around your garden, or if you have a few sensors or similar gadgets that you want to have outdoors, then this battery manager can help you.
The device can receive power from a typical 5 V solar panel (4.4 V - 6 V is allowed) and then convert it so it can charge a single-cell lithium battery (18650) with up to 500 mA current. So, with a large enough panel (~5 W), a typical battery can be charged within a single sunny afternoon. The output voltage of the module is the same as the battery’s voltage (3.7 V - 4.2 V), so if you need, for example, 5 V, you’d need to add a boost converter. But nowadays, most of the microcontrollers can run at 3.3 V, so if you have a modern enough microcontroller board, it already has everything needed (typically an efficient LDO regulator) for 3.3 V operation.
The module has standard JST connectors, and even a micro USB connector in case you want to charge with a “more reliable” power source than a solar panel or want to charge the battery to full before putting it out on the field. However, it is important to mention that when you use it with a pouch-type lithium battery, always double-check the polarity of the battery’s JST connector. Even though the connectors are standardised, certain manufacturers tend to flip the wires in their connectors.
The device has 2 LEDs: a red LED indicates the charging process and a green LED indicates when the battery is full.
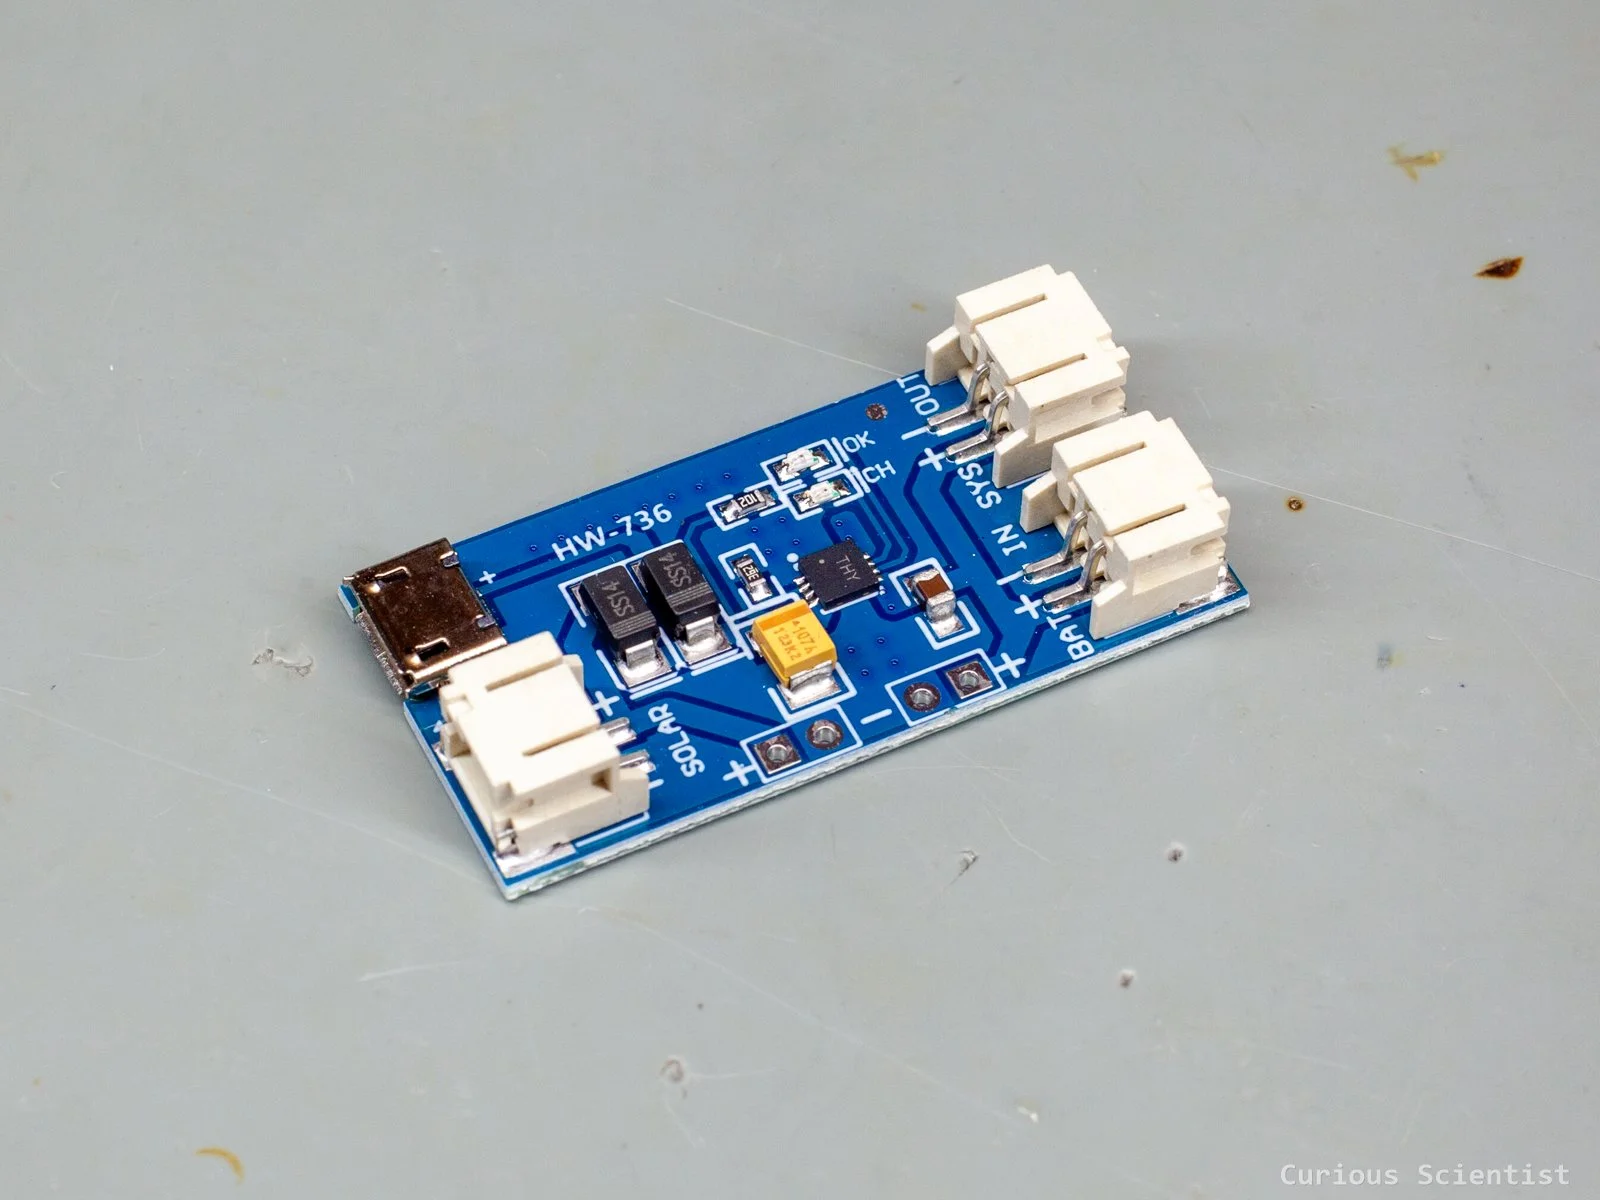
A relatively small panel with standardized connectors, status LEDs and protection
XHP70.3 LED with driver circuit
This is a high-power LED with a corresponding driver. The circuit is originally made for flashlights; therefore, its driver circuit board has a coin shape, and the positive and negative terminals are distributed accordingly. This circuit is intended to be installed into metal cylinders used for flashlights. The inner disc on the back of the circuit board is the positive terminal, and the outer ring is the negative terminal. Also, due to the flashlight usage, its operating voltage is the same as that of the 18650 lithium batteries: around 3.7 V to 4.2 V. The circuit regulates the lithium battery’s voltage to the LED’s operating voltage, and it allows drawing enormous currents (~10 A) from the battery. So, keep in mind that both the circuit and especially the LED can get really hot!
But nothing says that it must be used for flashlights only. With the proper cooling of the LED and the circuit, they can be implemented into anything where a high-power light source is needed. I will probably look into the possibilities of embedding this chip into my metallurgical microscope to replace the current halogen light source in it. I bought the driver circuit, which only has ON/OFF functions, but there’s a 5-mode driver too, which allows modes with different brightness as well as strobing effects.
The LED is mounted on a copper PCB because of the enormous heat generated by it during operation. So, when you use this device, make sure that you install it on a suitable heat sink!
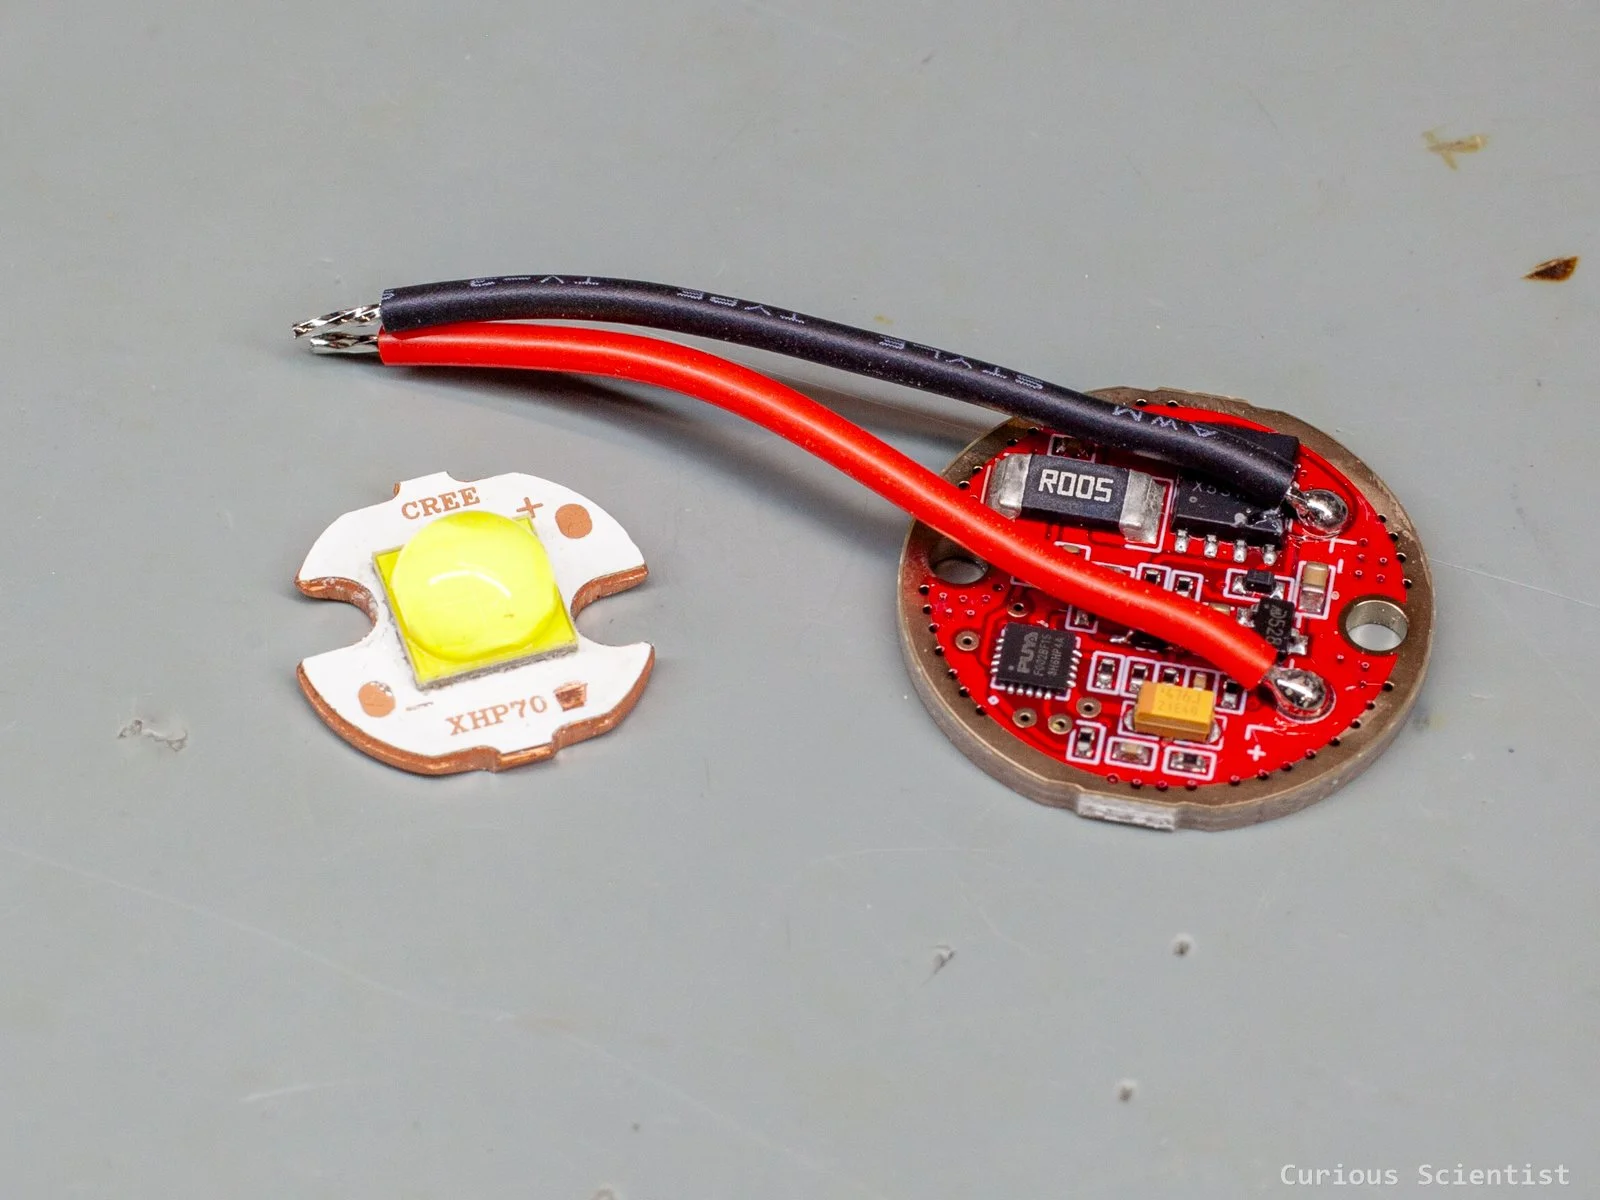
A coin-sized LED controller and power LED with a very bright light
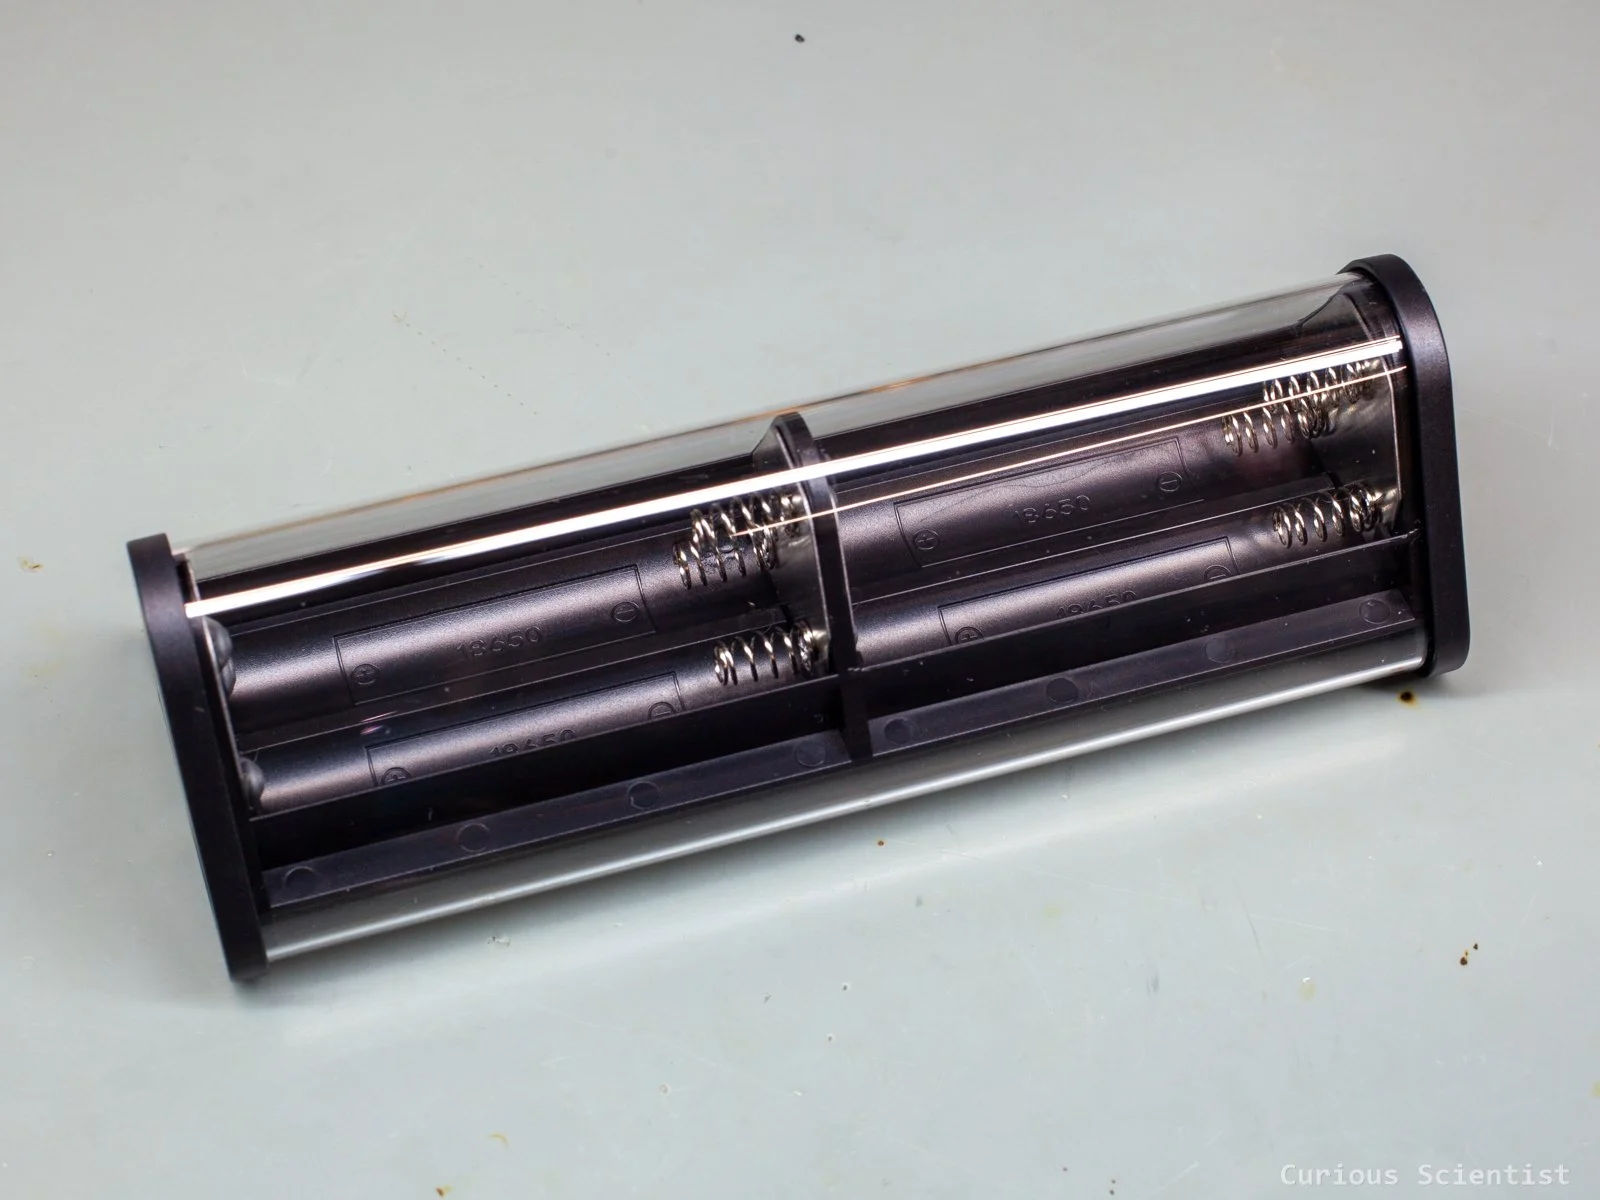
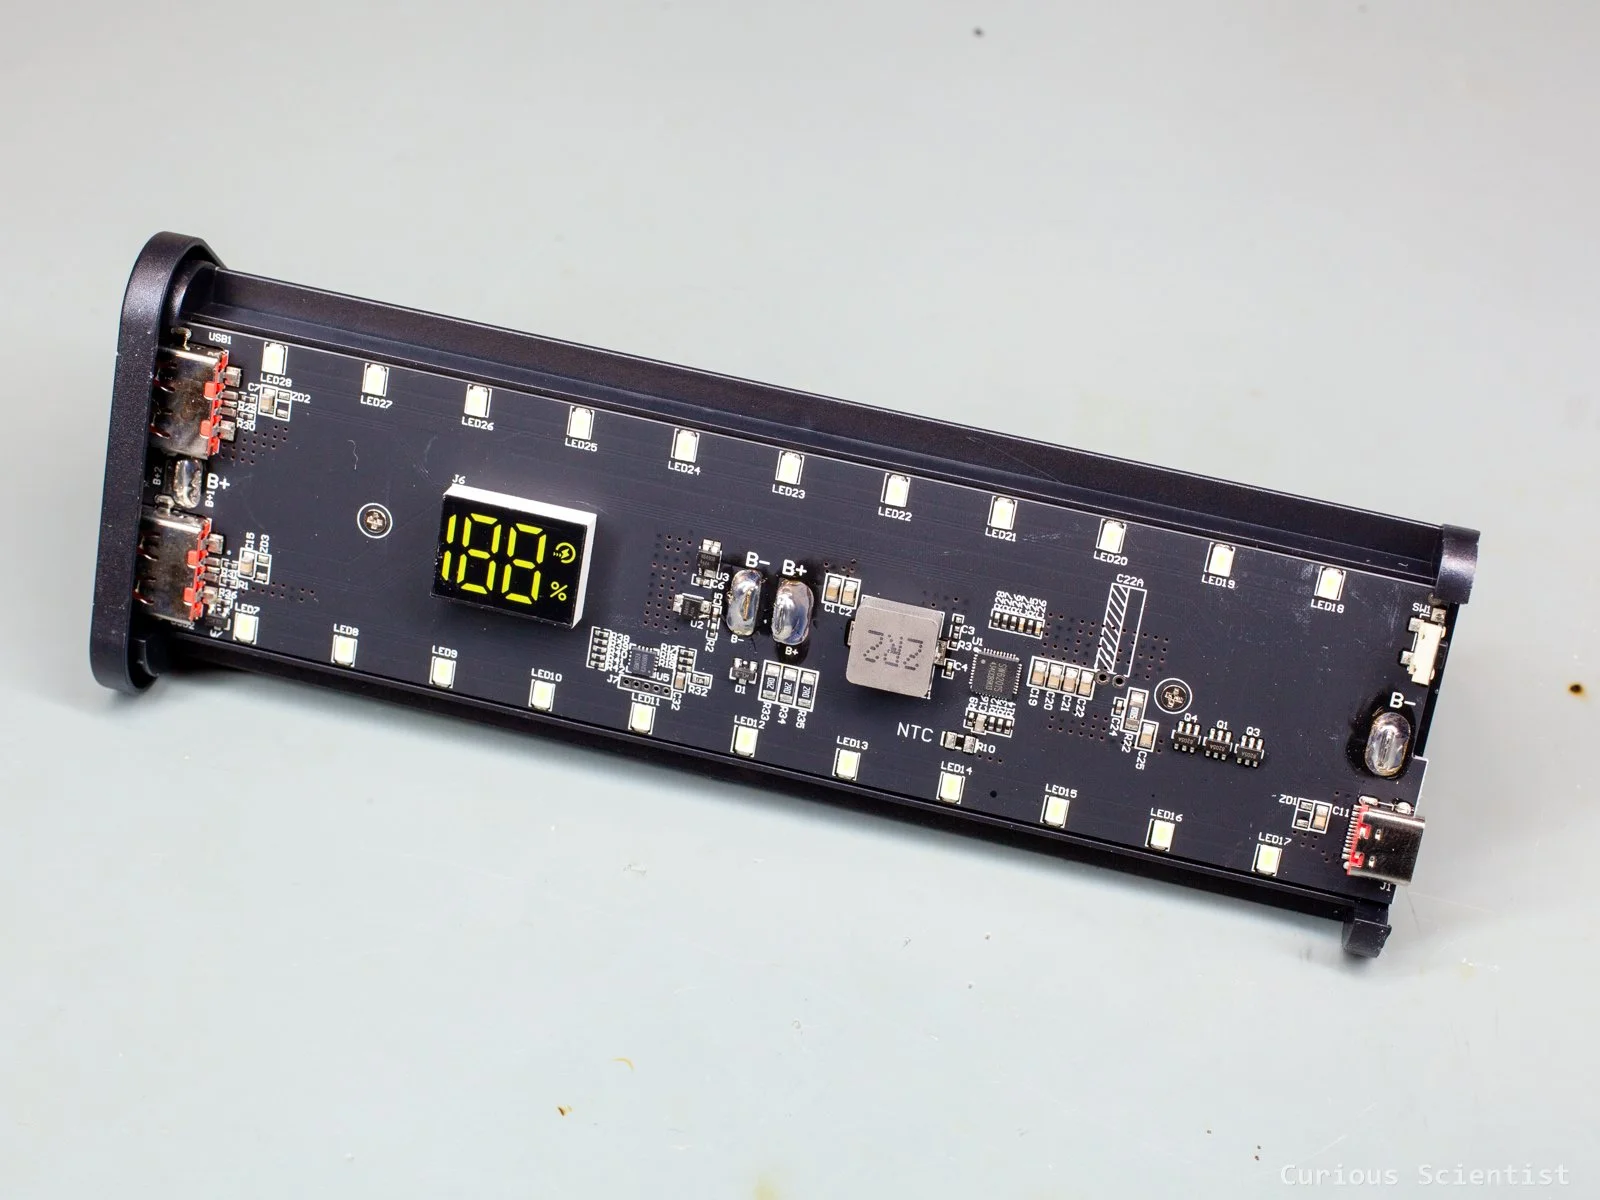
Transparent fast-charging case for 6× 18650 batteries
This cool device allows you to recycle your unused 18650 batteries and build them into a great power bank. It takes 6 batteries, so the capacity can reach up to 20000 mAh or even more! Both the input and output voltages can be 5, 9 or 12 V through the USB-C port. Actually, it is a smart device, so with a proper client device, we can select what voltage we want to request from the power bank, and we can even use PPS to require unique voltage. The PDO requests can be 5 V, 9 V and 12 V, and the PPS works between 5-11 V. This PD option only works via the USB-C port; however, the other two USB-A ports still support QC, so it can deliver enough power for quick charging.
It can charge multiple devices at the same time. It also has a set of built-in LEDs so it can be used as a camping light or a tabletop light in the garden, etc.
The enclosure is transparent, which makes it look rather cool with the exposed batteries and electronics. On the PCB side, there is a small display that shows the charge status.
MECHANIC GL-NXT 150 ml glass dispenser
This 150 ml dispenser is a must-have if you solder and want to clean your boards and tools easily.
It allows you to dispense small amounts of isopropyl alcohol (or your choice of solvent) in a comfortable way. The 150 ml glass container is thick and durable. With its cap on, it almost looks as if it were a perfume bottle. Unlike other, cheaper alternatives, this dispenser is entirely made of sturdy materials such as the glass container, the stainless steel tray and the tubing. Due to its weight, it is harder to knock it over, and if you accidentally touch it with the soldering iron, you won’t damage it. The dispenser pumps the liquid up smoothly; it does not get stuck and spray liquid all over the place like some cheaper ones. However, unlike my cheap dispenser, this does not allow the liquid to flow back to the container quickly. This could be an issue when you accidentally pump too much liquid into the tray. Both the tray and the bottom of the steel pipe have a filter mesh, which makes it easier to avoid contaminating the liquid with foreign particles.

A stylish dispenser bottle made of sturdy glass
MECHANIC NC800 Cleaning sponge
This sponge could be closely related to the previously introduced glass dispenser. It is made of high-density cotton, which makes it very good at absorbing all the dirt during the cleaning process.
A box contains 800 small cubes, which is enough for a long time. The cubes are pre-cut, so one just needs to rip them out from the bunch as needed. The cubes are easiest to handle with a pair of tweezers. They can be folded into whatever shape, so they can reach tight corners and narrow spaces on the circuit board. They don’t leave behind small strings like a cotton bud, so it really helps to keep the work clean. They are not restricted to just cleaning PCBs. They can be used for cleaning displays, glass surfaces or basically anything that needs to be cleaned carefully. Since they are made of cotton, they do not contain any abrasives; therefore, they don’t damage softer surfaces. Also because of this, they are not attacked by more aggressive solvents such as acetone, so they can be used for more stubborn stains. However, when you use acetone, you have to make sure that all the components you are about to clean can withstand it. It comes in a paper box that can be opened up in a way that makes it easy to access the sponge cubes.
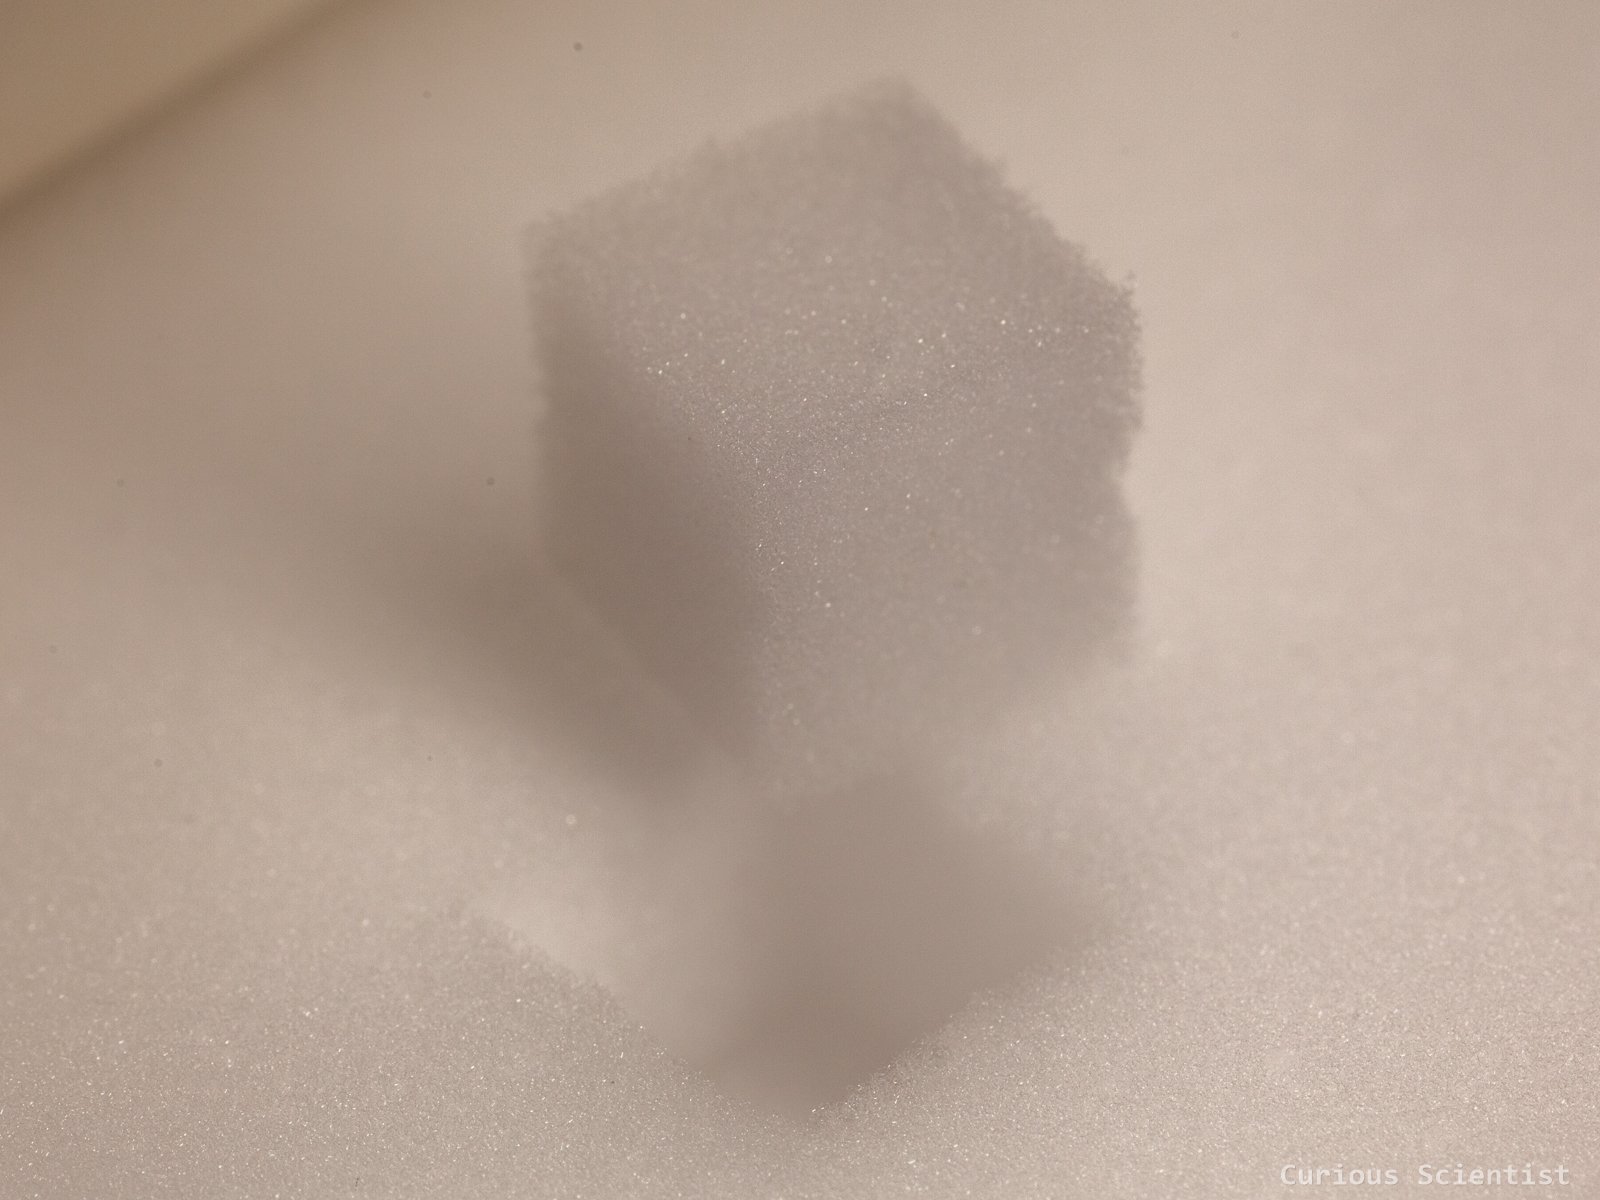
Small, roughly 1 cubic centimeter cotton sponge
BST-82 Circuit cleaning brush
This brush is yet another cleaning-related tool. It is basically a toothbrush for printed circuit boards. The brush has 10000 80-um-diameter soft bristles. The bristles are as thin as human hair, so they can reach the tightest places on your circuit board. It is ideal for cleaning up boards with SMD components, but it can also deal with traditional ones. The bristles are made of polybutylene terephthalate (PBT), which is a solvent-resistant, mechanically strong thermoplastic polymer. It can be used for other things than circuit boards, too! Thanks to its small bristles, it is effective in removing dust from small crevices and tight spaces. Just don’t brush your teeth with it!
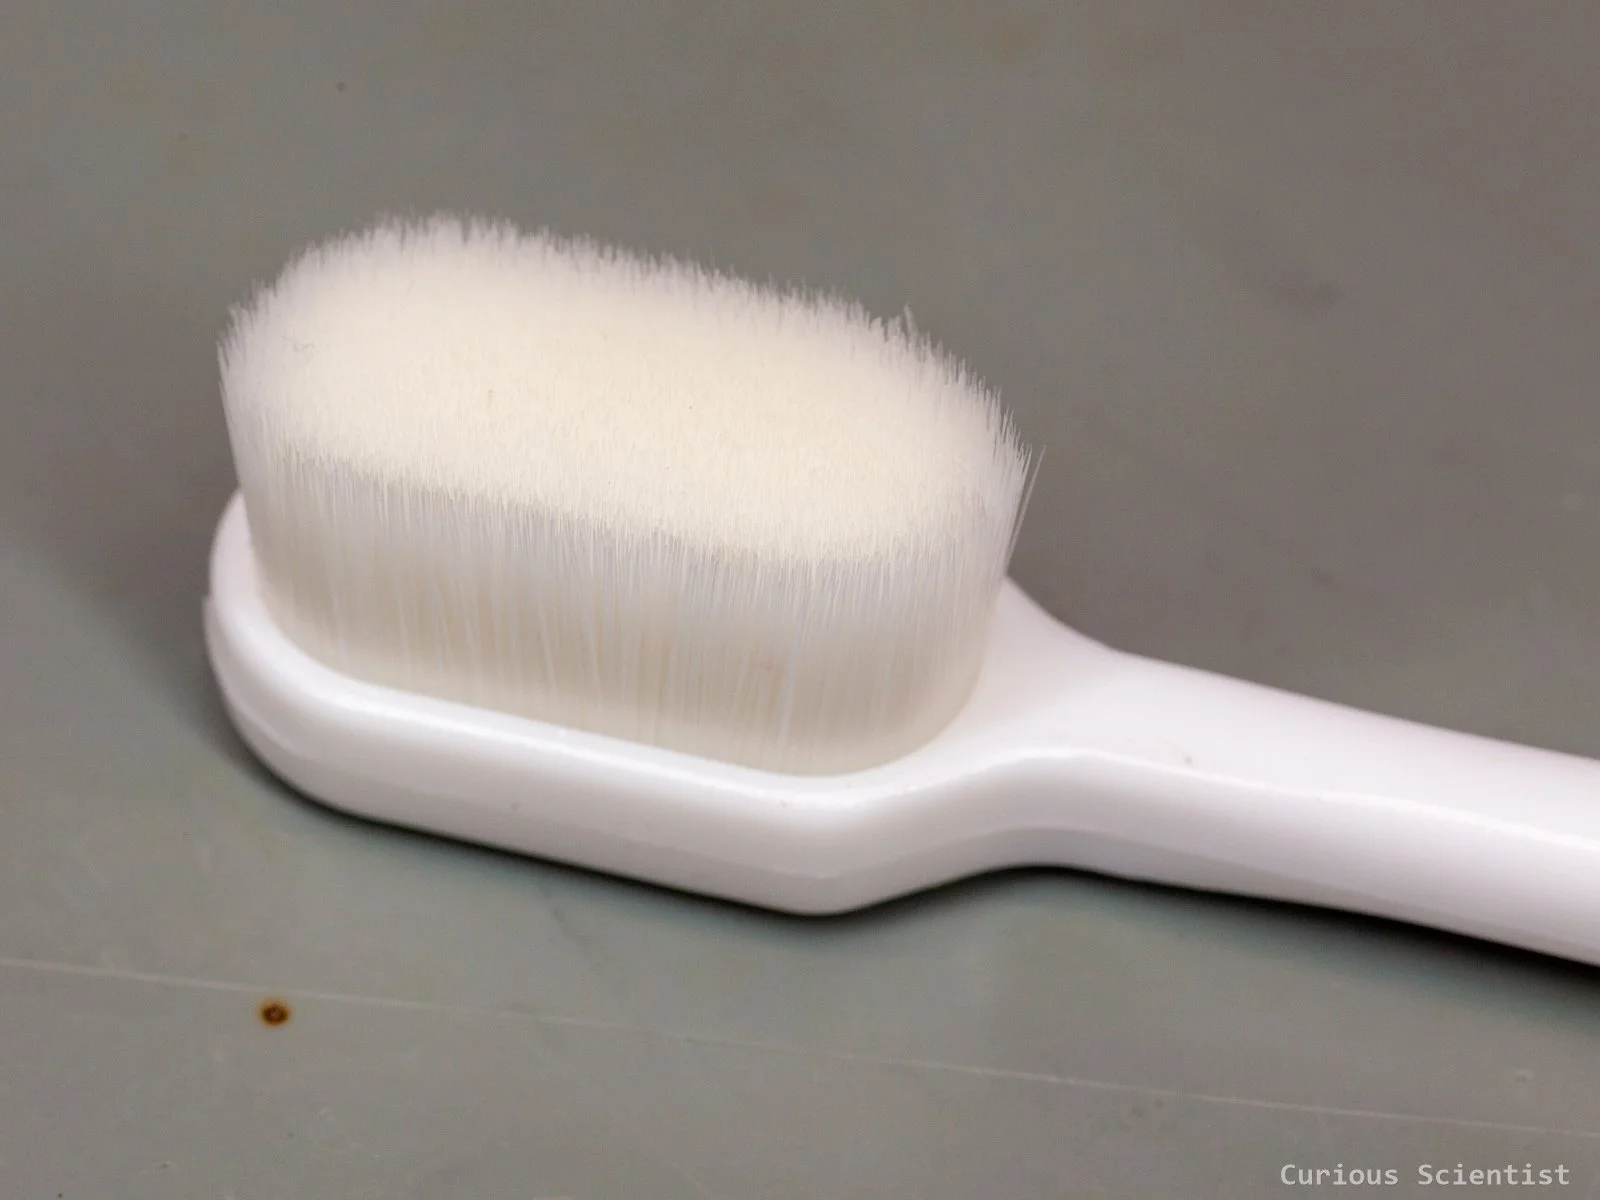
Gentle brush with thin bristles, ideal for cleaning SMD boards
Sticky dust removal stick
This is a random, unbranded product, but it is very useful. The end of the stick is a sticky viscose material. It can be used to remove dust particles from sensitive surfaces. Instead of, for example, trying to brush the dust off and potentially scratching your camera lenses, you can use this tool to remove the dirt. The tip is fairly soft and flexible, so it can be pressed into small gaps and crevices. It is ideal for today’s phones with multiple cameras. These cameras are often close to each other, and the dust and gunk can easily settle between the gaps. Or you can use it to remove dust and lint from your phone’s speaker opening and so on. The pins can be reused. Just wash them in water and blow-dry them.
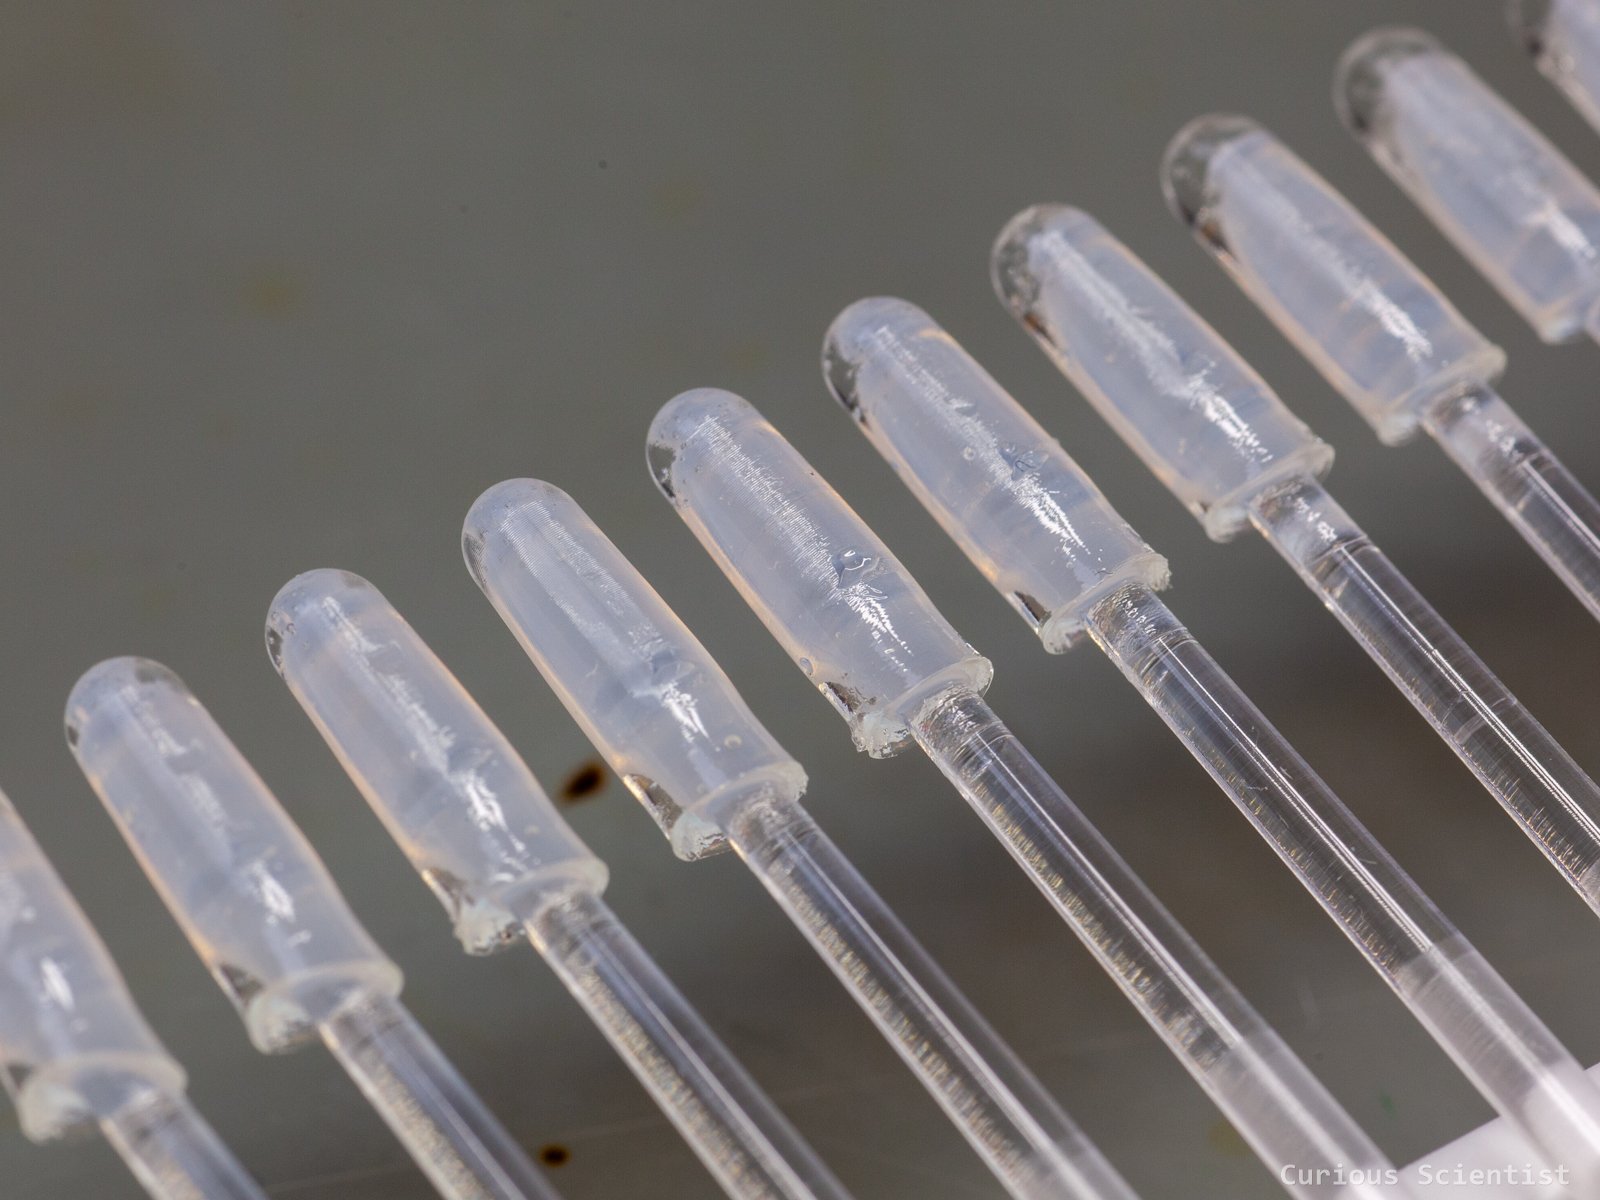
Reusable, sticky pins for cleaning up dust from sensitive surfaces