CH32V003F4P6 - SD card with FatFS
In this video, I discuss how to use an SD card with the CH32V003F4P6 microcontroller using the FatFs file system module. With the help of this module, we can read data from or write data to SD cards. This project enables us to transform our CH32 microcontroller-based circuits into powerful data loggers. The code can be easily ported to other CH32 microcontrollers, which is particularly useful for the CH32V0xx, CH32V1xx and CH32V2xx families because they don’t have available example code for SD cards via SPI. The CH32V3xx family, however, has examples, but they use the SDIO interface, and that code needs some adjustments to make it work via SPI.
There are two topics heavily utilised in this project that I have already covered: to provide some realistic real-time data that we can log on the SD card, I reused the code I developed for the DS18B20 1-Wire digital thermometer; and to communicate with the SPI microSD card module, I reused the SPI communication protocol I put together.
Introduction
The SD card module communicates with the microcontroller via SPI. The disk operations are implemented using the FatFS module. The module is implemented in a way that it is platform-independent. The file operations and functions are implemented in such a way that it is easy to port to various microcontrollers.
In this example, I use the CH32V003F4P6 chip. It works fine if the rest of the code (other than the SD card-related) is not too large. Unfortunately, the library uses about 11 kbytes of space, so for other code, only 5 kbytes is left. It is still a lot, especially if no USART is needed, but one must be careful with coding. For example, a thermometer chip such as the DS18B20 digital thermometer and a low-power deep sleep mode can both be implemented while still having a little memory left. This could transform the chip into a powerful, portable temperature logger.
A good alternative is to use a CH32V006xxxx chip. It has four times more memory than the CH32V003F4P6, while it is still relatively cheap ($0.3/piece, June 2025). Once I make my development board for the CH32V006K8U6 chip, I will start using it for future tutorials.

CH32F003F4P6 microcontroller with an SPI microSD card module and a 8 GB microSD card used for the demo.
File structure
ChaN’s FatFs module contains the following files:
diskio.c/.h - low-level disk IO module
ff.c/.h - Generic file system module (R0.15a)
ffconf.h - Configuration of the FatFs module
ffsystem.c - OS dependent functions for FatFs
ffunicode.c - Unicode handling functions for FatFs (above R0.13)
Modules I added:
sd.c/.h - SD communication protocols
spi.c/.h - SPI communication protocols
The sd.c/.h files are a mixture of things I found on the internet and my own stuff, and the spi.c/.h files are mostly based on my earlier SPI tutorial. The SPI.c/.h files are basically just a few functions which initialise the SPI bus and implement the transfer of data.
The ffconf.h file can be used to configure the module and enable/disable various features. This is especially useful when we use the CH32V003xxxx microcontroller because it only has 16 kbytes of program memory, and depending on what features are enabled, the library can occupy 10-11 kbytes. I also noticed that older versions of the FatFs module also take up less space. The difference can be up to 1 kbyte.
The diskio.c file also requires some attention because this is where we need to implement our own microcontroller’s protocol so that the module can initialise, read and write the SD card.
The SPI files contain the previously mentioned implementation of the SPI initialisation and transfer function.
The sd files contain the SD card-specific communication implementation.
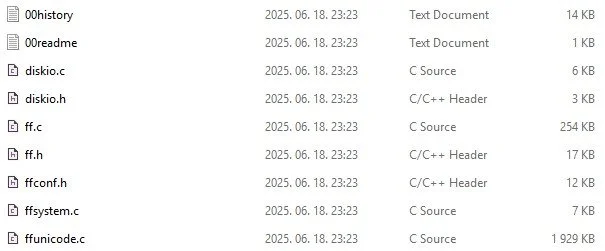
FatFs module’s files
Sample program - Initialisation
Instead of going through all the files line by line, I share the whole project (User folder and its content) as-is on my GitHub (see below at the end of the article), and I just discuss the main.c file where I show a simple example of reading and writing the SD card.
The very first thing I put in the code as a new thing, as compared to my previous codes, is the optional debug macro. This macro allows me to spam the code with printf() functions and turn them on or off at once. This allows me to develop the code quicker because it makes bug hunting more efficient, and when the code is done, I can remove all the unnecessary prints at once. It frees up memory and resources.
#define DEBUG_ 0

#if DEBUG_
  #include <stdio.h>
  #define DBG_PRINTF(...)   printf(__VA_ARGS__)
#else
  #define DBG_PRINTF(...)   do { } while (0)
#endif
Since I modified the sd.c file so the SD_Detect() pins can be chosen randomly, I added two lines where we can select the desired pin’s port and pin number. Then, this is used throughout the whole code. It is important to know that this pin is NOT the same as the chip select (CS) pin. This pin is available on certain SD card modules (Adafruit), and it can be used to detect if an SD card is present in the socket. I assigned this pin to be the same as the CS (chip select) pin to demonstrate how it works. But once again, it must be defined as a different pin. Alternatively, the whole procedure can be omitted if we are sure that we won’t miss inserting the card, or we don’t care about handling this type of error.
#define SD_DETECT_PORT  GPIOC
#define SD_DETECT_PIN   GPIO_Pin_4
Then, further down in the main(), I did a lot of different things. As I earlier mentioned, I use the DEBUG_ switch to turn the printf() on or off quickly. At the same time, I also exclude the USART-related code when the printf() is disabled. This is used for saving flash space, mainly.
Then, according to the recently introduced SD_Detect_Port and SD_Detect_Pin values, I set the chip detect pin of the SD card reader. This is important because the presence of the SD card is detected via this pin. If a card is inserted into the SD card reader, the reader changes the state of the CD pin, which we will detect. Each module has its own response when a card is inserted, so the logic might need some adjustment. Always consult the datasheet of the chip used in the SD card module.
Then, if enabled, we print some welcome message, so we can see that the code is (so far) operational. I also made a little for() loop that prints a dot on the serial terminal every second. It is kind of a progress bar, which I intended to use to give the user enough time to insert the SD card if it is not inserted yet.
Then, the code starts to look for the card. If the SD_Detect() function returns 0, then the SD card is not detected. Alternatively, after the printing, we can get the code stuck here or add a retry option. In the video, I cheated, and I just read the state of the chip select pin and used that value to guide the code to end up in the right block of the if-else(). But that was purely for the sake of demonstration!
If the SD card is detected, the code will try to initialise it. We only focus on the successful initialisation here. If it went well, then the code proceeds and determines the size of the SD card. After that, we can set the SD card, more precisely, the SPI speed to a higher speed. In the background (see spi.h and sd.c), this means that the initial prescaler (256) is set to a lower (4) value.
In case the card is not detected, after the error message, the code will be stalled so the user can take action.
Finally, the SD card is mounted. I could’ve added a check for the result of the f_mount(), but I let the reader do it if they find it necessary.
if(DEBUG_ == 1)
{
        USART_Printf_Init(115200);
        USARTx_CFG();
}

SD_SetChipDetect(SD_DETECT_PORT, SD_DETECT_PIN);

DBG_PRINTF("CH32V003F4P6 - Part 12 - SPI SD Card\n");
DBG_PRINTF("Insert SD Card in the next 10 seconds!\n");

for(int i = 0; i < 10; i++)
{
    Delay_Ms(1000);
    DBG_PRINTF(".");
}
uint8_t cardDetect = SD_Detect(SD_DETECT_PORT, SD_DETECT_PIN);

if(!cardDetect)
{
    DBG_PRINTF("SD card not detected!\n");
    while(1){};
}
else
{
    DBG_PRINTF("SD card detected!\n");

    if(SD_Initialize())
    {
            DBG_PRINTF("SD card error!\n");
            Delay_Ms(500);
    }
    else
    {
        DBG_PRINTF("SD card initialized!\n");
        uint32_t sd_size = SD_GetSectorCount();
        DBG_PRINTF("SD Card Size (MB):%d\n", sd_size >> 11);
        SD_HighSpeed();
    }
}

result = f_mount(&fs,"0:",1);
Sample program - Read and write
After mounting the file system, the code should be able to read and write files on the SD card.
First, a reading test is performed. I put a text file with some random text in it on the SD card to test the reading. So, the code opens this file for reading. An important detail here is that the file name must not be more than 8 characters long; otherwise, the code will throw an error, and the reading will fail. This can be changed by modifying the FF_USE_LFN to anything non-zero (1, 2 and 3), and FF_MAX_LFN to let’s say 64, but it will increase the code by ~2500 bytes, which is a LOT considering that we are already using nearly 12000 bytes out of 16000…
Then, if there are no errors, the code proceeds and reads the file line by line. I wrote a code in a way that each line is printed with a 1-second delay in between. This is just to print the contents of the file in a more dramatic way for this demonstration, but otherwise, one can flood the terminal with the lines without using the delay. One important thing, however, is that the char line[64] that we defined at the beginning of the main.c file plays a crucial role here. As one can see, the while() prints only a sizeof(line) amount of text at a time. So, if the line is more than 64 characters long, the printing of a single line will be broken into multiple prints.
After printing everything, the file we read from is closed and then the code proceeds to writing.
We create a file here. This is determined by the FA_CREATE_ALWAYS switch. If there’s a file already named “Writetest.txt”, the code will overwrite it.
Once the code proceeds with success, we write our “welcome message”, msg, to the file. Let’s consider this as the header of the file.
Then, the file is closed and the code proceeds.
DBG_PRINTF("READ TEST: \n");
result = f_open(&fileread, "0:READTEST.TXT", FA_READ);

if (result != FR_OK)
{
    DBG_PRINTF("f_open failed: %u\n", result);
}

while (f_gets(line, sizeof(line), &fileread))
{
    DBG_PRINTF("%s", line);
    Delay_Ms(1000);
}

f_close(&fileread);

DBG_PRINTF("WRITE TEST: \n");

result = f_open(&filewrite, "0:Writetes.txt", FA_CREATE_ALWAYS | FA_WRITE );

if ( result == FR_OK )
{
    DBG_PRINTF("Succesful write operation!\n");
    result=f_write(&filewrite,msg,strlen(msg),&fnum);

    if(result==FR_OK)
    {
        DBG_PRINTF("File written successfully, byte data written: %d\n",fnum);
    }
    else
    {
        DBG_PRINTF("Writing in the file has failed: (%d)\n",result);
    }

    f_close(&filewrite);
}
else
{
    DBG_PRINTF("Failed to open/create file\n");
}
Sample program - while(1) loop
Once the code proceeds to the while(1) loop, the whole code is placed in an if block that is only allowed to run if the counter is less than 10. I added this code to limit the amount of time I write on the SD card, so after 10 lines of data, I can remove the SD card and check its contents on my computer.
The code proceeds to open the file. We are opening the same “Writetes.txt” file. You can see that the capitalisation of the file name is different here. However, this is just a demonstration to show that the FatFS is case-insensitive, so it does not matter how we name the file. But it is important to notice that this is only true if we do not use FF_USE_LFN (FF_USE_LFN = 0)!
Then we look for the EOF using the f_lseek() function. The code simply searches for the end of the file by determining the on-disk file size in bytes. Then it uses this value as the offset value for the file’s internal write pointer. So, when a new writing operation is called, the code will know that it has to start writing from this position.
Then, based on my DS18B20 example, we read the temperature of the sensor. I slightly had to modify the printFloatTemp() function because now it has to pass the conversion results to an array. Instead of returning with the conversion result, I used snprintf(), whose return value is the number of characters we would have written. But at the same time, the snprintf() also copies the floating-point “string” to the buf buffer, which is the line (char line[64]) buffer in the code.
int printFloatTemp(int16_t raw, char *buf, size_t buflen)
{
    int32_t scaled = (int32_t) raw * 10 / 16;
    int whole = (int)scaled / 10;
    int frac = (int)abs(scaled % 10);
    return snprintf(buf, buflen, "%d.%01d\n", whole, frac);
}
So, we write in the file again using the recently populated line buffer. If the operation was successful, the file is closed, the counter is increased and the code waits for 1 second before attempting a new writing.
Get the relevant products using my affiliate links:
CH32V003F4P6
WCH-LinkE programmer
SD card module
DS18B20 thermometer
if(counter < 10)
{
    DBG_PRINTF("Update.\n");

    result = f_open(&filewrite, "0:Writetes.txt", FA_OPEN_ALWAYS | FA_WRITE);
    if (result != FR_OK)
    {
         DBG_PRINTF("Error writing...");
         continue;
    }

    result = f_lseek(&filewrite, f_size(&filewrite));
    if (result != FR_OK)
    {
        f_close(&filewrite);
        continue;
    }

    int16_t raw = ds18b20_get_temperature_raw();
    int length = printFloatTemp(raw, line, sizeof(line));
    result = f_write(&filewrite, line, length, &fnum);
    if (result != FR_OK || fnum < (UINT)length)
    {
         DBG_PRINTF("Error writing...");
         continue;
     }

     f_close(&filewrite);
     counter++;
     Delay_Ms(1000);
}
else
{
   //...
}